
Backsplash Designs for Small Kitchen: Transform Your Space with Style
Backsplash designs for small kitchen spaces serve as the perfect opportunity to inject personality, color, and visual interest while protecting walls from cooking splashes and stains. This often-overlooked design element can dramatically transform your compact kitchen, creating focal points that draw the eye upward, making ceilings feel higher and spaces feel larger. From classic subway tiles to bold geometric patterns, contemporary glass mosaics to timeless natural stone, the right backsplash choice elevates both function and aesthetics in small cooking spaces.
The beauty of kitchen backsplashes lies in their versatility—they occupy relatively small square footage yet deliver outsized visual impact. Strategic backsplash selection can complement your cabinet design, coordinate with countertops, and establish the overall design tone for your entire kitchen. Whether you’re planning a complete kitchen remodel or seeking an affordable refresh, updating your backsplash offers maximum transformation for moderate investment.
⭐ Quick Takeaways
- Backsplashes protect walls while adding style—combine function with visual appeal
- Light-colored tiles (white, cream, light gray) make small kitchens feel 20-30% larger
- Subway tile remains most popular choice: timeless, affordable ($3-8/sq ft), easy DIY install
- Extending backsplash to ceiling creates dramatic height and modern look
- Professional installation costs $400-$1,500; DIY saves 50-70% with peel-and-stick or simple tiles
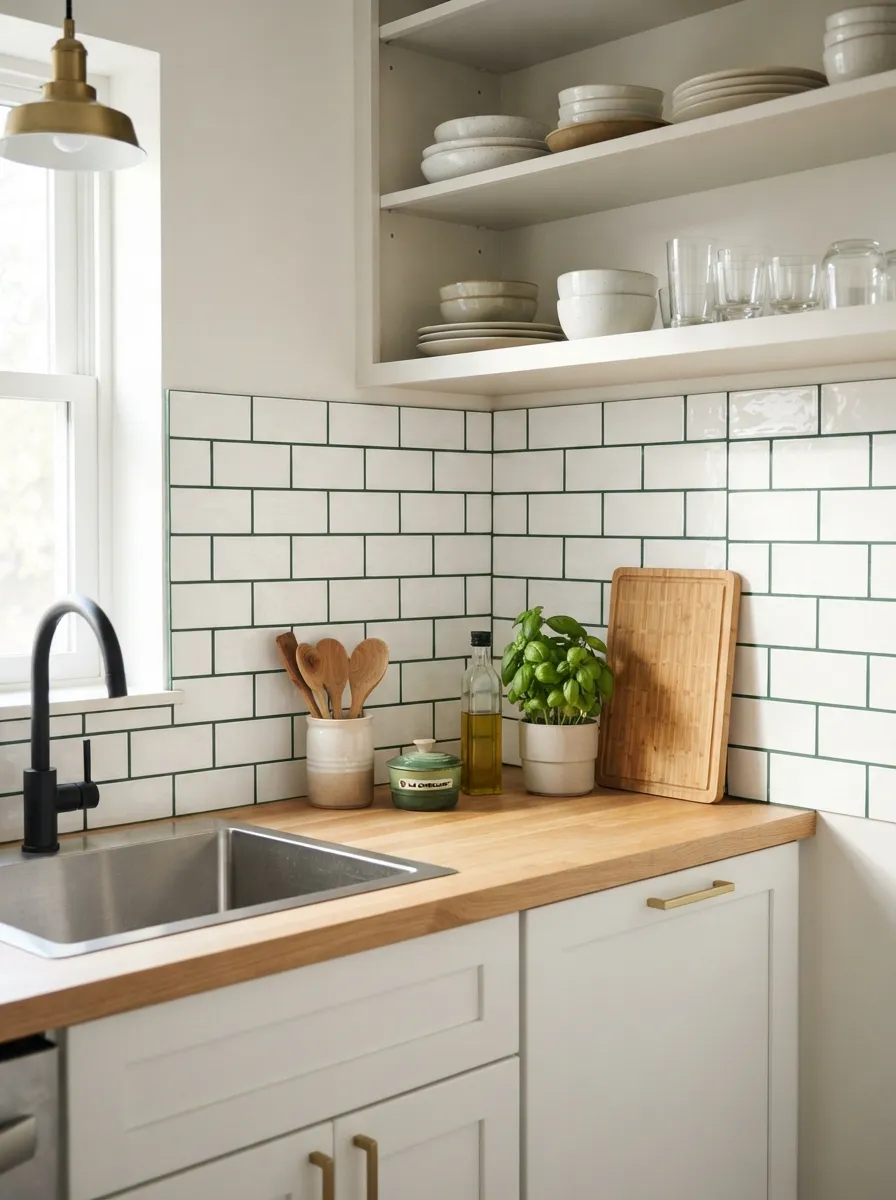
Classic white subway tile backsplash with green grout adds subtle color interest to small kitchen
📑 Table of Contents
What is a Kitchen Backsplash?
A kitchen backsplash is the protective and decorative wall covering installed on the vertical surface between countertops and upper cabinets (or ceiling). This essential kitchen element shields walls from water splashes, grease splatters, and food stains while providing opportunities for creative design expression.
Backsplashes typically extend from the countertop surface upward 15-18 inches to the bottom of wall cabinets in standard installations, though contemporary designs increasingly feature full-height backsplashes reaching all the way to the ceiling for dramatic effect. The material choice—tiles, stone slabs, glass, metal, or alternative surfaces—significantly impacts both the kitchen’s aesthetic appeal and maintenance requirements.
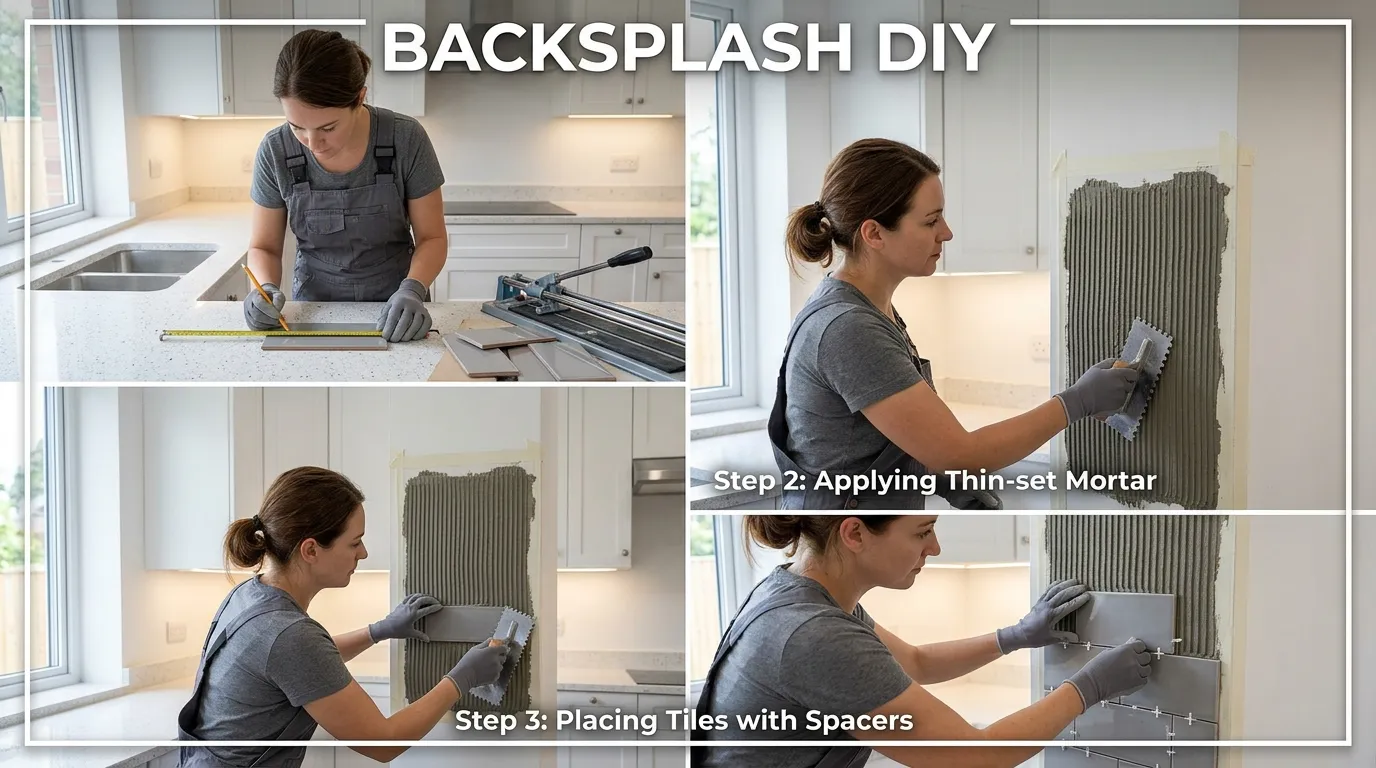
Step-by-step guide to tiling kitchen backsplash showing proper installation technique
Key Functions of Kitchen Backsplashes
- Wall protection: Prevents water damage, staining, and deterioration behind sinks and cooktops
- Easy cleaning: Provides wipeable surface removing grease and food splatters effortlessly
- Visual interest: Creates focal point and adds color, pattern, or texture to kitchen design
- Style definition: Establishes design aesthetic (modern, traditional, farmhouse, etc.)
- Property value: Quality backsplash installation increases perceived kitchen value and appeal
- Space enhancement: Reflective or light-colored backsplashes make small kitchens feel larger
Standard Backsplash Heights & Coverage
Understanding typical backsplash dimensions helps with material estimation and design planning.
📏 Typical Backsplash Measurements:
Standard Height: 15-18 inches (to bottom of wall cabinets)
Full-Height (Modern): 54-60+ inches (countertop to ceiling)
Behind Stove: 24-30 inches (extended height for extra protection)
Minimum Coverage: 4 inches above countertop (basic splash protection)
Side Extensions: 6-12 inches beyond appliances/fixtures for complete coverage
Where Backsplashes Are Most Essential
While complete wall coverage creates the most polished look, certain areas absolutely require backsplash protection regardless of budget constraints.
- Behind sink: Highest water exposure area; backsplash prevents moisture damage
- Behind cooktop/range: Protects from grease, heat, and food splatters during cooking
- Between counters and uppers: Natural landing zone for splashes and spills
- Around windows: Frames windows beautifully while protecting adjacent walls
- Open wall sections: In open kitchens, backsplash on exposed walls defines kitchen boundaries
Benefits of Good Backsplash Design in Small Kitchens
Strategic backsplash choices deliver remarkable benefits beyond basic wall protection, especially in compact cooking spaces where every design decision impacts the overall feel.
1. Visual Space Expansion
Light-colored, reflective backsplashes bounce natural and artificial light around small kitchens, creating the perception of significantly more space. The right backsplash can make a cramped 60-square-foot kitchen feel 20-30% larger through visual trickery.
- White or light gray tiles reflect maximum light, brightening dark corners
- Glossy finishes amplify light reflection better than matte surfaces
- Glass tile backsplashes create depth and luminosity impossible with paint
- Horizontal patterns draw eyes sideways, making narrow kitchens appear wider
- Vertical patterns draw eyes upward, making ceilings feel taller
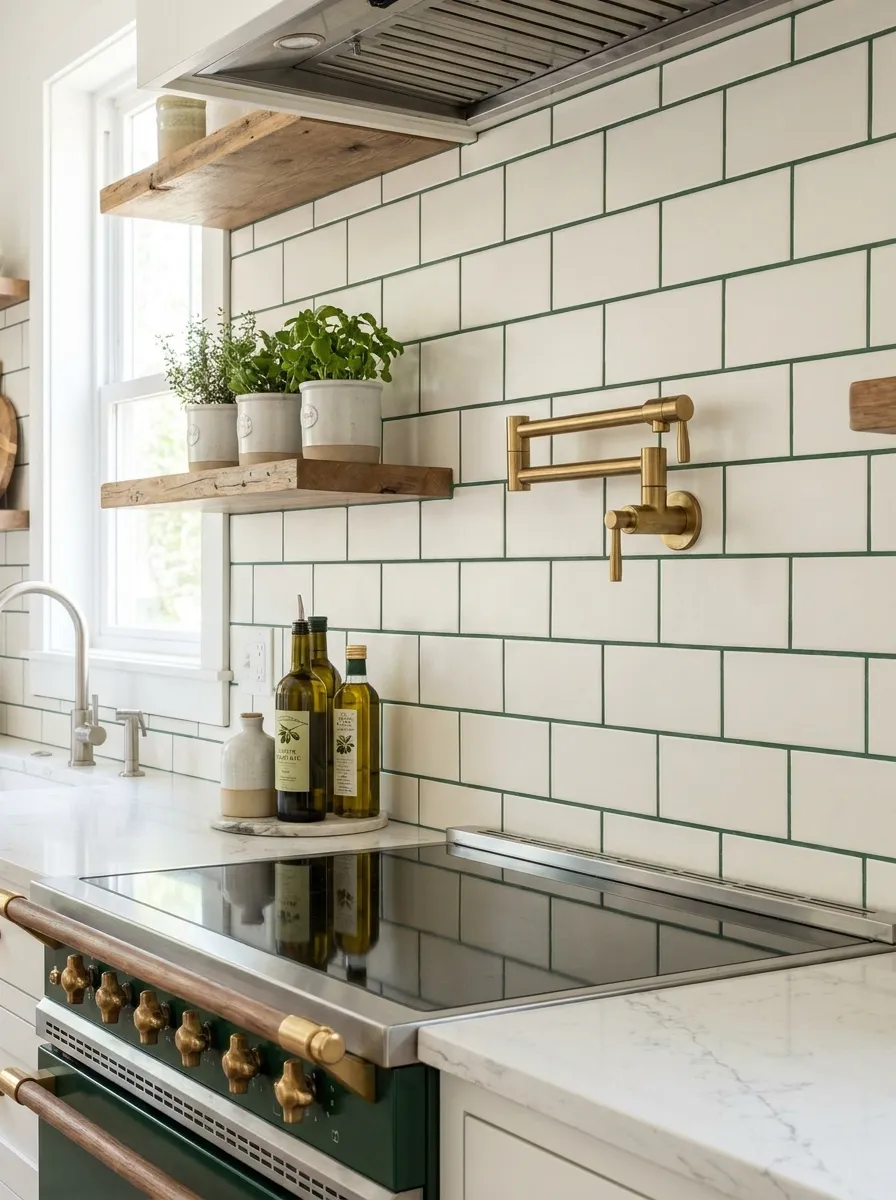
Bright white subway tile backsplash maximizes light reflection in compact kitchen space
2. Affordable Kitchen Transformation
Backsplash updates deliver dramatic visual impact for relatively modest investment compared to cabinet replacement or full renovations. This makes backsplash projects ideal for budget-conscious homeowners seeking maximum design return.
- Transform entire kitchen aesthetic for $300-$1,500 vs. $15,000+ for new cabinets
- DIY-friendly project saves 50-70% on installation costs
- Completed in 1-3 days with minimal kitchen disruption
- Instant gratification—immediate visual transformation upon completion
- Increases home value and appeal to potential buyers
3. Personality and Style Expression
Backsplashes provide the perfect canvas for introducing color, pattern, and personality into small kitchens that may have neutral cabinets and countertops. This design element allows safe experimentation without overwhelming commitment.
- Bold backsplash adds character to all-white kitchens without major investment
- Patterned tiles introduce visual interest in minimalist spaces
- Colored backsplash coordinates with or complements cabinet colors
- Unique materials (reclaimed wood, metal, stone) create focal points
- Easier to change than cabinets if tastes evolve over time
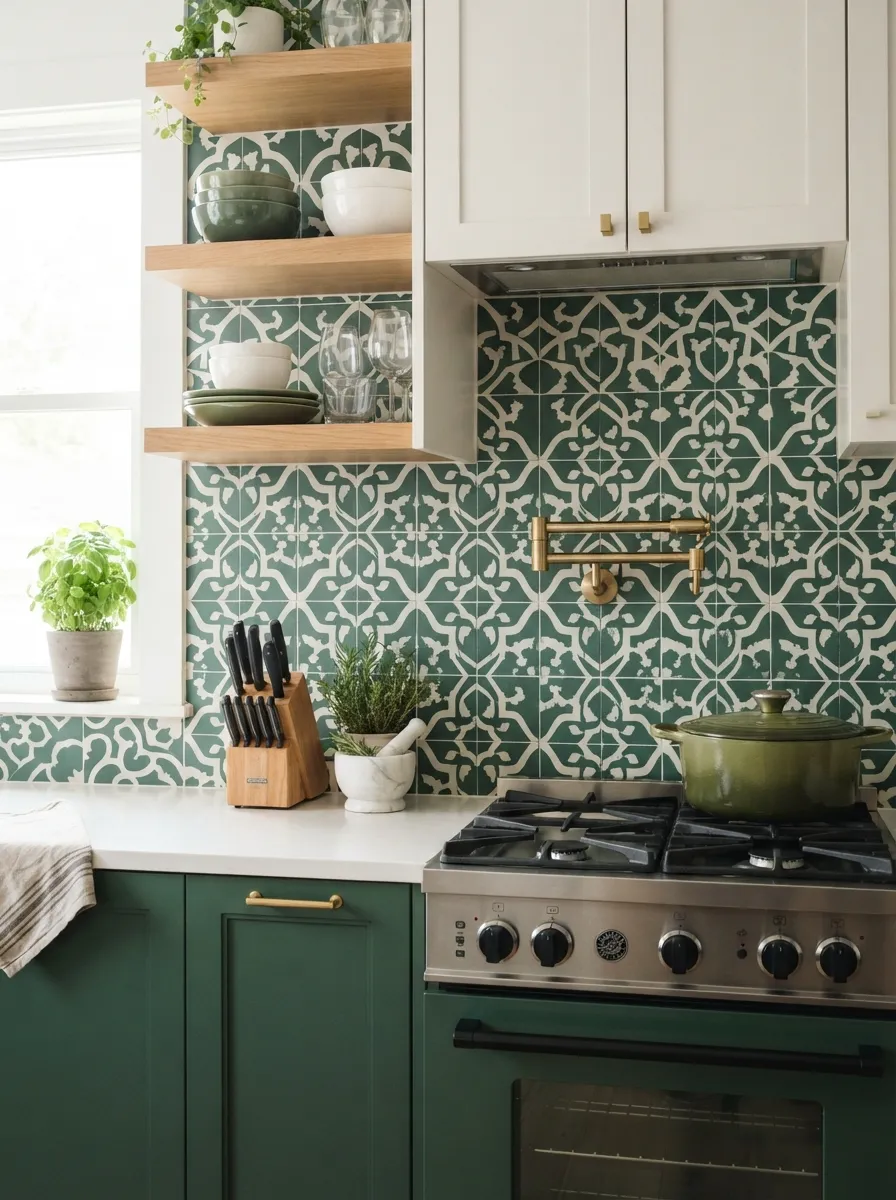
Geometric tile backsplash in green and white adds bold personality to small kitchen design
4. Low-Maintenance Cleanliness
Quality backsplash materials resist staining, absorb no moisture, and clean effortlessly—critical advantages in compact kitchens where cooking activity concentrates in small areas.
- Tile, glass, and stone surfaces wipe clean with damp cloth
- Non-porous materials prevent grease absorption (unlike painted walls)
- Smooth surfaces eliminate texture that traps food particles
- Glossy finishes resist staining better than matte alternatives
- Properly sealed grout prevents discoloration and moisture penetration
5. Heat and Moisture Protection
Behind cooktops and sinks, backsplashes shield walls from conditions that would quickly damage paint or wallpaper, preventing costly repairs and maintaining kitchen integrity.
- Ceramic and porcelain tiles withstand heat from cooking without damage
- Waterproof surfaces prevent moisture rot behind sinks
- Durable materials resist warping, peeling, and deterioration
- Protects drywall from grease penetration and staining
- Extends wall lifespan significantly compared to painted surfaces
6. Coordination and Cohesion
Thoughtful backsplash selection ties together countertops, cabinets, and flooring into cohesive design schemes. This unifying function proves especially valuable in small kitchens where disjointed elements create visual chaos.
- Pick up accent colors from countertop veining or patterns
- Bridge color gap between light cabinets and dark counters (or vice versa)
- Echo flooring materials or patterns for vertical-horizontal connection
- Complement cabinet hardware finishes (brass, black, chrome)
- Create color story flowing throughout entire kitchen design
Popular Backsplash Materials for Small Kitchens
Material selection dramatically impacts your backsplash’s appearance, durability, maintenance requirements, and installation complexity. Understanding options helps you make informed choices aligned with your style, budget, and skill level.
1. Ceramic and Porcelain Tile
Ceramic and porcelain tiles remain the most popular backsplash materials, offering unmatched versatility in colors, patterns, sizes, and finishes at accessible price points.
Subway Tile (Classic 3×6″)
The timeless subway tile—rectangular ceramic tiles traditionally measuring 3×6 inches—dominates kitchen backsplashes for good reason: affordability, versatility, and enduring appeal.
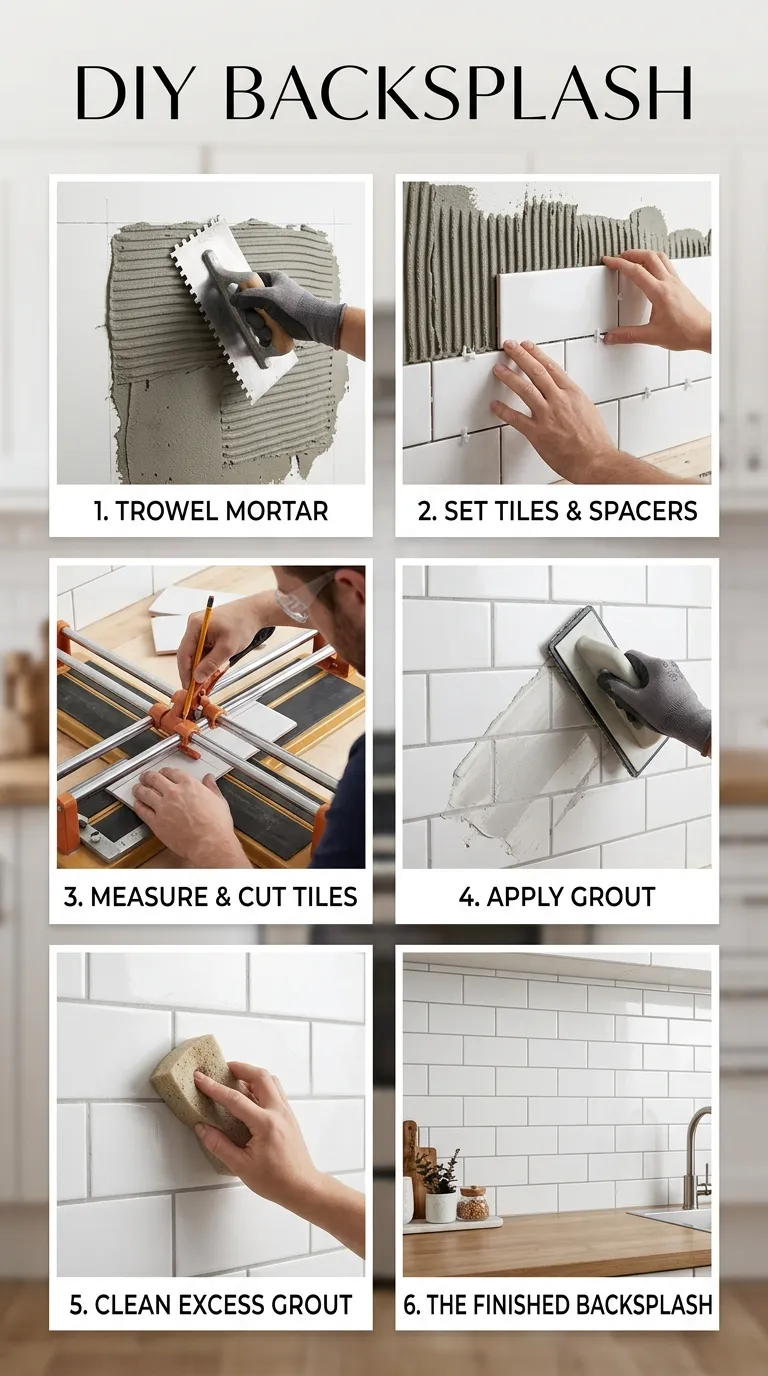
DIY subway tile backsplash installation process showing classic ceramic tile placement
- Cost: $3-8 per square foot (materials only)
- Pros: Timeless appeal, easy DIY installation, widely available, countless colors
- Cons: Can feel generic if not styled thoughtfully, many grout lines to maintain
- Best for: Traditional, farmhouse, transitional kitchen styles
- Installation tip: Offset tiles in brick pattern or try vertical stacking for modern twist
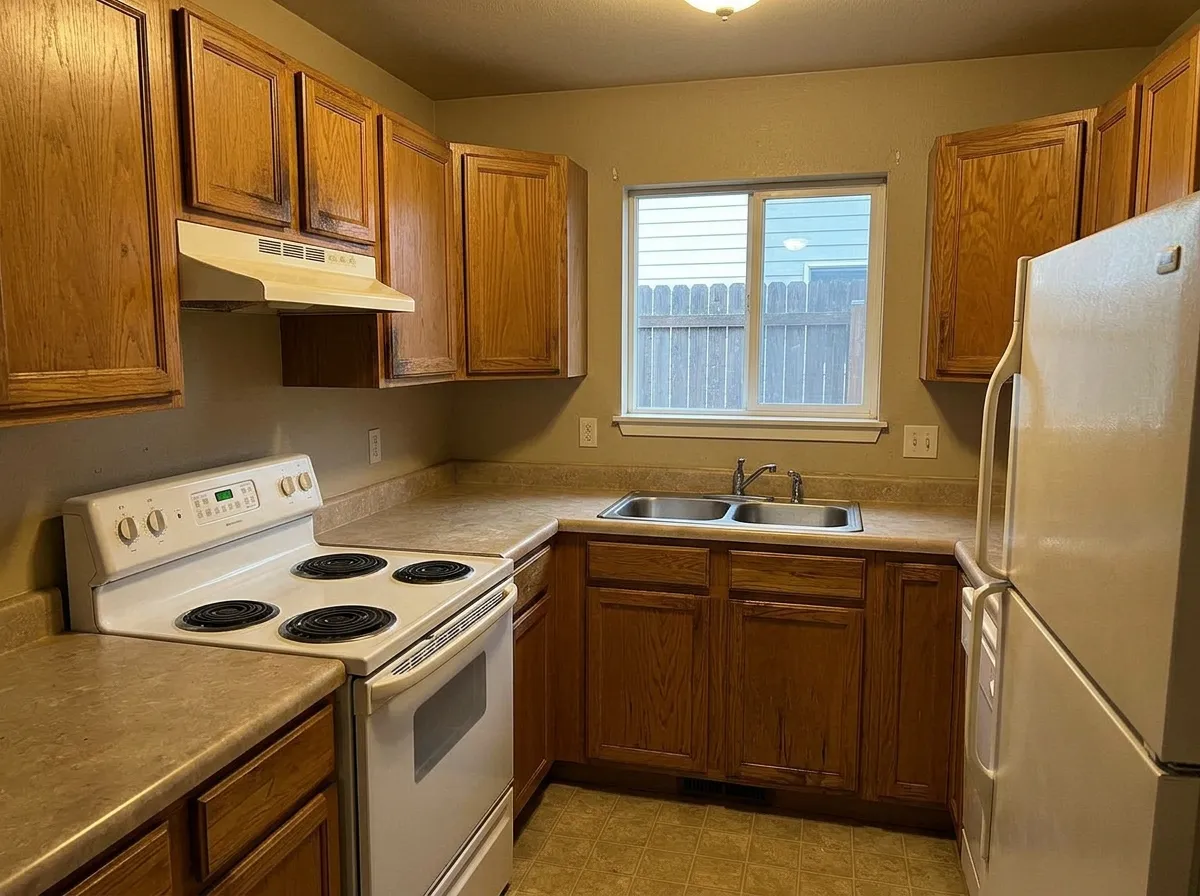
Small kitchen remodel featuring classic white subway tile backsplash transformation
Geometric and Patterned Tiles
Hexagons, arabesque, fish scales, and other shaped tiles create visual interest and modern appeal in small kitchens.
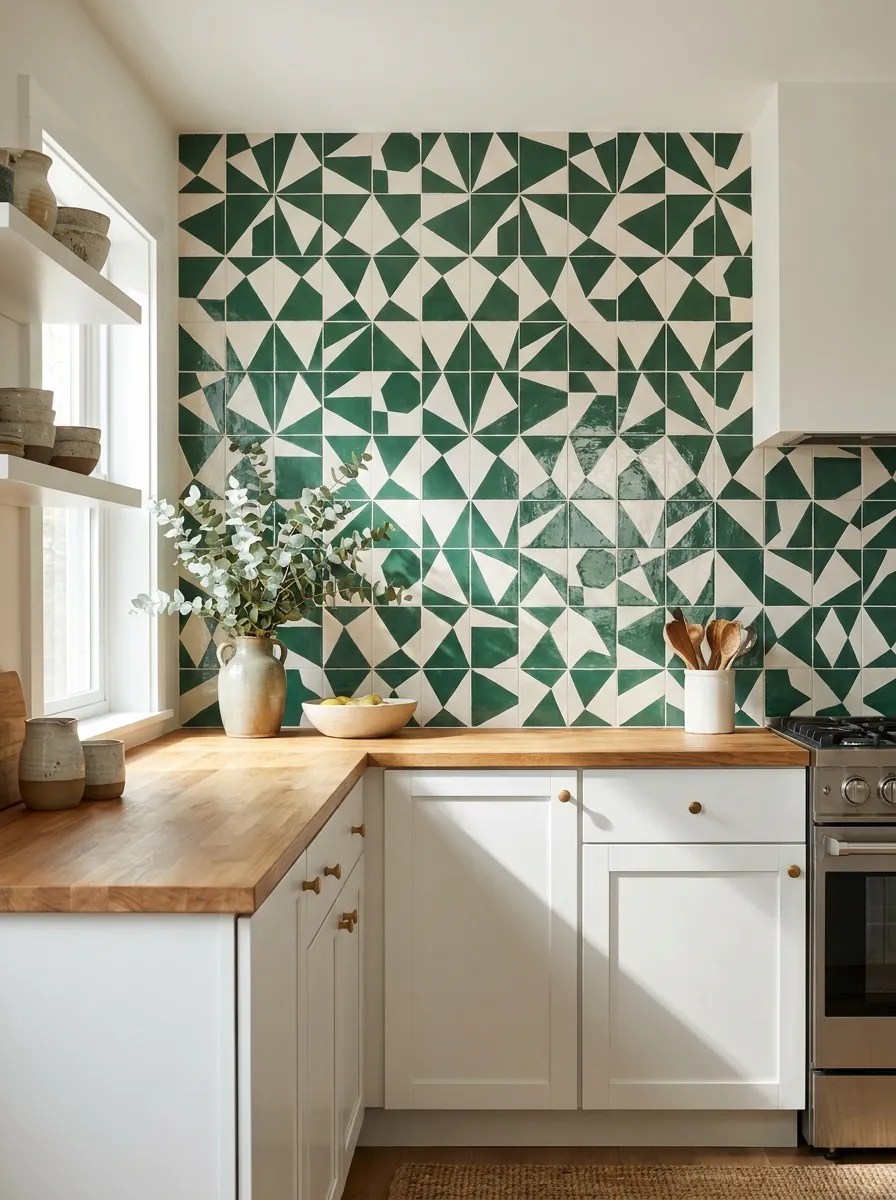
Modern geometric pattern tile backsplash creates striking focal point in small kitchen
- Cost: $8-20 per square foot
- Pros: Unique appearance, creates focal points, hides imperfections better than plain tile
- Cons: More expensive, trickier DIY installation, can overwhelm very small spaces
- Best for: Contemporary, eclectic, bohemian kitchen styles
- Design tip: Use patterned tiles as accent strip with neutral tiles above/below in tiny kitchens
Large Format Tiles
Tiles measuring 12×24 inches or larger minimize grout lines, creating sleek, contemporary aesthetic perfect for small spaces.
- Cost: $6-15 per square foot
- Pros: Minimal grout (easier maintenance), modern appearance, makes small spaces feel larger
- Cons: Requires perfectly level walls, heavier (needs proper adhesive), harder to cut
- Best for: Modern, minimalist, contemporary kitchen designs
- Installation tip: Hire professional for large-format installation—errors show prominently
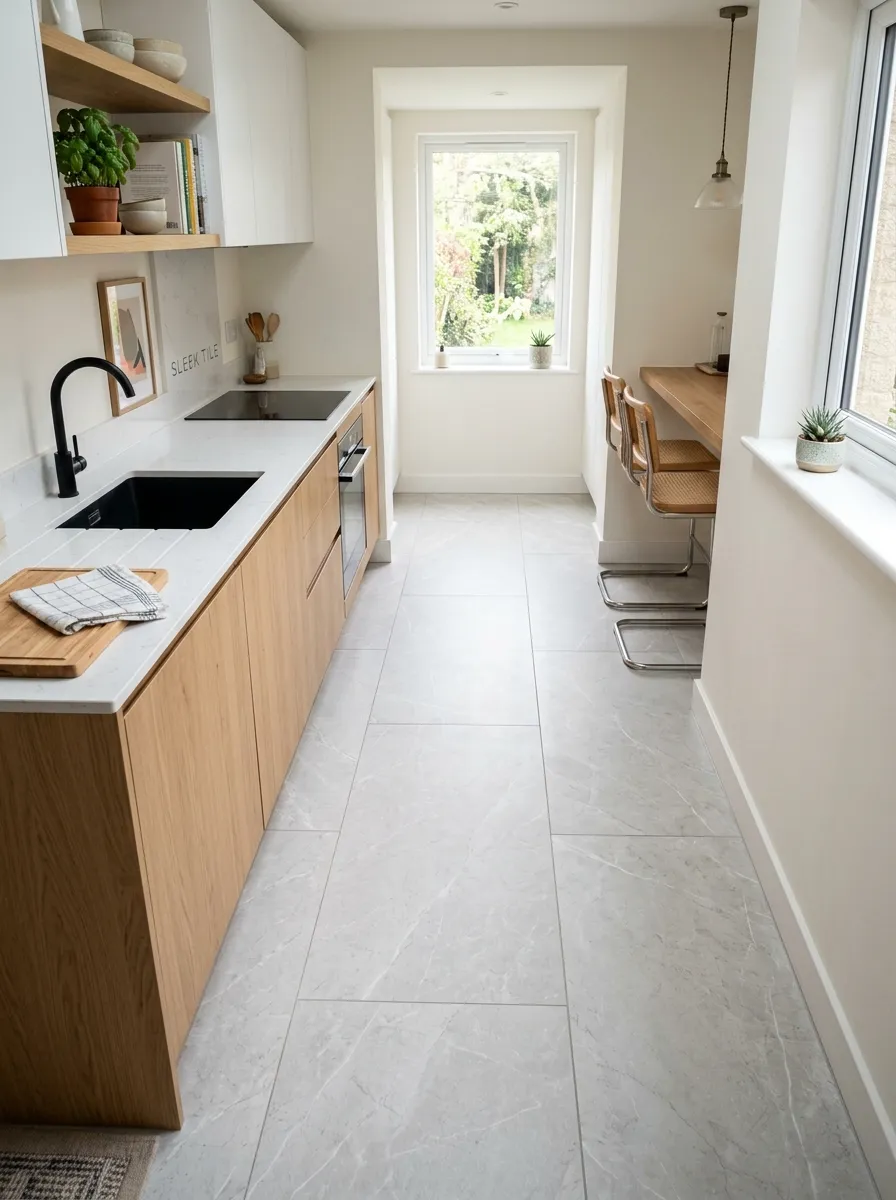
Large format porcelain tiles create sleek, modern backsplash with minimal grout lines
2. Glass Tile
Glass tiles add luminosity and depth impossible with ceramic, bouncing light throughout small kitchens while creating jewel-like appearance.
- Cost: $15-40 per square foot
- Pros: Reflects light beautifully, doesn’t stain, easy cleaning, luxurious appearance
- Cons: Shows water spots, expensive, requires transparent adhesive, can scratch
- Best for: Contemporary, coastal, glamorous kitchen styles
- Sizes: Small mosaics (1×1″), medium subway (3×6″), large formats (4×12″+)
- Colors: Clear, frosted, metallic, iridescent, solid colors in full spectrum
3. Natural Stone
Marble, travertine, slate, and other natural stones bring organic beauty and luxury to kitchen backsplashes, though they require more maintenance than manufactured alternatives.
Marble Slab or Tile
Marble backsplashes exude elegance and sophistication, especially popular in white or light gray varieties.
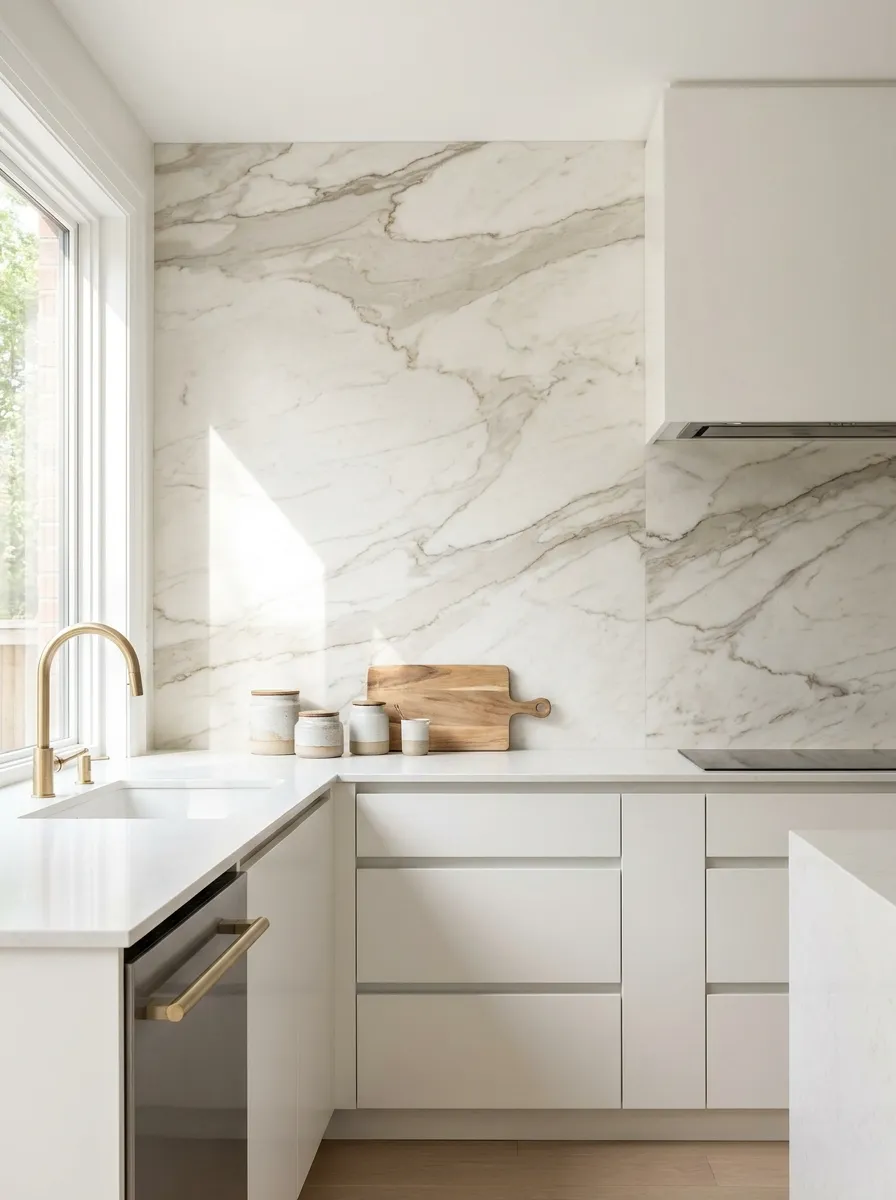
Elegant marble slab backsplash with grey veining adds luxury to small kitchen design
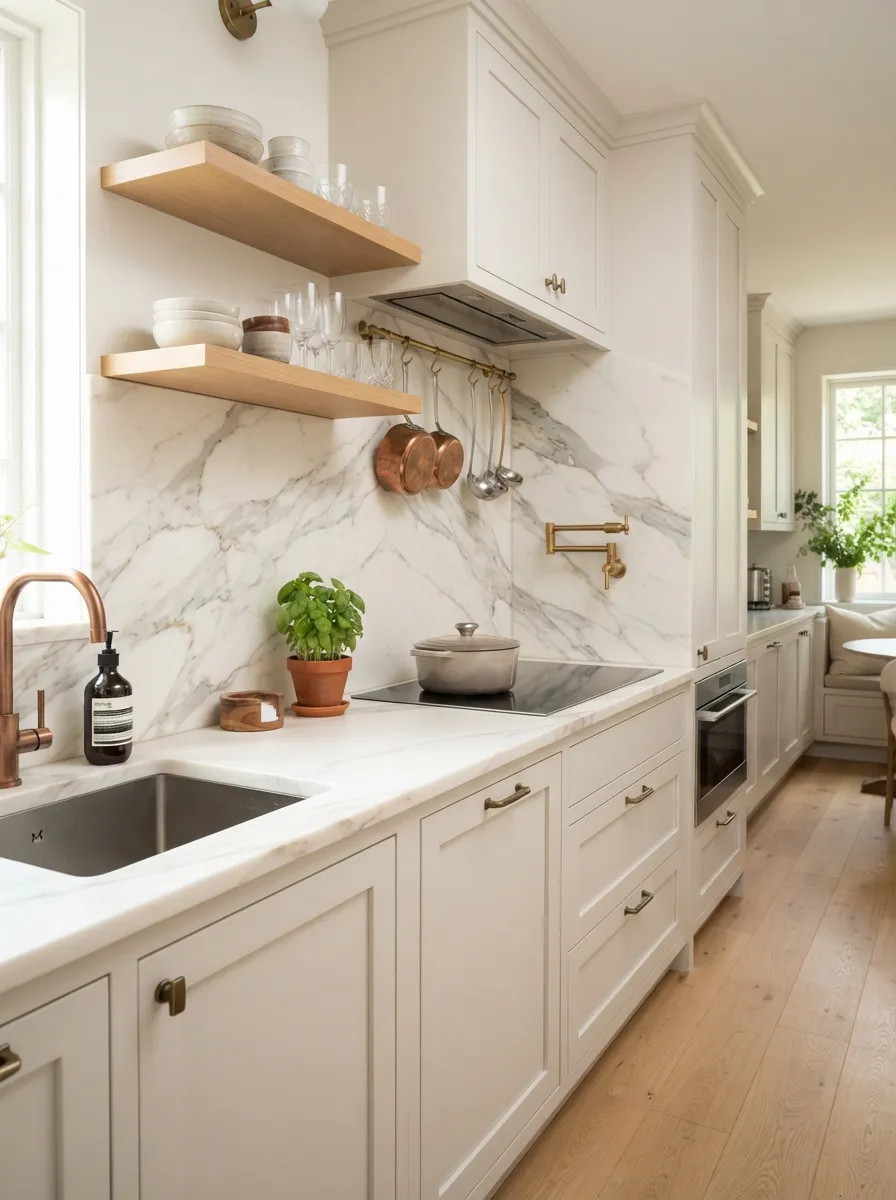
Natural marble tile backsplash showcases beautiful veining patterns in upscale kitchen
- Cost: $20-50+ per square foot (tile), $50-100+ (slab installation)
- Pros: Luxurious appearance, heat resistant, unique natural patterns
- Cons: Porous (stains easily), requires sealing, acid-sensitive, expensive
- Best for: Traditional, transitional, luxury kitchen designs
- Maintenance: Seal every 6-12 months; clean only with pH-neutral cleaners
4. Stainless Steel and Metal
Metal backsplashes—stainless steel sheets, copper tiles, or tin ceiling tiles—create industrial or vintage character while offering exceptional durability.
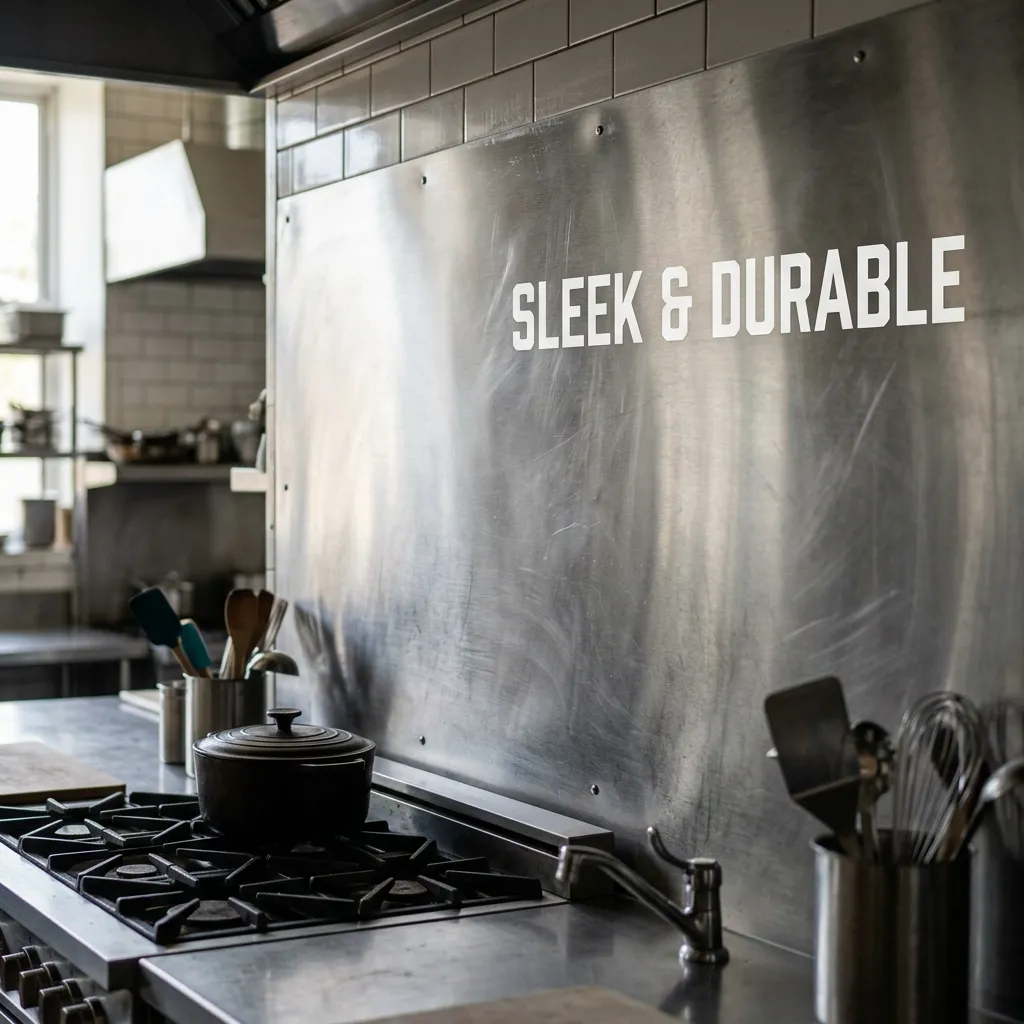
Stainless steel sheet backsplash creates modern industrial aesthetic in compact kitchen
- Cost: $20-50 per square foot
- Pros: Extremely durable, heat resistant, modern appearance, reflects light
- Cons: Shows fingerprints and water spots, can dent, limited design versatility
- Best for: Modern, industrial, professional-style kitchens
- Installation: Sheets easier than individual tiles; use construction adhesive
5. Peel-and-Stick Options
Self-adhesive backsplash tiles revolutionize DIY kitchen updates, offering renter-friendly, budget-conscious solutions requiring zero special tools or skills.
- Cost: $10-25 per square foot
- Pros: Ultra-easy DIY installation, removable (rental-friendly), no grout, instant results
- Cons: Less durable than traditional tile, visible seams, can peel in high-heat areas
- Best for: Renters, temporary updates, extreme budget constraints
- Materials: Vinyl, gel/polymer, real thin tiles with adhesive backing
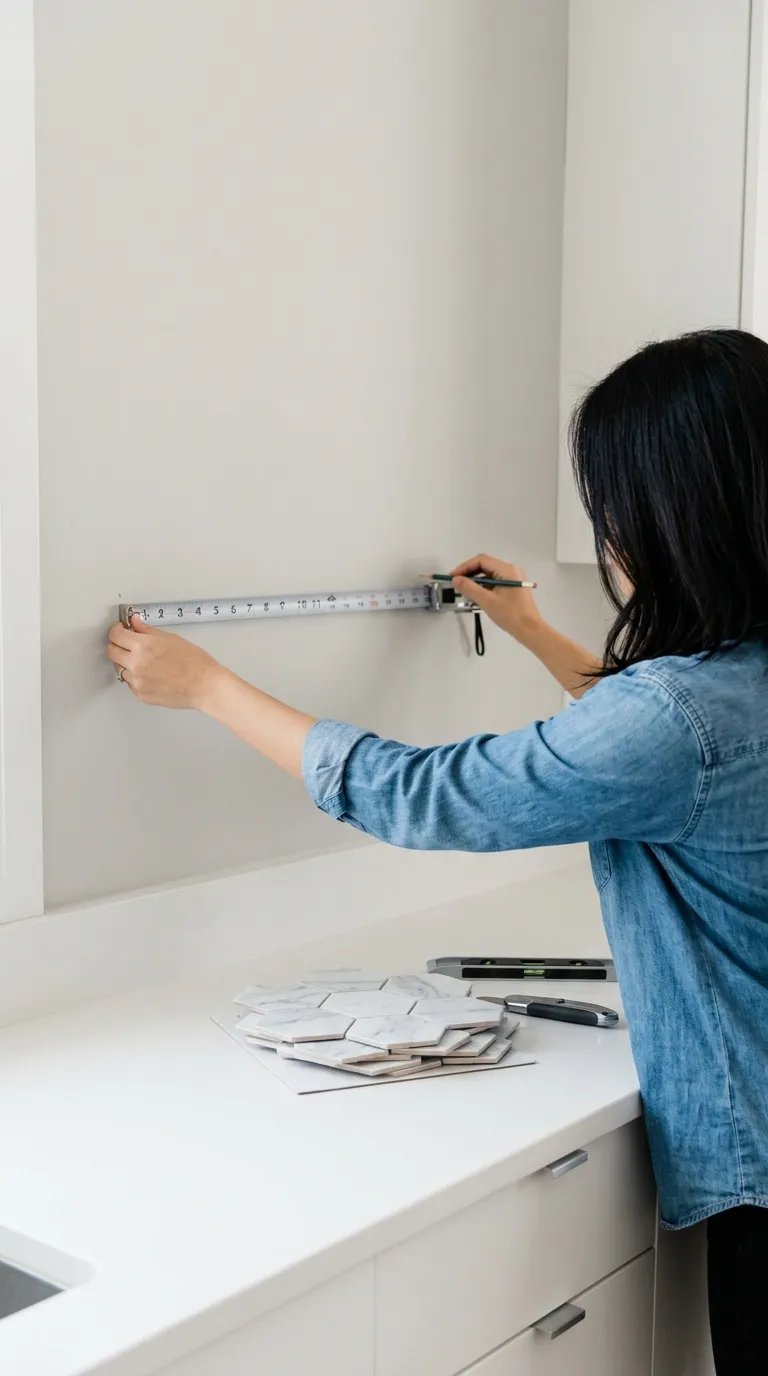
Easy peel-and-stick backsplash installation perfect for DIY and rental properties
Backsplash Design Ideas by Kitchen Style
Your backsplash should complement your overall kitchen aesthetic while reflecting personal style. Explore these design approaches tailored to popular kitchen styles.
1. Modern and Contemporary Backsplashes
Modern kitchen backsplashes emphasize clean lines, minimal ornamentation, and sophisticated simplicity through material choice and installation patterns.
- Large format tiles: 12×24″ or 24×48″ porcelain in solid colors (white, gray, black)
- Slab backsplash: Continuous stone or quartz extending from counter to cabinets (no grout)
- Glass tile: Solid color glass subway tiles in glossy finish
- Minimalist patterns: Horizontal stacking (not offset) for strong linear appearance
- Monochromatic schemes: Backsplash matching cabinet or counter color in lighter/darker shade
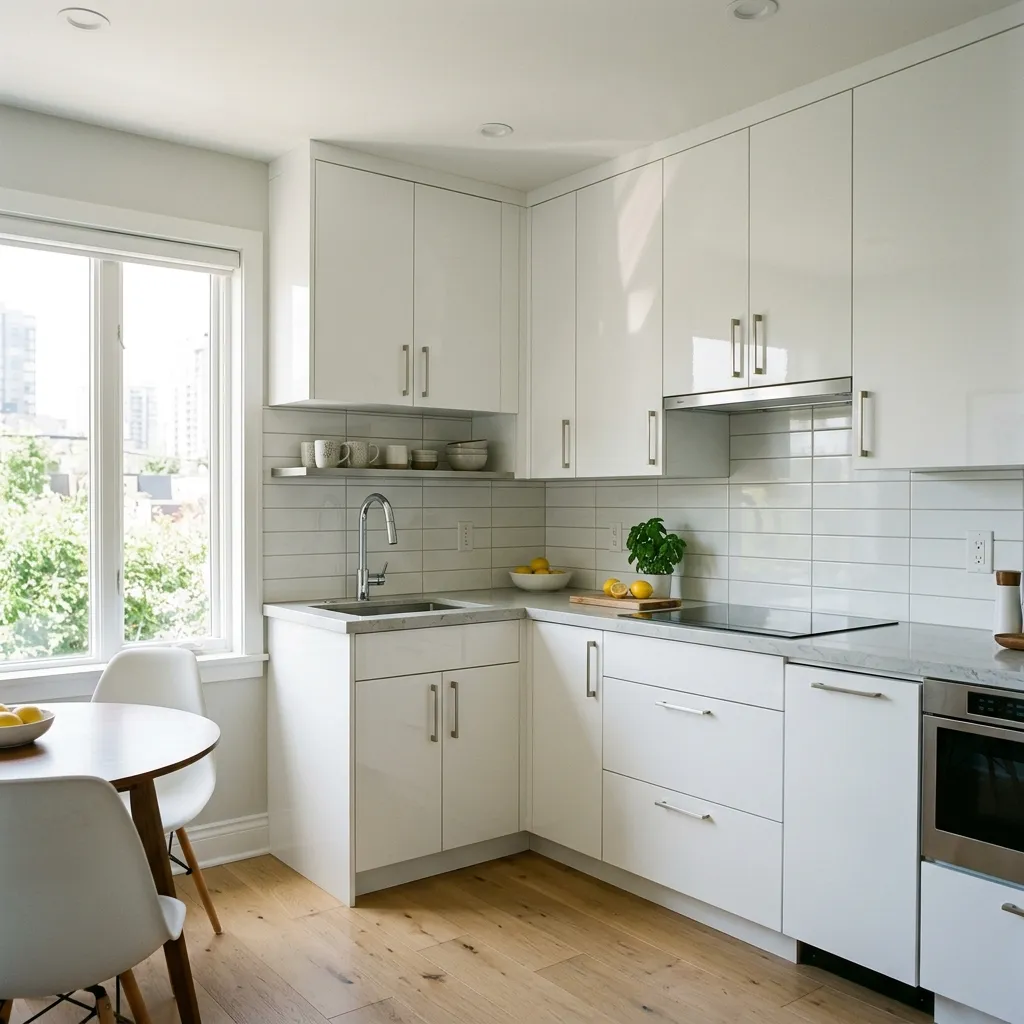
Modern small kitchen featuring high-gloss backsplash in contemporary minimalist design
2. Traditional and Classic Backsplashes
Traditional kitchens call for timeless backsplash materials and patterns that won’t feel dated in 10-20 years.
- White subway tile: Classic 3×6″ ceramic in brick offset pattern
- Marble or travertine: Natural stone tile or slab in neutral tones
- Decorative accent strips: Pencil tile or decorative border at cabinet line
- Herringbone or basket weave: Traditional laying patterns with subway tiles
- Warm colors: Cream, beige, soft gray rather than stark white or black
3. Farmhouse and Cottage Backsplashes
Farmhouse kitchens embrace rustic charm, natural materials, and relaxed, welcoming aesthetics.
- White subway tile with dark grout: Creates vintage, lived-in appearance
- Reclaimed wood: Shiplap or barn wood backsplash (sealed for protection)
- Brick veneer: Thin brick tiles create authentic farmhouse character
- Hand-painted tiles: Artisan ceramic tiles with imperfect, handmade quality
- Beadboard: Painted wood paneling for cottage kitchen charm
4. Colorful and Bold Statement Backsplashes
For homeowners seeking personality and visual impact, bold backsplash choices transform neutral kitchens into memorable spaces.
Green Backsplash Designs
On-trend green backsplashes—from sage to forest to emerald—bring nature-inspired warmth while remaining sophisticated.
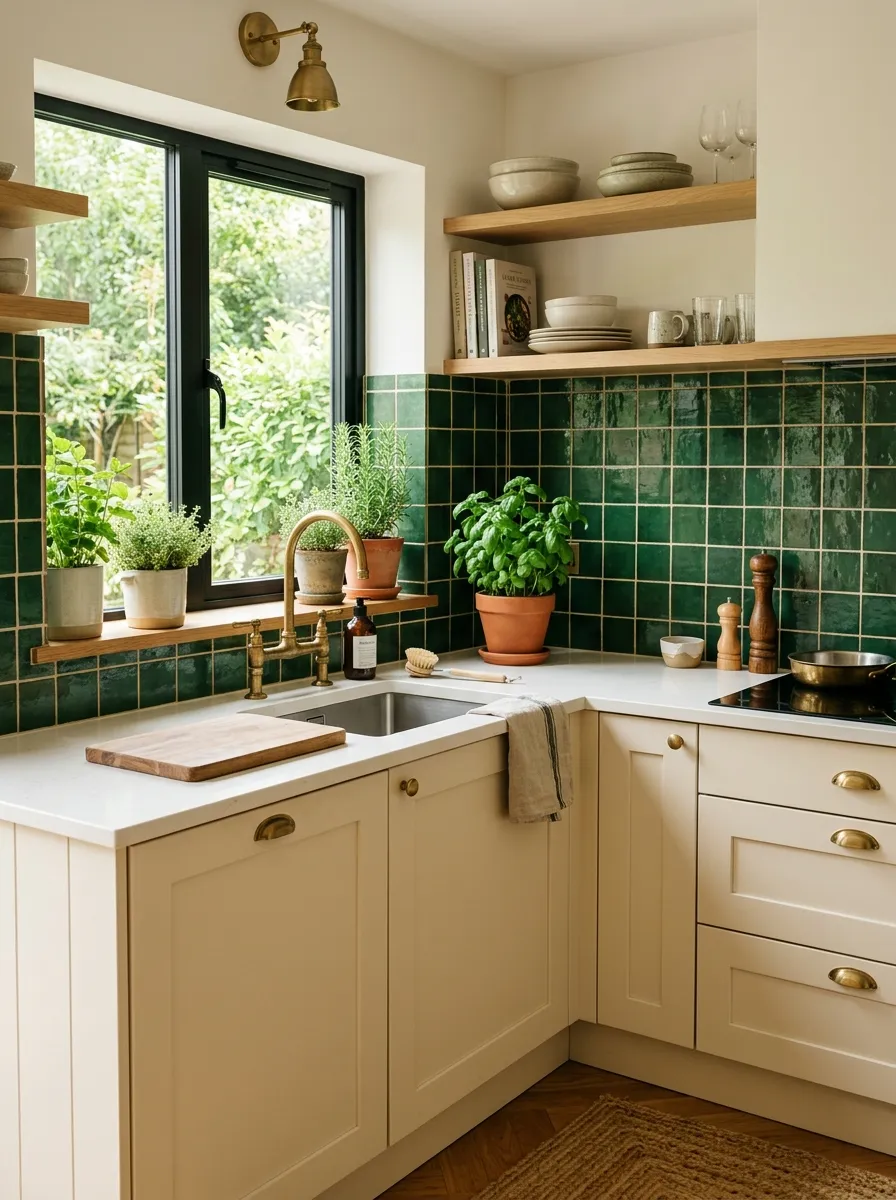
White kitchen with green tile backsplash provides perfect pop of color without overwhelming
- Forest green subway tile with white cabinets creates classic, grounded look
- Sage green large-format tiles feel calming and spa-like
- Emerald green glass tile adds glamorous, jewel-tone sophistication
- Green and white patterned cement tiles introduce bohemian flair
- Pairs beautifully with brass or gold hardware and fixtures
Patterned and Decorative Tiles
Patterned cement tiles, Moroccan-inspired designs, or graphic geometrics create instant focal points.
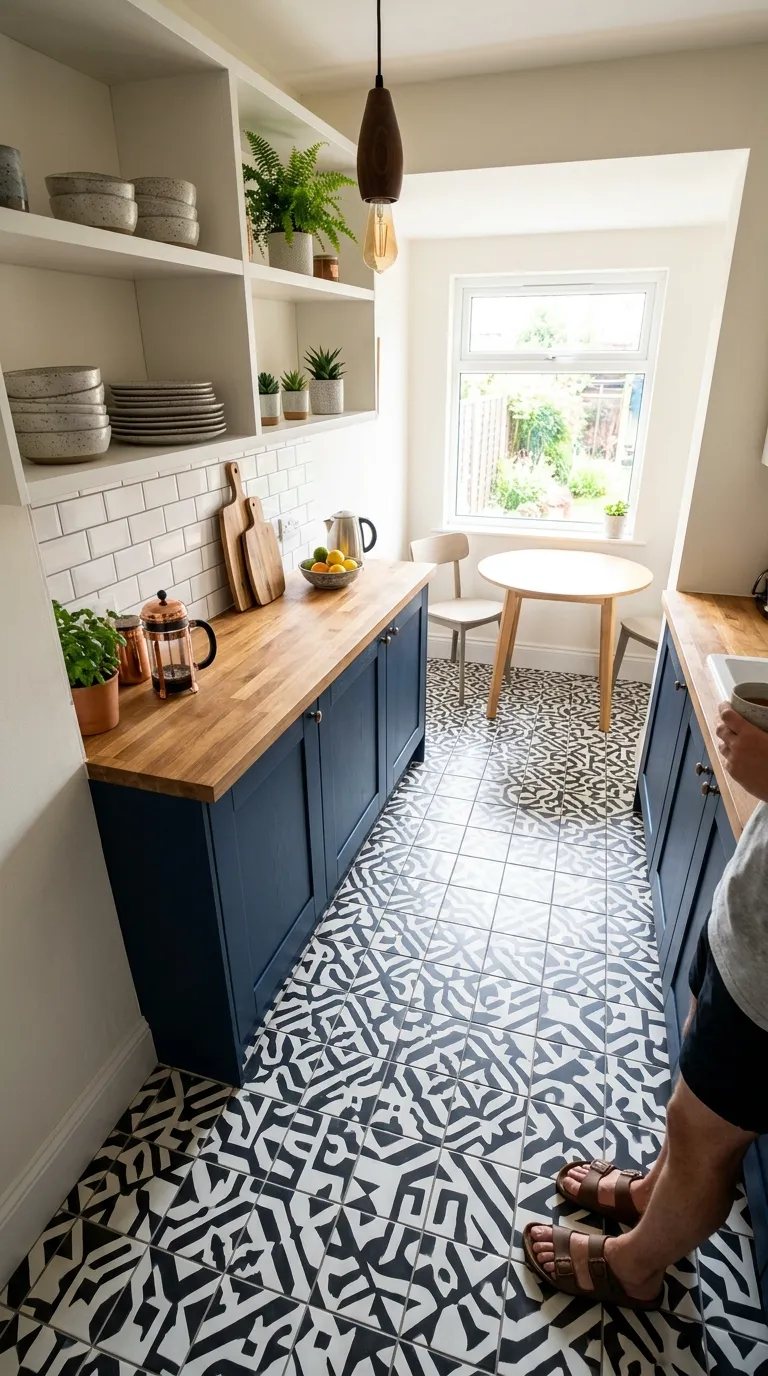
Patterned tile backsplash creates stunning decorative focal point in small kitchen remodel
- Cost: $15-50+ per square foot for authentic cement tiles
- Best practice: Use patterned tiles on single wall (behind stove) with solid tiles elsewhere
- Color coordination: Pull one color from pattern and repeat in accessories, textiles
- Scale consideration: Smaller patterns work better in tiny kitchens than large, bold graphics
Colors & Patterns for Small Kitchen Backsplashes
Color and pattern selection dramatically impacts how large or small your kitchen feels. Strategic choices create visual expansion, while poor selections can make already tight spaces feel even more cramped.
Best Backsplash Colors for Small Kitchens
White and Light Neutrals
White, cream, light gray, and beige backsplashes remain the safest, most space-maximizing choices for compact kitchens.
- Pure white: Maximizes light reflection; pairs with any cabinet/counter color
- Warm white/cream: Softer than stark white; creates inviting, less clinical feel
- Light gray: Contemporary alternative to white; hides imperfections better
- Greige (gray-beige): Warm neutral bridging cool and warm tones
- Visual impact: Light colors make small kitchens feel 20-30% larger
Strategic Color Accents
While light colors expand space, strategic color introduction adds personality without sacrificing openness.
- Colored grout with white tile: Gray, charcoal, or navy grout adds interest inexpensively
- Single accent wall: Bold color behind range; neutral tiles elsewhere
- Gradient effect: Ombre tiles transitioning from light (bottom) to darker (top)
- Coordinated accents: Backsplash color echoing island, window treatments, or decor
Colors to Approach Cautiously
Some color choices can make small kitchens feel smaller or create maintenance headaches.
- Dark colors (black, navy, dark gray): Absorb light; use sparingly or with excellent lighting
- Very bright colors (red, orange, yellow): Visually advance, making walls feel closer
- Multiple competing colors: Creates chaos in small spaces requiring visual simplicity
- Trendy colors: May date quickly; consider resale impact if selling within 5-10 years
Patterns and Layouts for Small Spaces
Horizontal vs. Vertical Patterns
Installation direction significantly impacts spatial perception.
- Horizontal patterns: Draw eyes sideways; make narrow kitchens appear wider
- Vertical patterns: Draw eyes upward; make ceilings feel taller
- Brick offset: Traditional horizontal pattern; safest, most forgiving installation
- Vertical stack: Modern linear appearance; emphasizes height
- Herringbone: Diagonal pattern adds visual interest; works well with small tiles
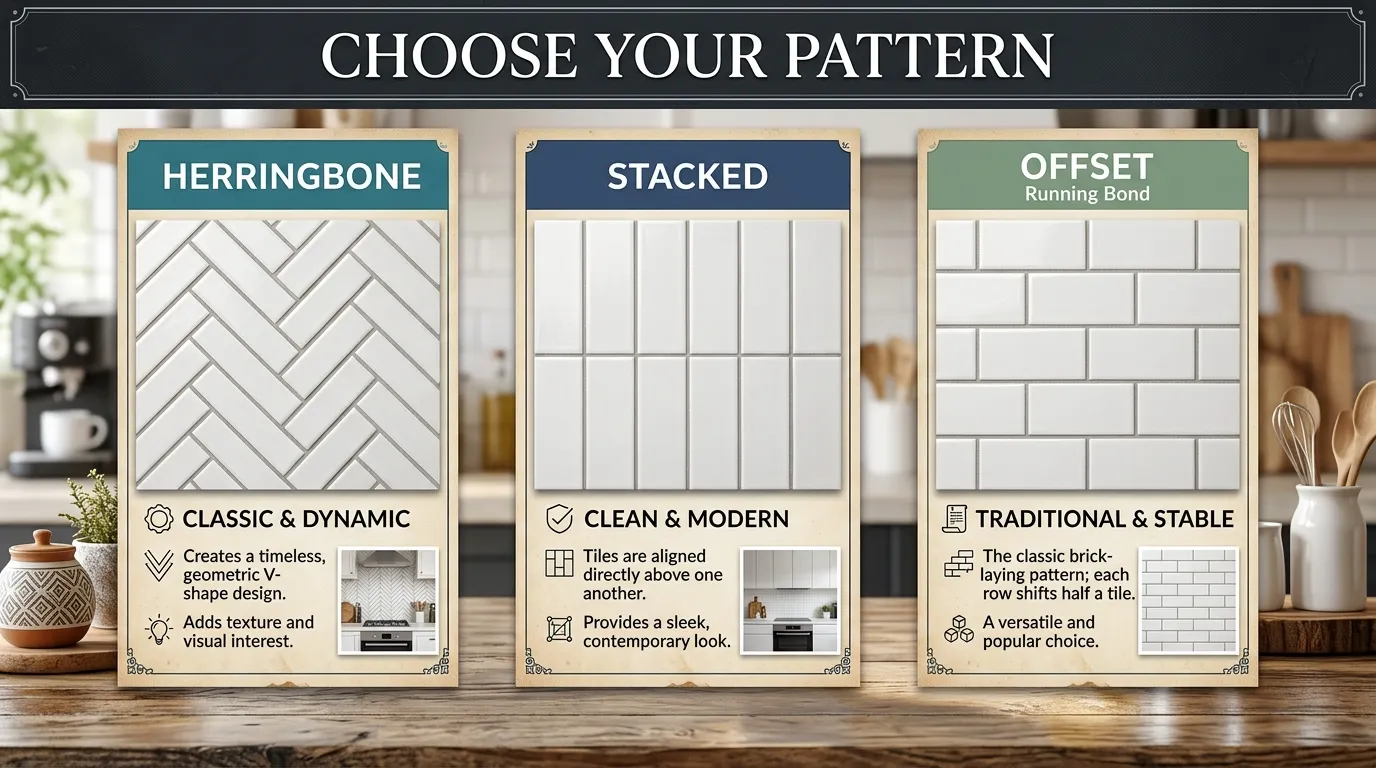
Tile pattern comparison showing horizontal, vertical, and herringbone installation options
Scale and Size Considerations
Tile size impacts both aesthetic and perceived space in compact kitchens.
- Large tiles (12×24″+): Fewer grout lines; cleaner, more spacious appearance
- Medium tiles (4×8″, 6×6″): Versatile; easier DIY installation than large formats
- Small tiles (2×2″, penny rounds): Create texture; require more grout maintenance
- Mosaic sheets: Multiple small tiles on mesh backing; easier installation than individual
Creating Focal Points
Strategic focal point creation draws attention to attractive kitchen features while disguising limitations.
- Behind range: Different tile, pattern, or color makes cooktop area statement wall
- Full-height sections: Extend backsplash to ceiling in one area for dramatic effect
- Accent strips: Decorative tile band at cabinet line or mid-height
- Niche framing: Special tile surrounding built-in shelving or display areas
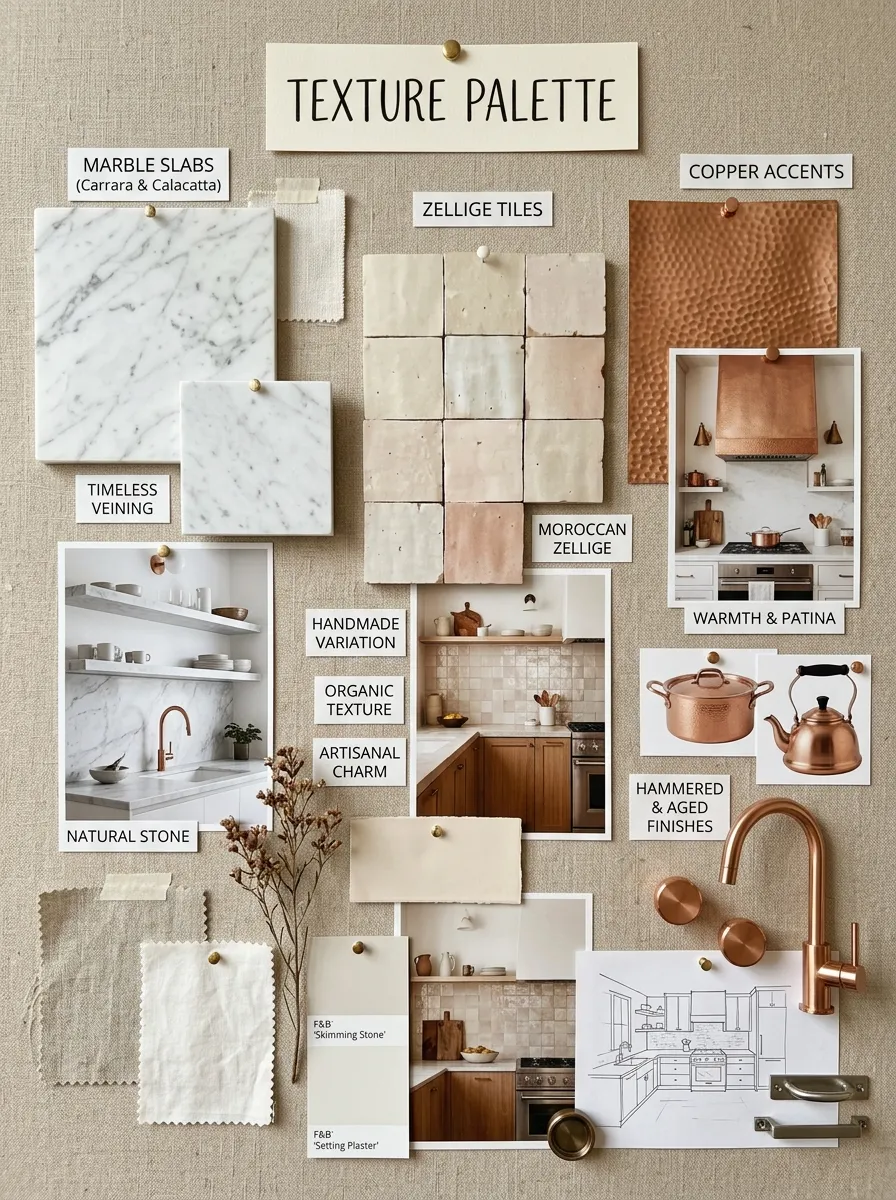
Backsplash design mood board showcasing color combinations and pattern possibilities
Backsplash Installation Methods & Costs
Understanding installation processes and associated costs helps you budget appropriately and decide between professional hiring and DIY approaches.
Professional Installation
Hiring experienced tile setters ensures quality results, especially for complex materials or patterns, though it significantly increases project costs.
💰 Professional Installation Costs:
Labor Only: $10-25 per square foot
Total (materials + labor): $15-40 per square foot
Typical Small Kitchen (25-35 sq ft): $400-$1,500 total
Timeline: 1-3 days (including prep and grouting)
Warranty: Most pros guarantee workmanship 1-2 years
When to Hire a Professional
- Large format tiles (12×24″+) requiring precision and perfect walls
- Natural stone installation needing specialized cutting tools and skills
- Complex patterns (herringbone, chevron, diagonal) demanding experience
- Glass tile requiring transparent adhesive and expert technique
- Uneven or damaged walls needing extensive prep work
- Full-height installations reaching 7-10 feet requiring scaffolding
DIY Installation
Competent DIYers can successfully install many backsplash types, saving 50-70% on labor costs while gaining satisfaction of personal achievement.
Best DIY-Friendly Options
- Peel-and-stick tiles: Easiest; requires only cutting tool and level
- Standard subway tile: Forgiving size; easy brick pattern; widely available
- Mosaic sheets: Multiple tiles pre-mounted; faster than individual placement
- Medium tiles (4×8″, 6×6″): Manageable size; fewer cuts than large formats
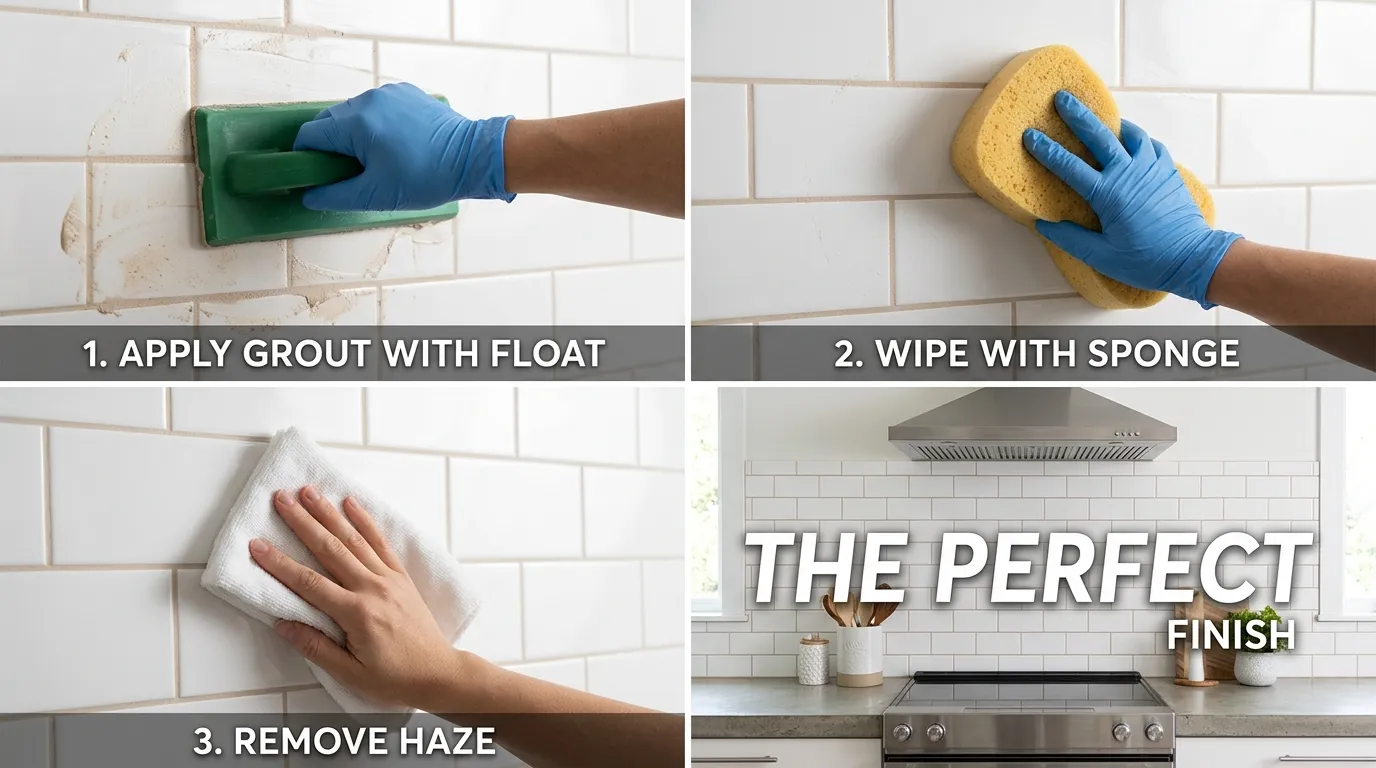
Step-by-step grouting tutorial for DIY backsplash tile installation
Essential DIY Tools and Materials
- Tile adhesive/mastic: $20-40 per gallon (pre-mixed easiest for DIY)
- Grout: $15-30 per bag; choose sanded (wide joints) or unsanded (narrow joints)
- Notched trowel: $8-15; size depends on tile dimensions
- Tile spacers: $5-10; ensure consistent grout lines
- Tile cutter: $30-100 (manual) or $50-150 (rental wet saw for many cuts)
- Level and measuring tape: $15-30 if you don’t already own
- Grout float and sponges: $10-20
- Sealer: $15-30 (for natural stone or porous tile)
Step-by-Step DIY Installation Overview
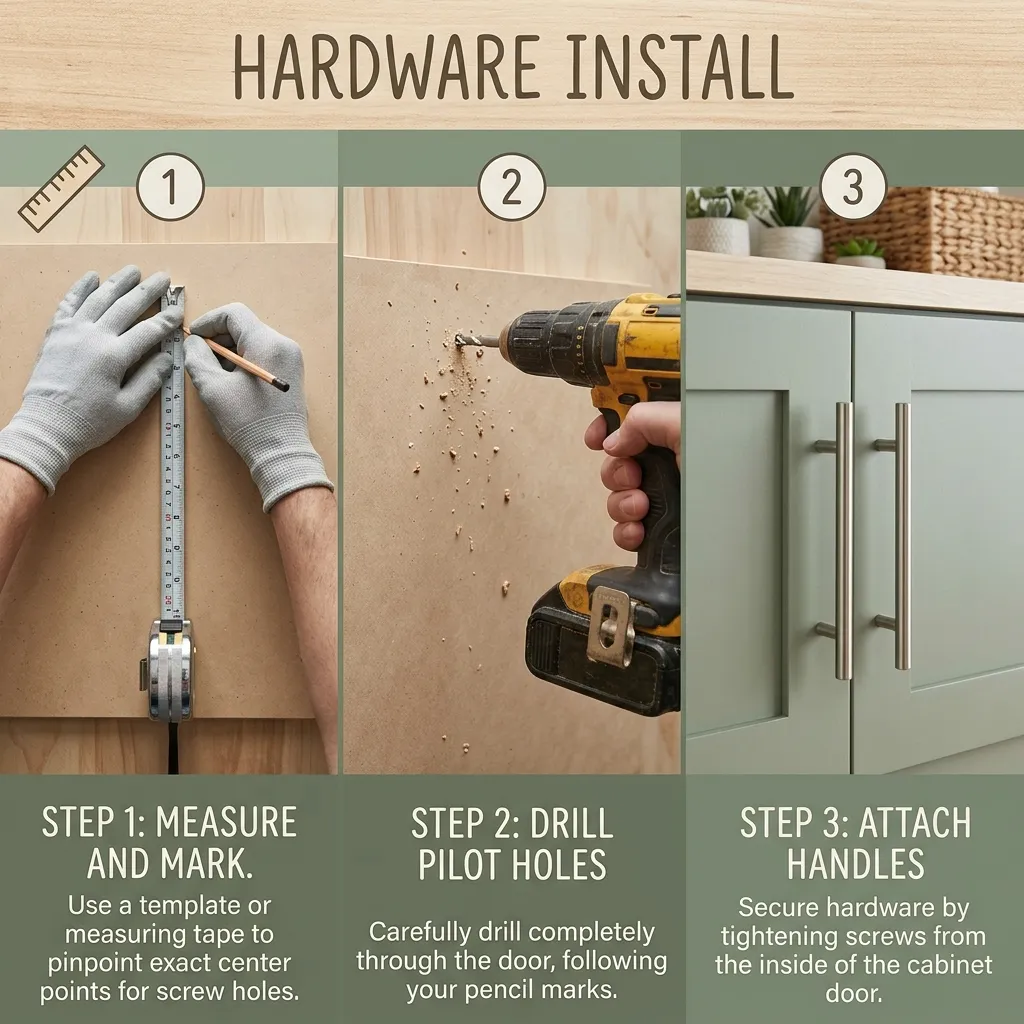
- Prepare surface: Clean walls; remove outlet covers; ensure smooth, dry surface
- Plan layout: Measure and mark; determine starting point for symmetry
- Apply adhesive: Spread thin layer with notched trowel in small sections
- Place tiles: Press firmly with slight twisting motion; use spacers for consistent gaps
- Cut edge/corner tiles: Measure carefully; score and snap or use wet saw
- Allow drying: Wait 24-48 hours before grouting (check adhesive instructions)
- Apply grout: Force grout into joints with rubber float; work diagonally
- Clean excess: Wipe diagonal with damp sponge; rinse frequently
- Seal (if needed): After grout cures 72 hours, seal natural stone or porous materials
- Finish details: Caulk seams where backsplash meets counters; reinstall outlets
Alternative Installation Methods
Peel-and-Stick Installation
Self-adhesive tiles revolutionize DIY backsplash installation with remarkable simplicity.
- Prep: Clean wall; ensure grease-free surface for proper adhesion
- Application: Peel backing; press tile firmly; smooth out air bubbles
- Cutting: Score with utility knife; snap along straightedge
- Timeline: Complete small kitchen in 2-4 hours
- Tools needed: Level, measuring tape, utility knife, straightedge
Panel Systems
Large backsplash panels (4×8 feet) install quickly with minimal seams, though options are limited.
- Materials: Acrylic, laminate, stainless steel, or composite panels
- Pros: Fastest installation; no grout; contemporary appearance
- Cons: Limited design options; visible seams in larger kitchens
- Cost: $15-50 per square foot installed
Budget-Friendly Backsplash Ideas
Beautiful, functional backsplashes don’t require luxury budgets. Creative material choices and strategic installation deliver impressive results affordably.
Ultra-Budget Options (Under $200)
Peel-and-Stick Tiles
The most budget-friendly option combines low material costs with zero installation expense.
- Total cost: $100-200 for typical small kitchen (25-35 sq ft)
- Best sources: Home Depot, Amazon, Wayfair
- Installation time: 2-4 hours DIY
- Longevity: 3-5 years with proper installation
- Ideal for: Renters, temporary updates, extreme budget constraints
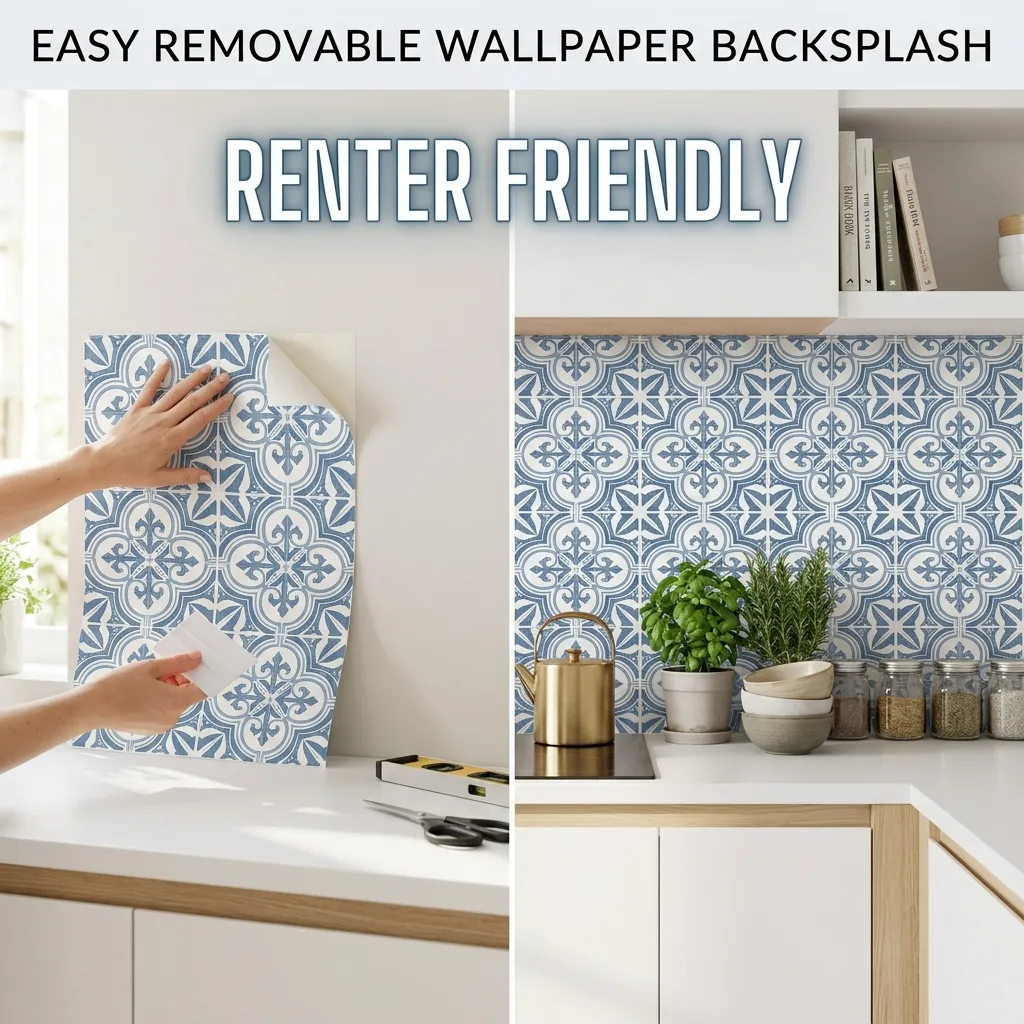
Removable wallpaper backsplash offers budget-friendly, rental-friendly design solution
Basic Ceramic Subway Tile (DIY)
Standard white 3×6″ subway tile from big box stores offers incredible value when self-installed.
- Materials cost: $80-150 (tile, adhesive, grout, tools)
- Labor: $0 (DIY friendly)
- Total: $80-150 for standard small kitchen
- Durability: Decades with proper installation
- Upgrade option: Use colored grout ($10-20 extra) for custom look
Mid-Budget Options ($200-$500)
Accent Wall Strategy
Splurge on special tile for single focal wall (behind range); use basic tile elsewhere.
- Premium patterned tile (4-6 sq ft @ $20/sq ft): $80-120
- Basic white tile for remaining walls (20-25 sq ft @ $5/sq ft): $100-125
- Installation supplies: $75-100
- DIY labor: $0
- Total: $255-345 for custom, two-tier look
Partial Height Backsplash
Install backsplash only in essential areas (behind sink and stove), leaving other walls painted.
- Reduces tile coverage by 40-60%
- Focuses budget on high-impact, high-use areas
- Can add full coverage later when budget allows
- Works best in l-shaped or u-shaped kitchens
Money-Saving Installation Strategies
- DIY installation: Saves $250-$875 in labor on typical small kitchen
- Simple patterns: Brick offset easier/faster than herringbone or diagonal
- Standard sizes: Common tiles (3×6″, 4×4″) cost less than specialty sizes
- Local tile shops: Often beat big box prices on bulk purchases
- End-of-year sales: December clearances offer deep discounts
- Contractor samples: Some tile shops sell sample tiles at discounts; can work for small spaces
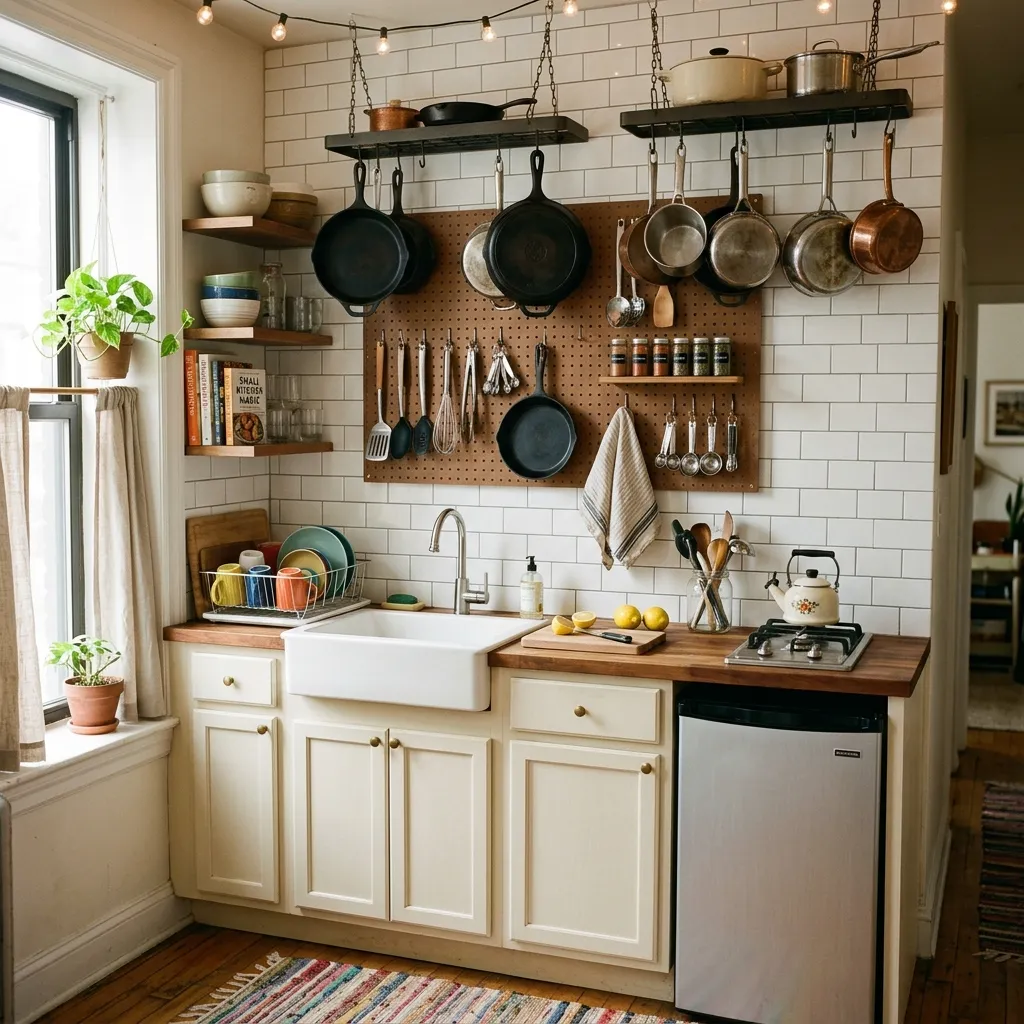
Budget-friendly kitchen design featuring affordable backsplash and smart organization
What NOT to Cheap Out On
While saving money is important, certain elements warrant proper investment to avoid costly problems.
- Wall prep: Properly preparing surface prevents future tile failure
- Quality adhesive: $10 savings on cheap mastic causes $500 repair when tiles fall
- Behind stove: Use real tile (not peel-stick) in high-heat zone for safety
- Proper tools: Level, spacers, and good trowel ensure professional results
- Grout sealer: $15-30 investment prevents staining and prolongs grout life
Cleaning & Maintenance Tips for Backsplashes
Proper care keeps your backsplash looking new for years while preventing damage and deterioration. Maintenance requirements vary significantly by material.
Daily and Weekly Cleaning
Ceramic and Porcelain Tile
- Daily: Wipe splashes with damp cloth or paper towel
- Weekly: Spray with all-purpose cleaner; wipe with microfiber cloth
- Grout cleaning: Scrub grout lines monthly with soft brush and baking soda paste
- Avoid: Abrasive scrubbers that scratch glazed surfaces
Glass Tile
- Daily: Squeegee or wipe to prevent water spot buildup
- Weekly: Glass cleaner or vinegar solution for streak-free shine
- Special care: Avoid abrasive cleaners that scratch glass surfaces
Natural Stone (Marble, Travertine, Slate)
- Daily: Wipe with pH-neutral stone cleaner (never vinegar or acidic cleaners)
- Monthly: Reseal if water no longer beads on surface
- Stain removal: Poultice treatment for oil or organic stains
- Avoid: Acidic cleaners (vinegar, lemon, harsh chemicals) that etch stone
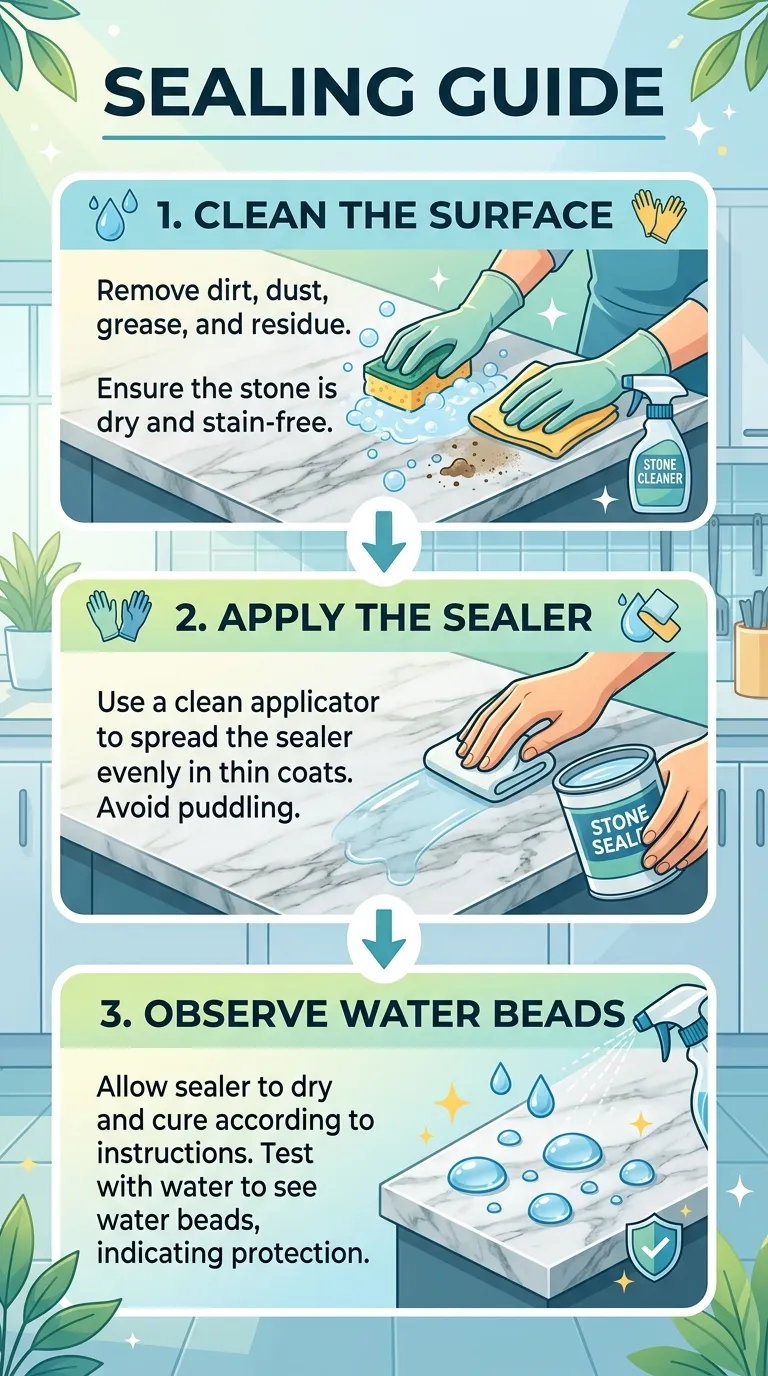
Proper sealing technique for natural stone backsplash maintenance and protection
Deep Cleaning and Restoration
Grout Cleaning and Sealing
Grout requires more maintenance than tile surfaces, especially in light colors.
- Annual deep clean: Oxygen bleach solution or commercial grout cleaner
- Scrubbing technique: Soft brush along grout lines; avoid tile surfaces
- Whitening: Grout paint or marker restores dingy white grout ($10-20)
- Sealing frequency: Every 1-2 years for standard grout; epoxy grout doesn’t need sealing
- Application: Brush or applicator bottle; wipe excess from tiles immediately
Removing Tough Stains
- Grease buildup: Degreasing dish soap or TSP solution; scrub gently
- Hard water deposits: Vinegar solution (ceramic/glass only) or commercial lime remover
- Mold/mildew: Bleach solution (1:10 ratio) or hydrogen peroxide spray
- Food stains: Baking soda paste; let sit 15-30 minutes before scrubbing
Preventing Damage and Wear
- Immediate cleanup: Wipe acidic spills (tomato sauce, citrus) immediately from stone
- Proper ventilation: Run range hood to reduce grease buildup on all surfaces
- Avoid impacts: Don’t bang pots/pans against tile; chips are difficult to repair
- Regular sealing: Maintain grout and stone sealers on schedule
- Gentle products: Use pH-neutral cleaners; avoid harsh chemicals
Repair and Touch-Up
- Cracked grout: Remove damaged grout; apply fresh grout; seal when cured
- Loose tiles: Remove tile; scrape old adhesive; reattach with fresh mastic
- Chips: Touch up with epoxy filler in matching color (small chips only)
- Discolored caulk: Remove and replace silicone caulk where backsplash meets counters
Common Backsplash Mistakes to Avoid
Learning from common errors saves time, money, and frustration in your backsplash project.
1. Choosing Wrong Tile Size for Space
Tile scale dramatically impacts how large or cramped small kitchens feel.
- Too small: Excessive grout lines create busy, cluttered appearance
- Too large: Awkward cuts at edges; few tiles mean mistakes show prominently
- Ideal for small kitchens: Medium tiles (3×6″, 4×8″, 6×6″) or large formats (12×24″)
2. Skimping on Surface Preparation
Proper wall prep determines whether your backsplash lasts decades or fails within months.
- Dirty walls: Grease and dust prevent adhesive bonding; tiles fall off
- Uneven surfaces: Create lippage (uneven tile edges) and poor appearance
- Moisture issues: Install on completely dry walls; moisture causes tile failure
- Wrong substrate: Some tiles require cement board backing, not drywall
3. Poor Layout Planning
Failing to plan tile layout before installation creates awkward cuts and unprofessional appearance.
- Starting without measuring: Results in tiny slivers at edges looking amateurish
- Not centering: Unbalanced layout draws attention to asymmetry
- Ignoring focal points: Outlets, windows should align with grout lines or tile centers
- Solution: Dry-lay tiles before adhering; adjust for symmetry and full/half tiles at edges
4. Using Wrong Adhesive or Grout
Different tiles require specific adhesives; using incorrect products causes failure.
- Glass tile: Requires white thinset (gray shows through); standard mastic yellows over time
- Heavy stone: Needs modified thinset; mastic insufficient for weight
- Large format: Requires large-and-heavy-tile mortar for proper support
- Grout width: Sanded grout for joints 1/8″+ wide; unsanded for narrower joints
5. Neglecting Sealing Requirements
Natural stone and some grouts require sealing to prevent staining and damage.
- Unsealed stone: Absorbs oil, grease, and food stains permanently
- Unsealed grout: Discolors quickly; harbors bacteria and mold
- Timing: Seal after grout fully cures (72 hours minimum)
- Frequency: Reseal stone/grout every 1-2 years as needed
6. Installing Peel-and-Stick Too Close to Heat
Self-adhesive tiles fail in high-heat areas, creating safety and aesthetic problems.
7. Forgetting Electrical Considerations
Outlets require special planning in backsplash installations.
- Turn off power before removing outlet covers
- Purchase outlet extenders if tile thickness makes outlets recessed
- Tile around outlets neatly; use plastic tile spacers for consistent gaps
- Consider hiring electrician if outlets need repositioning for better layout
8. Choosing Trendy Over Timeless
Extremely trendy backsplash choices may date quickly, affecting resale value and long-term satisfaction.
- Ultra-trendy patterns: May look dated in 3-5 years
- Very specific colors: Limit future decorating flexibility
- Balance approach: Classic base with trendy accents you can change
- Timeless choices: White subway, marble, solid neutrals, simple geometrics
- Consideration: If selling within 5 years, choose broadly appealing options
Backsplash Design Gallery
Explore inspiring backsplash designs showcasing various materials, colors, patterns, and installation approaches for small kitchens.
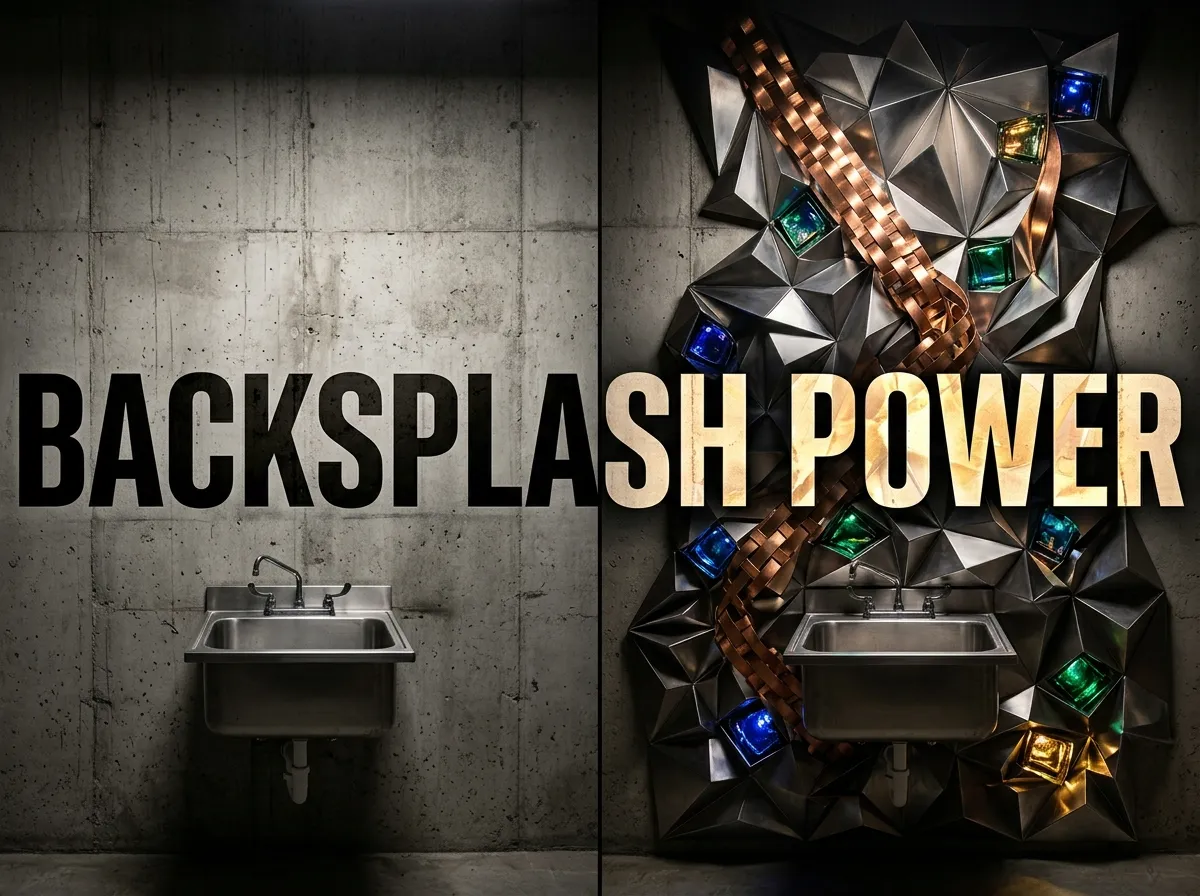
Dramatic backsplash remodel before and after showing complete kitchen transformation
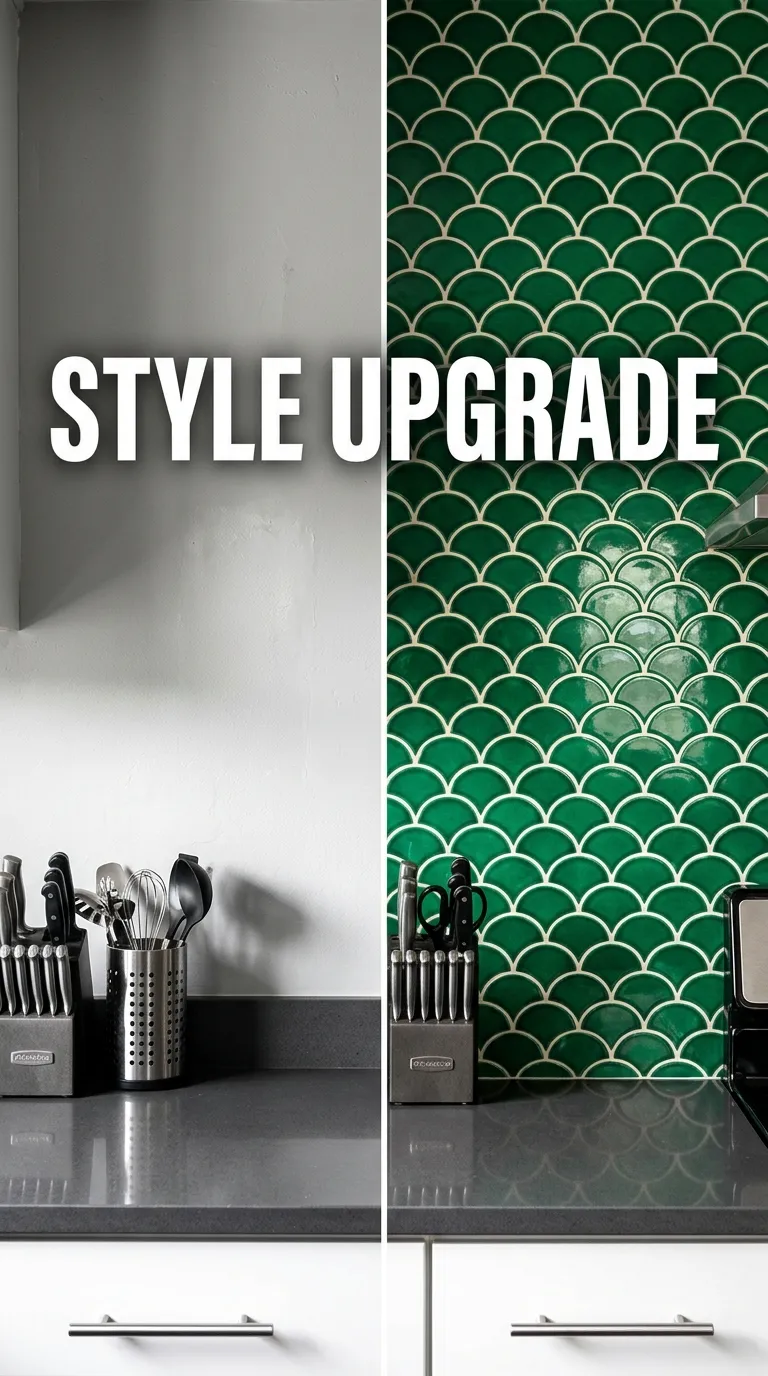
Bold emerald green backsplash transformation creates stunning focal point
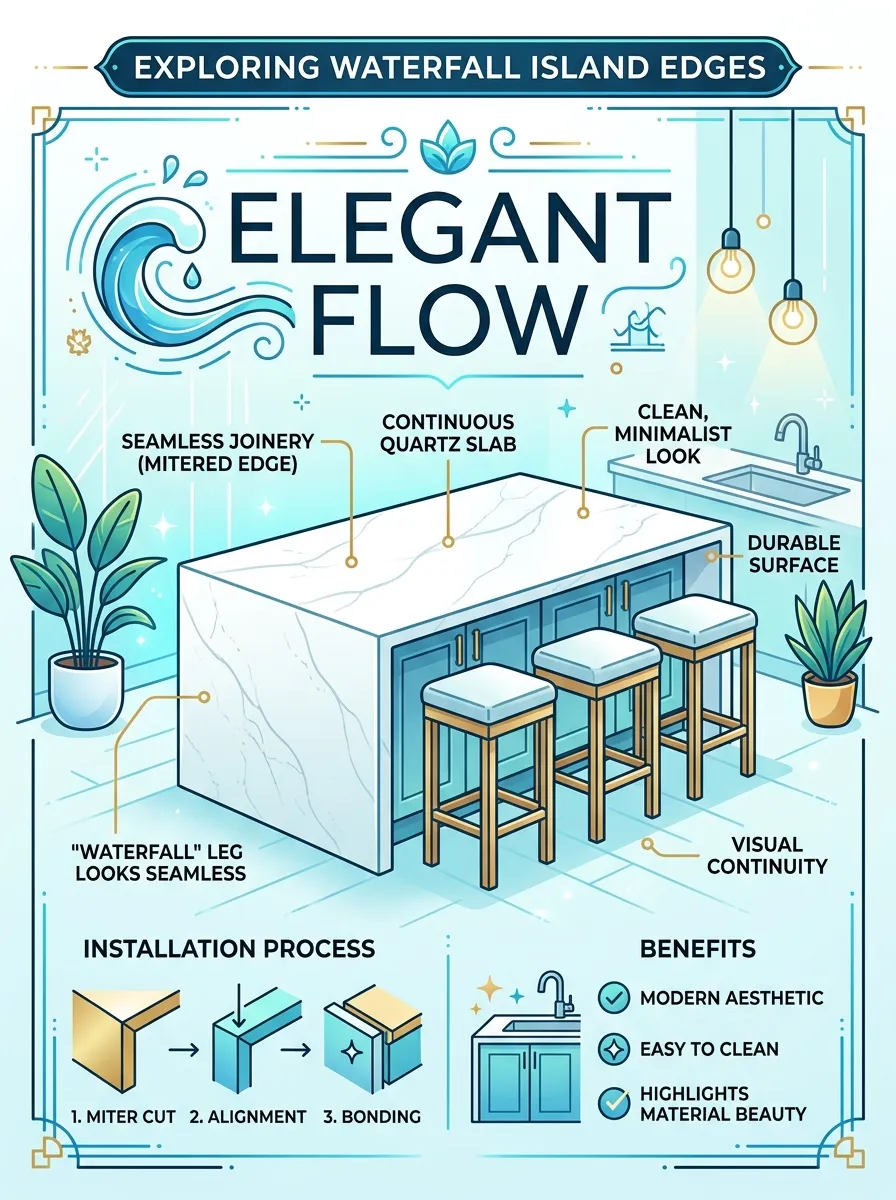
Design guide showing how to coordinate backsplash with countertops and cabinets
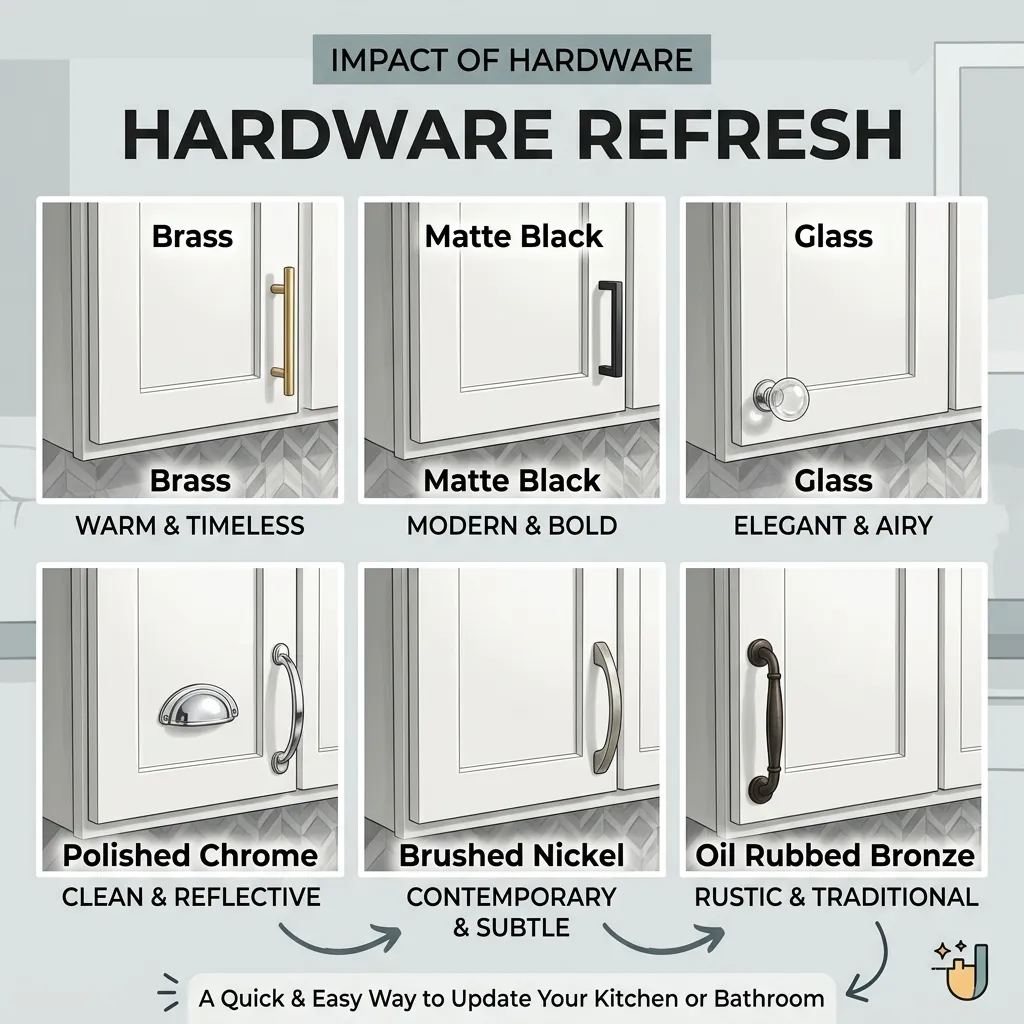
Coordinating backsplash with cabinet hardware for cohesive kitchen design
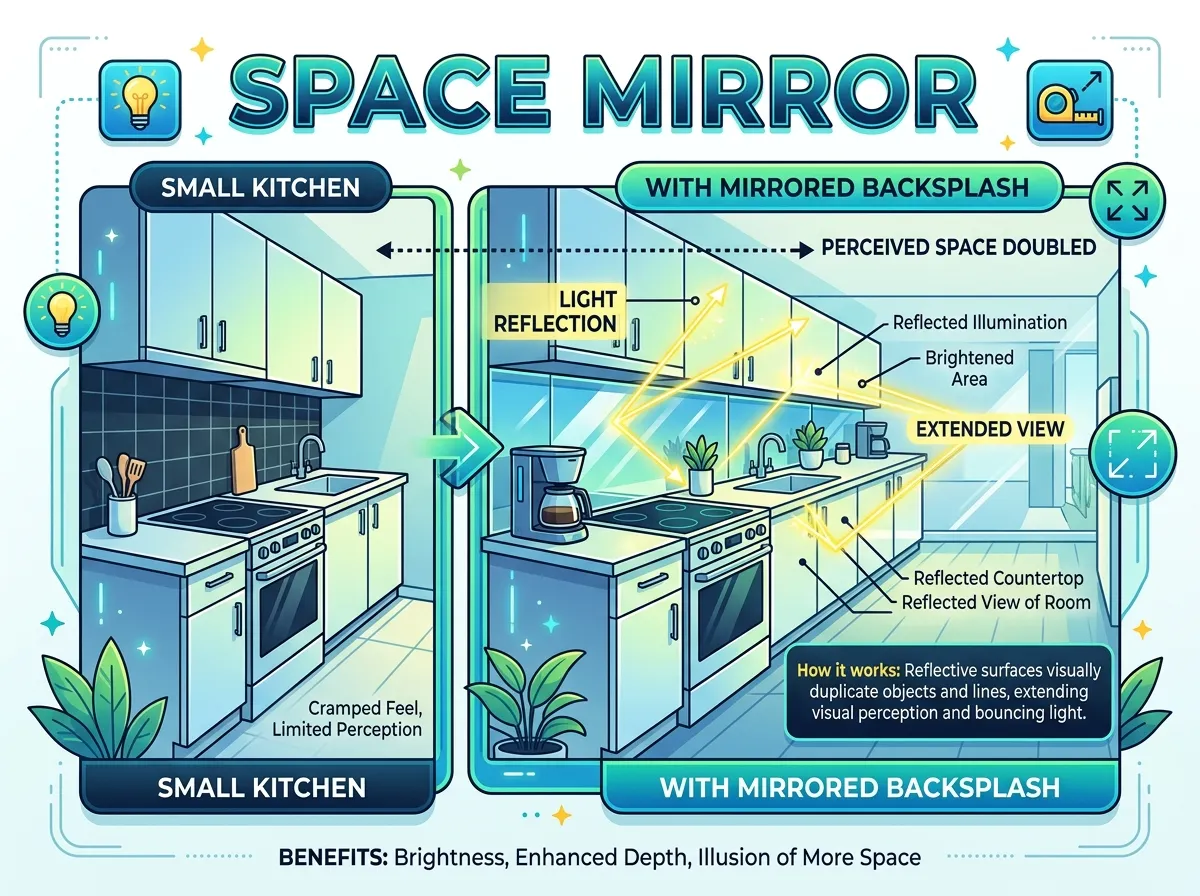
Mirrored backsplash doubles visual space through light reflection in small kitchen
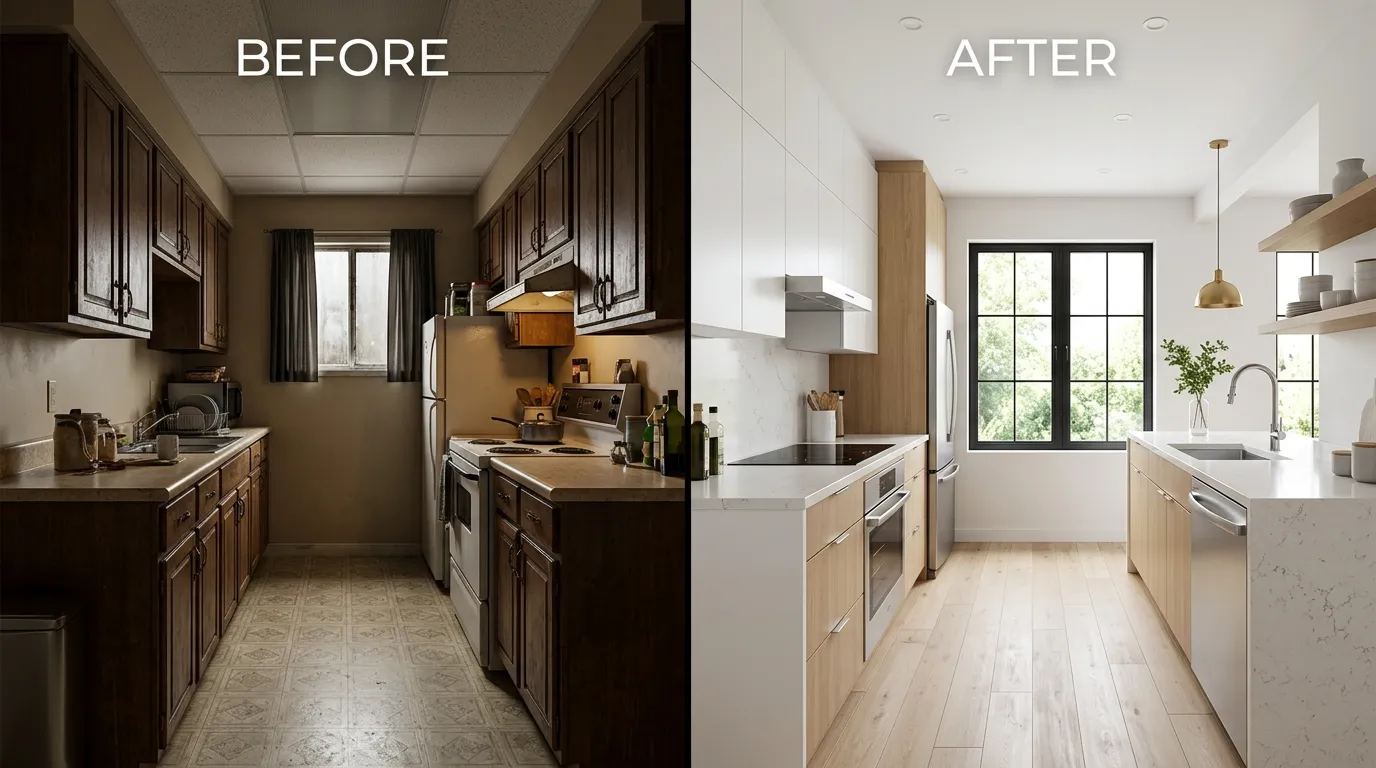
Complete kitchen transformation with new backsplash as focal point of renovation
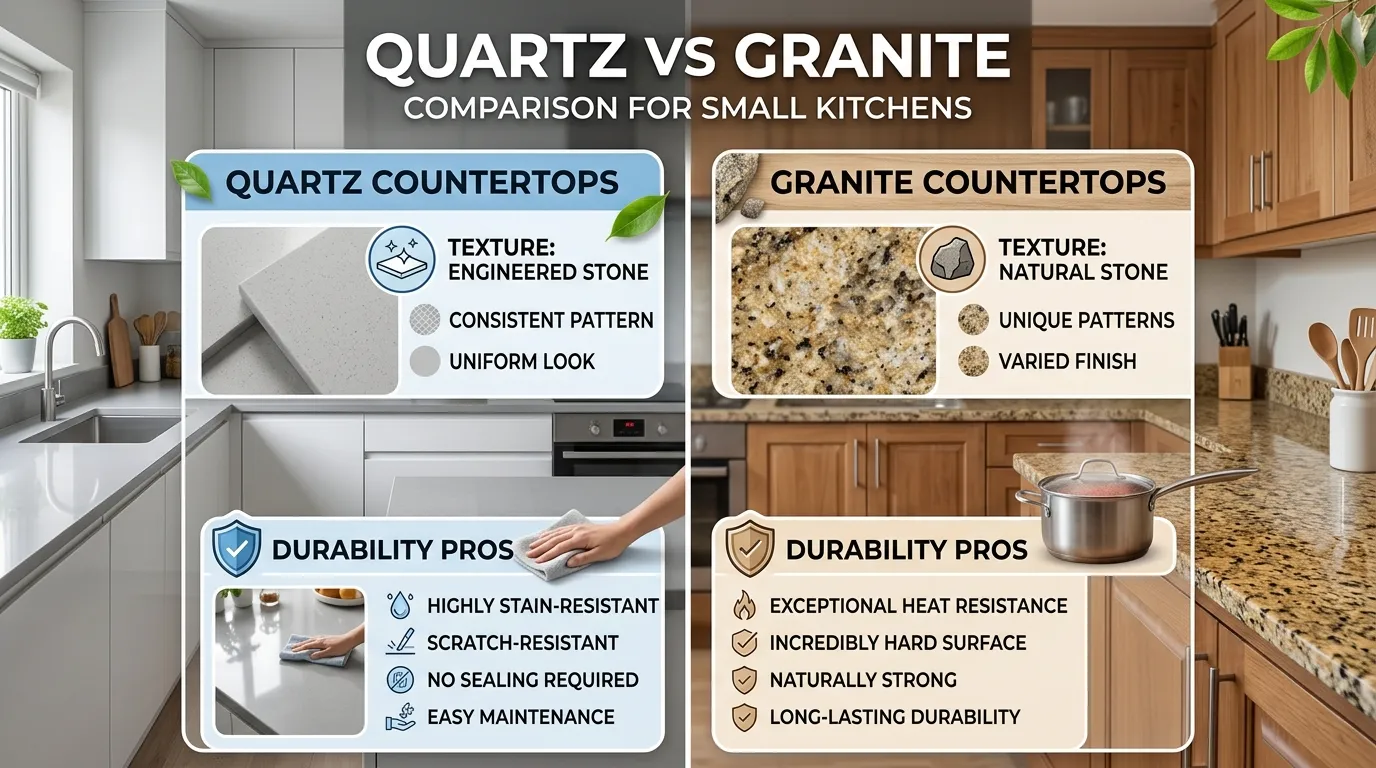
Material comparison guide for selecting ideal backsplash for your kitchen style
Proper backsplash installation around outlets and fixtures for professional finish
Guide to coordinating backsplash colors with cabinet finishes and materials
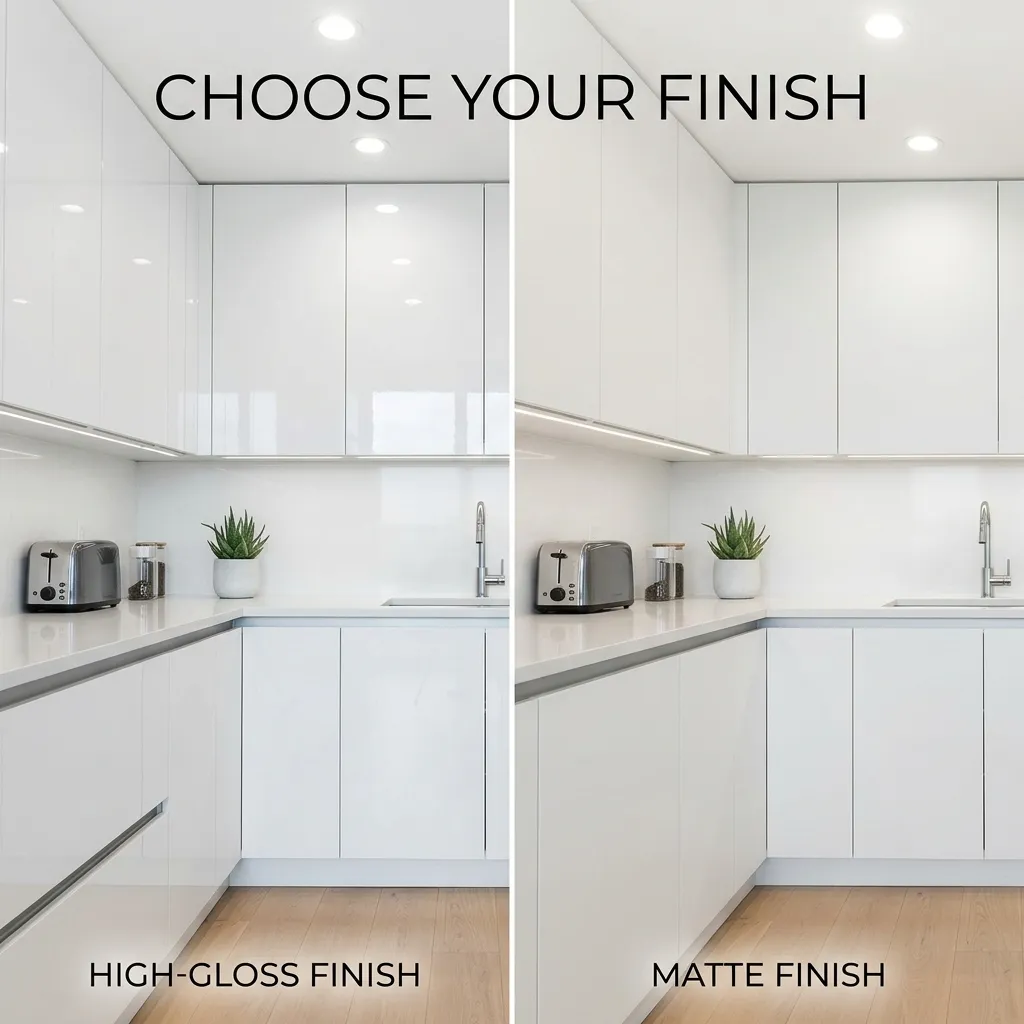
Backsplash finish comparison showing glossy vs matte surface options
Backsplash style guide comparing traditional and modern design approaches
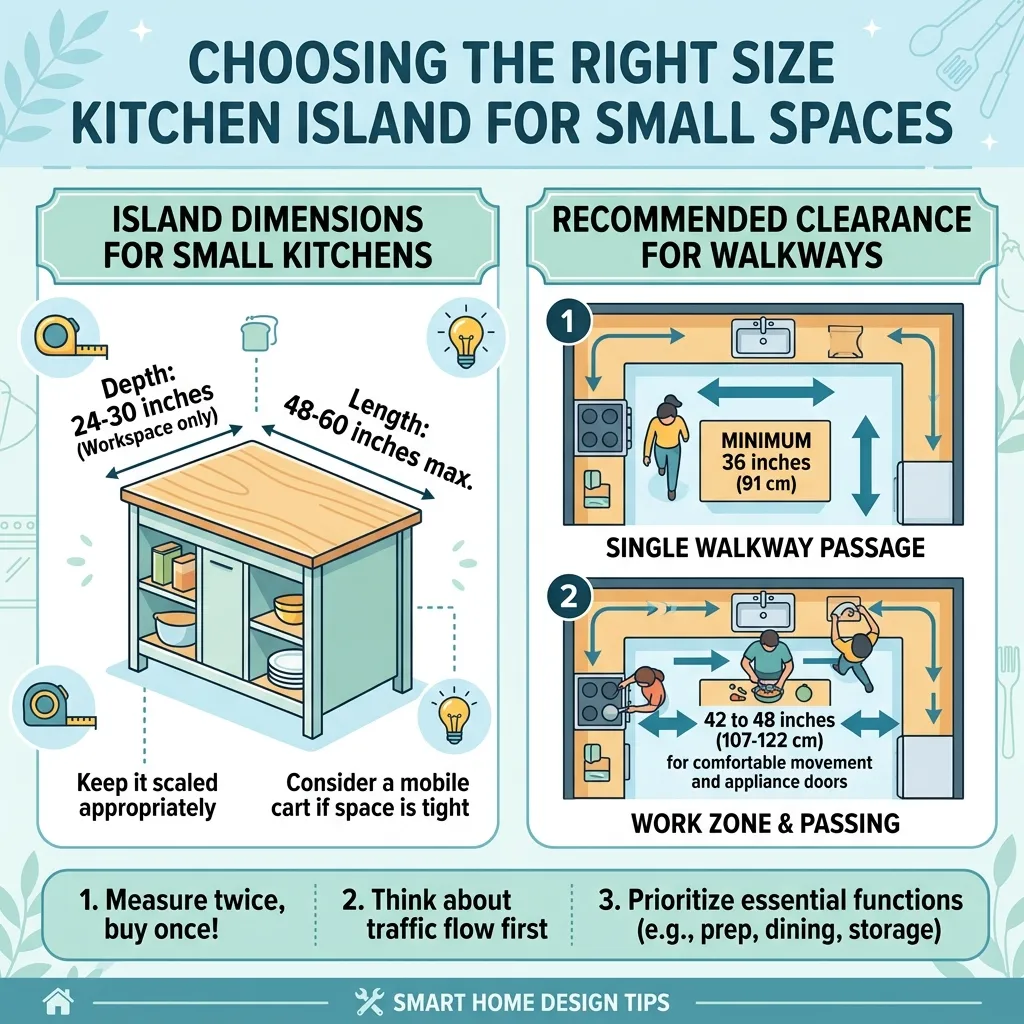
Comprehensive planning guide for backsplash measurements and layout design
Frequently Asked Questions About Kitchen Backsplashes
What is the most popular backsplash for a small kitchen?
White subway tile remains the most popular backsplash for small kitchens due to its timeless appeal, affordability ($3-8/sq ft), and space-expanding properties. The classic 3×6″ ceramic tiles in brick pattern create bright, clean appearance that makes compact kitchens feel larger while coordinating with any cabinet color or design style. Second most popular is light gray large-format tile (12×24″) which offers contemporary aesthetic with minimal grout lines. Both choices maximize light reflection and provide neutral backdrop allowing other design elements to shine.
How much does it cost to install a backsplash in a small kitchen?
Small kitchen backsplash installation costs $400-$1,500 total including materials and labor. DIY installation with basic subway tile runs $80-250 (materials only), while professional installation with mid-range tile costs $600-1,200. Breakdown: ceramic tile materials ($3-15/sq ft), professional labor ($10-25/sq ft), supplies/adhesive/grout ($75-150). Typical small kitchen requires 25-35 square feet of coverage. Peel-and-stick options cost $100-200 for DIY. Luxury materials (marble slab, designer tiles) can exceed $2,000-3,000 installed.
Should backsplash go to ceiling in small kitchen?
Extending backsplash to ceiling in small kitchens creates dramatic height perception and ultra-modern aesthetic, making low ceilings feel taller. This works especially well in contemporary designs and on single accent walls behind cooktop or sink. However, standard height (to bottom of cabinets, 15-18″) works better for traditional styles and is more budget-friendly. Full-height backsplash increases material costs by 200-300% but delivers maximum visual impact. Best candidates: kitchens with 8’+ ceilings, modern design style, open layouts where kitchen visible from living areas. Consider doing one full-height wall as focal point with standard height elsewhere.
What backsplash makes a small kitchen look bigger?
Light-colored, large-format tiles with glossy finish make small kitchens look biggest. White, light gray, or cream tiles in 12×24″ or larger sizes minimize grout lines while maximizing light reflection, creating 20-30% larger perceived space. Glossy/glass finishes reflect more light than matte. Horizontal tile patterns draw eyes sideways making narrow kitchens appear wider. Vertical patterns draw eyes upward making ceilings feel taller. Avoid: dark colors, tiny mosaics with excessive grout lines, and busy patterns—all make small spaces feel cramped. Also avoid stopping backsplash mid-wall; extend fully from counter to cabinets for uninterrupted visual flow.
Can I install backsplash myself?
Yes, most homeowners can successfully DIY basic backsplash installation with standard tiles (subway, medium formats) in simple patterns, saving 50-70% on labor costs. Best DIY options: peel-and-stick (easiest), ceramic subway tile in brick pattern, mosaic sheets on mesh backing. Required skills: measuring, basic cutting, following level lines. Timeline: 1-2 days for small kitchen. However, hire professionals for: large-format tiles (12×24″+) requiring precision, glass tile needing transparent adhesive, natural stone installation, complex patterns (herringbone, diagonal), or significantly uneven walls. First-timers should expect imperfections but can achieve satisfactory results with patience and proper preparation.
What color backsplash is timeless?
White, light gray, and natural marble/stone remain most timeless backsplash colors, staying stylish across decades and design trends. White subway tile has remained popular for over 100 years. Light gray offers contemporary alternative that hides imperfections better than pure white. Natural marble/travertine provides organic beauty transcending trends. These neutrals coordinate with evolving cabinet colors, countertops, and decor without requiring replacement. Avoid: extremely trendy colors (bright teal, millennial pink), busy patterns, and very specific color matches that limit future flexibility. For personality with longevity, use timeless neutral base with colored grout or small accent strips you can change affordably.
How high should backsplash go in kitchen?
Standard kitchen backsplash height is 15-18 inches—from countertop to bottom of wall cabinets. This protects most vulnerable areas while providing finished appearance. Behind stove, extend backsplash 24-30 inches for extra protection from grease and heat. Modern trend: full-height backsplash extending counter to ceiling (54-60″+) creates dramatic statement and emphasizes height in small kitchens. Minimum functional height: 4 inches above counter provides basic splash protection though looks unfinished. In kitchens without upper cabinets, determine height based on aesthetics—typically 18-24 inches or full-height to ceiling for maximum impact.
Should backsplash be lighter or darker than cabinets?
In small kitchens, backsplash should typically be lighter than or similar in tone to cabinets to maximize brightness and perceived space. Light backsplash with dark cabinets creates pleasing contrast while maintaining airiness. Dark backsplash with light cabinets can work but risks making small space feel closed-in unless lighting is excellent. Safest approach: stay within 2-3 shades of cabinet color for cohesion. White cabinets pair beautifully with white, light gray, or subtle color backsplash. Dark cabinets benefit from light backsplash (white, cream, light gray) to prevent cave-like feeling. Avoid: matching backsplash exactly to cabinet color—creates flat, monotonous appearance lacking visual interest.
What is the easiest kitchen backsplash to install?
Peel-and-stick tiles are easiest backsplash to install, requiring only measuring, cutting with utility knife, and pressing into place—no special tools, adhesive, or grout needed. Complete installation takes 2-4 hours for small kitchen. Second easiest: mosaic tiles on mesh sheets which install like large tiles but look like individual mosaics. Third easiest: standard subway tile (3×6″) in simple brick pattern—forgiving size and pattern hide minor imperfections. Most difficult: large-format tiles (12×24″+), glass tile, intricate patterns (herringbone, diagonal), and natural stone—all best left to professionals for first-timers.
How do I choose backsplash color for small kitchen?
Choose backsplash color for small kitchens by: (1) starting with your countertop—pick up accent color from veining or pattern, (2) considering cabinet color—use lighter shade for dark cabinets, complementary tone for light cabinets, (3) assessing lighting—rooms with limited natural light need lighter backsplash, (4) determining style—modern favors neutrals (white, gray), traditional allows warmer tones (cream, beige), (5) testing samples in actual kitchen under both natural and artificial light before committing. Safest choices: white, light gray, cream expand small spaces universally. Add personality through colored grout, accent strips, or patterned section rather than committing entire backsplash to bold color.
Creating Your Perfect Kitchen Backsplash
Kitchen backsplash design offers one of the most accessible, impactful opportunities to transform your small kitchen’s appearance while protecting walls from cooking damage. Whether you choose classic white subway tile, bold geometric patterns, luxurious marble slabs, or budget-friendly peel-and-stick options, the right backsplash elevates both function and aesthetics in your compact cooking space.
The keys to successful backsplash selection include understanding your priorities—budget, style, maintenance tolerance, and DIY capability—then choosing materials and designs aligned with those parameters. Light colors and large formats maximize perceived space in small kitchens, while thoughtful coordination with cabinets, countertops, and overall design style creates cohesive, intentional appearance.
From ultra-budget peel-and-stick installations under $200 to professional marble slab installations exceeding $2,000, backsplash projects scale beautifully to any budget. DIY-friendly options like basic subway tile offer exceptional value for handy homeowners, while complex installations warrant professional expertise ensuring lasting, beautiful results.
Remember that backsplash installation represents relatively small square footage with outsized visual impact—making it the perfect project for experimenting with color, pattern, or texture you might hesitate to introduce through larger commitments like cabinetry. With proper installation, maintenance, and care, your kitchen backsplash will protect and beautify your small kitchen for decades to come.
Ready to explore more kitchen design elements? Discover complementary ideas in our guides to cabinet design, interior design strategies, and complete remodel planning to create the small kitchen of your dreams.