
Small Kitchen Design Layout Ideas: Choose the Perfect Configuration for Your Space
Small kitchen design layout ideas form the foundation of functional, efficient compact kitchens. While you can change colors, materials, and finishes relatively easily, your layout—the arrangement of cabinets, appliances, and work zones—fundamentally determines how your kitchen functions daily. Choosing the right layout for your specific space, cooking habits, and household needs ensures your small kitchen works as hard as possible, with optimal workflow, adequate storage, and comfortable movement despite limited square footage.
From ultra-efficient galley kitchens that maximize narrow corridors to versatile L-shaped configurations that adapt to various room shapes, each layout offers distinct advantages and challenges. Understanding these layout options, their space requirements, and their functional characteristics empowers you to select (or recognize) the best configuration for your small kitchen. Whether you’re planning a renovation with flexible walls or working within a fixed footprint, knowing how different layouts perform in compact spaces helps you create a kitchen that feels spacious, functions efficiently, and meets your cooking needs perfectly.
Quick Takeaways: Small Kitchen Layouts
- One-wall layout: Simplest, most affordable, works in 7-12 foot spaces
- Galley layout: Most efficient for small kitchens, doubles storage vs. one-wall
- L-shaped layout: Most popular and versatile, needs 100+ sq ft
- U-shaped layout: Maximum storage and counter space, requires 120+ sq ft
- Work triangle (sink-stove-fridge) should total 12-26 feet for efficiency
- Minimum aisle width: 36 inches absolute minimum, 42-48 inches comfortable
- Layout choice depends on room shape, size, door/window placement, and budget
Table of Contents
The Kitchen Work Triangle Principle
Before diving into specific layouts, understanding the work triangle concept is essential. This design principle, developed in the 1940s, remains relevant for creating efficient kitchen workflows.
What is the Kitchen Work Triangle?
The work triangle connects your three primary work zones:
- Sink: Prep and cleanup zone (most-used area)
- Range/Cooktop: Cooking zone
- Refrigerator: Storage and ingredient retrieval zone
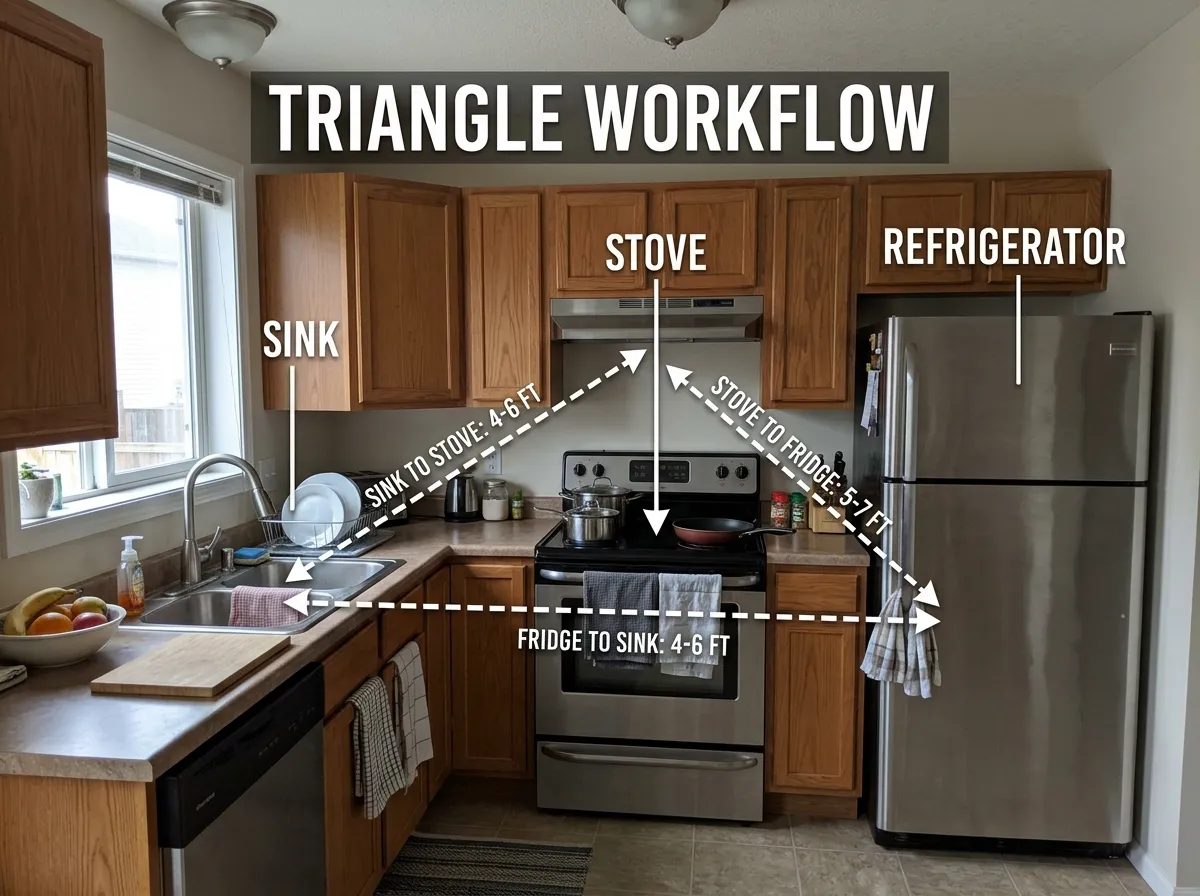
Kitchen work triangle illustrating efficient workflow between sink, stove, and refrigerator
Ideal Work Triangle Dimensions
Perfect Work Triangle Measurements
Total Triangle Perimeter: 12-26 feet (sum of all three sides)
Each Leg: 4-9 feet (no leg shorter than 4 feet or longer than 9 feet)
No Obstacles: No traffic patterns cutting through triangle
No Interruptions: Islands or tables shouldn’t obstruct triangle paths
Why the Work Triangle Matters in Small Kitchens
In compact spaces, the work triangle principle becomes even more critical:
- Efficiency: Minimizes steps during meal preparation
- Safety: Reduces carrying hot pots across long distances
- Comfort: Creates natural workflow without awkward reaches
- Multiple cooks: Well-designed triangles accommodate two people
Modern Adaptations: Work Zones
Contemporary kitchens often use “work zones” concept instead of strict triangles:
- Prep zone: Sink, countertop, cutting boards, knives
- Cooking zone: Range, oven, spices, utensils
- Storage zone: Refrigerator, pantry, food storage
- Cleaning zone: Sink, dishwasher, trash, cleaning supplies
- Serving zone: Plating area, serving dishes (if space allows)
One-Wall Kitchen Layout
The simplest and most compact layout, placing all appliances, cabinets, and sink along a single straight wall.
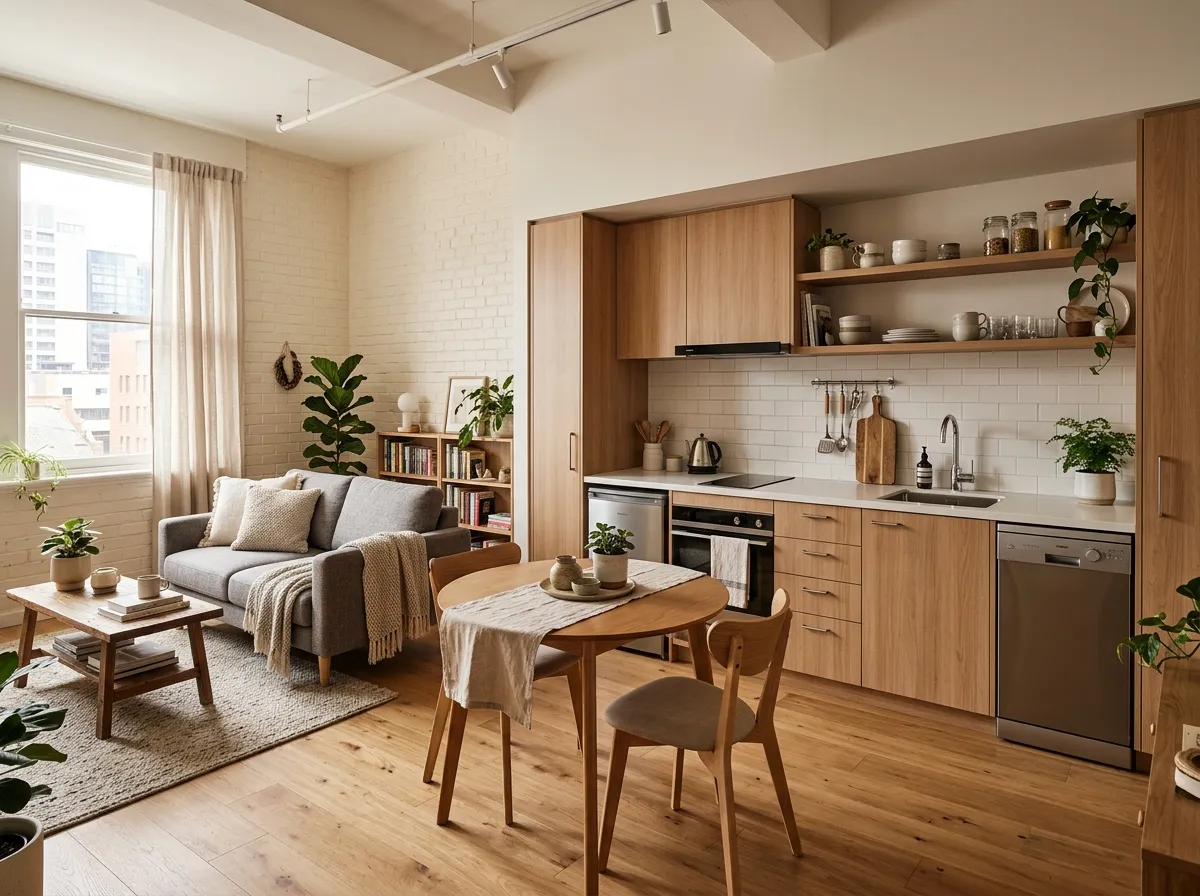
One-wall kitchen layout with all elements on single wall—ultimate space efficiency
Configuration and Dimensions
Typical Arrangement (left to right):
- Refrigerator → Counter (18-24″) → Sink → Counter (24-36″) → Range → Counter (15-18″)
- Minimum wall length: 8 feet
- Comfortable length: 10-12 feet
- Optimal length: 12-15 feet
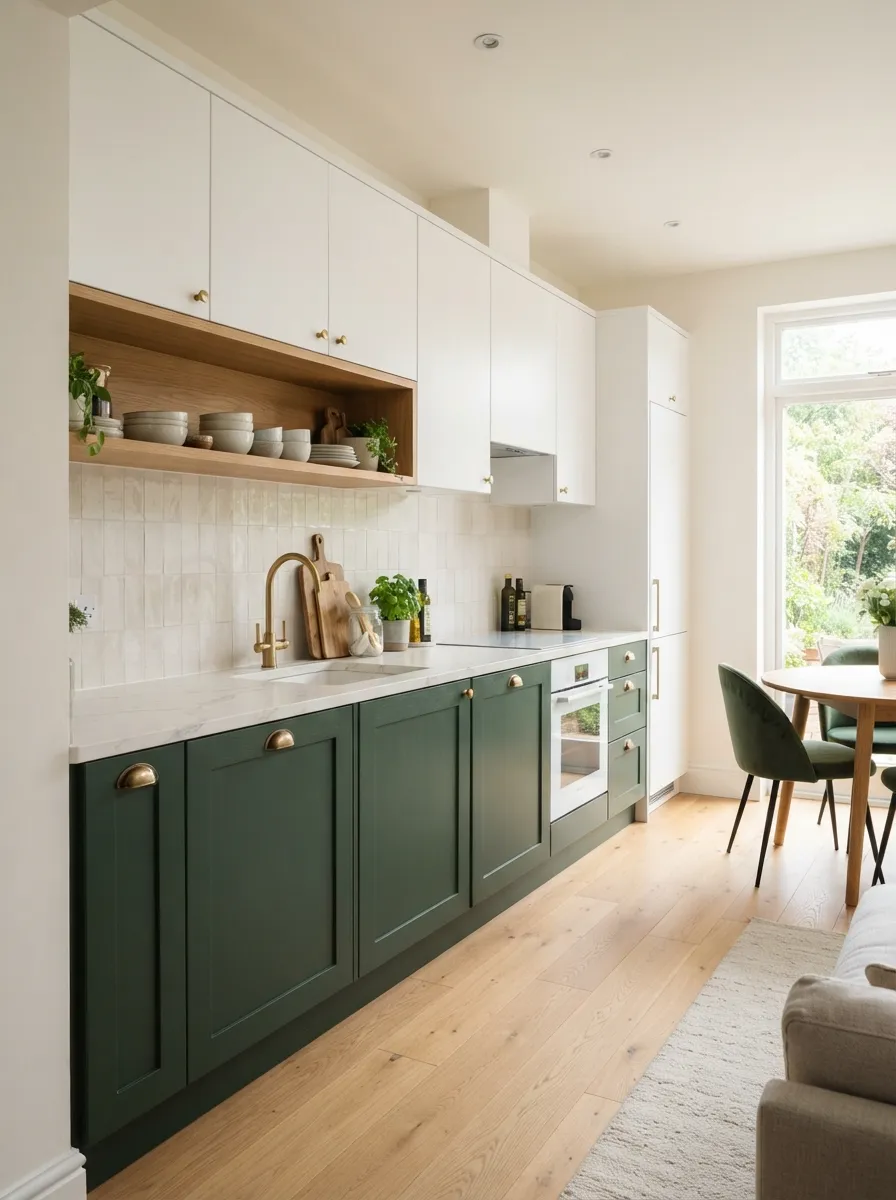
One-wall kitchen renovation showing efficient use of single wall space
Advantages ✓
- Most affordable layout (least cabinetry)
- Simplest to plan and install
- Works in extremely narrow spaces (under 7 ft wide)
- Leaves opposite wall free for dining or living
- Open, airy feeling
- Perfect for studio apartments
- Easy to accessorize with mobile cart/island
Disadvantages ✗
- Limited counter space
- Minimal storage compared to other layouts
- Long work triangle (more steps)
- Not ideal for serious cooks
- Difficult for multiple people
- All mess visible (no hiding behind corner)
Best For:
- Studio apartments and tiny homes
- Narrow spaces (under 7 feet wide)
- Single occupants or couples
- Light cooking and minimal storage needs
- Open-concept loft living
- Basement or guest house kitchenettes
Optimization Tips:
- Maximize vertical storage with floor-to-ceiling cabinets
- Add mobile cart or small table for extra prep space
- Use wall-mounted storage (magnetic strips, hooks, shelves)
- Consider compact appliances (24″ apartment-size range, 24″ dishwasher)
- Install pull-out pantry cabinets for maximum storage density
- Use overhead cabinets with glass doors to create visual openness
- Add under-cabinet lighting to enhance functionality
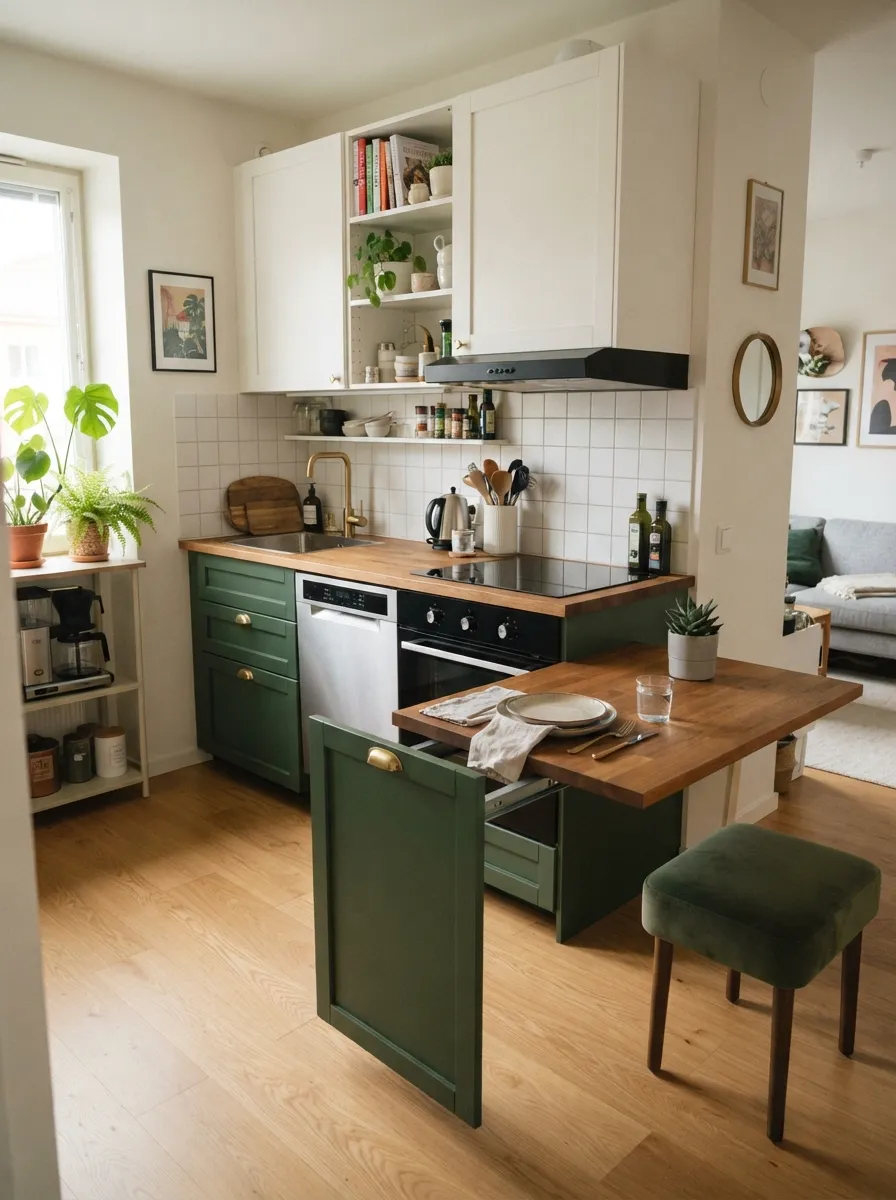
One-wall kitchen enhanced with mobile cart for additional prep space and storage
Galley Kitchen Layout
The galley (or corridor) layout features two parallel walls of cabinets and appliances, creating an efficient work corridor. Named after ship galleys, this layout maximizes efficiency in narrow spaces.
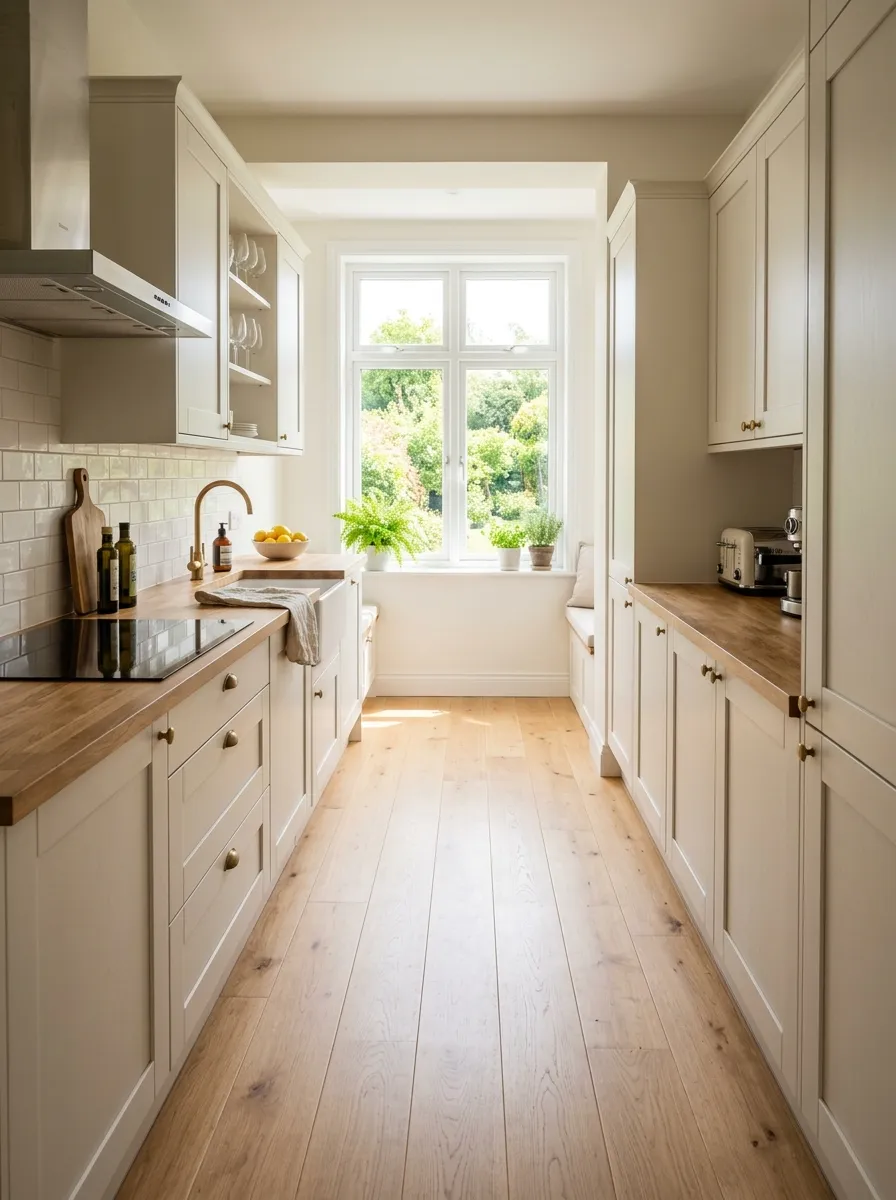
Classic galley kitchen with two parallel work surfaces creating efficient corridor
Configuration and Dimensions
Typical Arrangement:
- Wall 1: Refrigerator → Counter → Sink → Counter → Range
- Wall 2: Continuous counter with cabinets above and below
- Corridor width (between cabinets): 36-48 inches
- Minimum corridor: 36 inches (tight but functional)
- Comfortable corridor: 42-48 inches
- Maximum corridor: 60 inches (beyond this, efficiency decreases)
- Length: 8-13 feet typically
Galley Kitchen Space Requirements
Minimum Room Size: 7′ × 10′ (70 sq ft)
Comfortable Size: 8′ × 12′ (96 sq ft)
Corridor Width Sweet Spot: 42-48 inches
Optimal for: 60-120 square foot kitchens
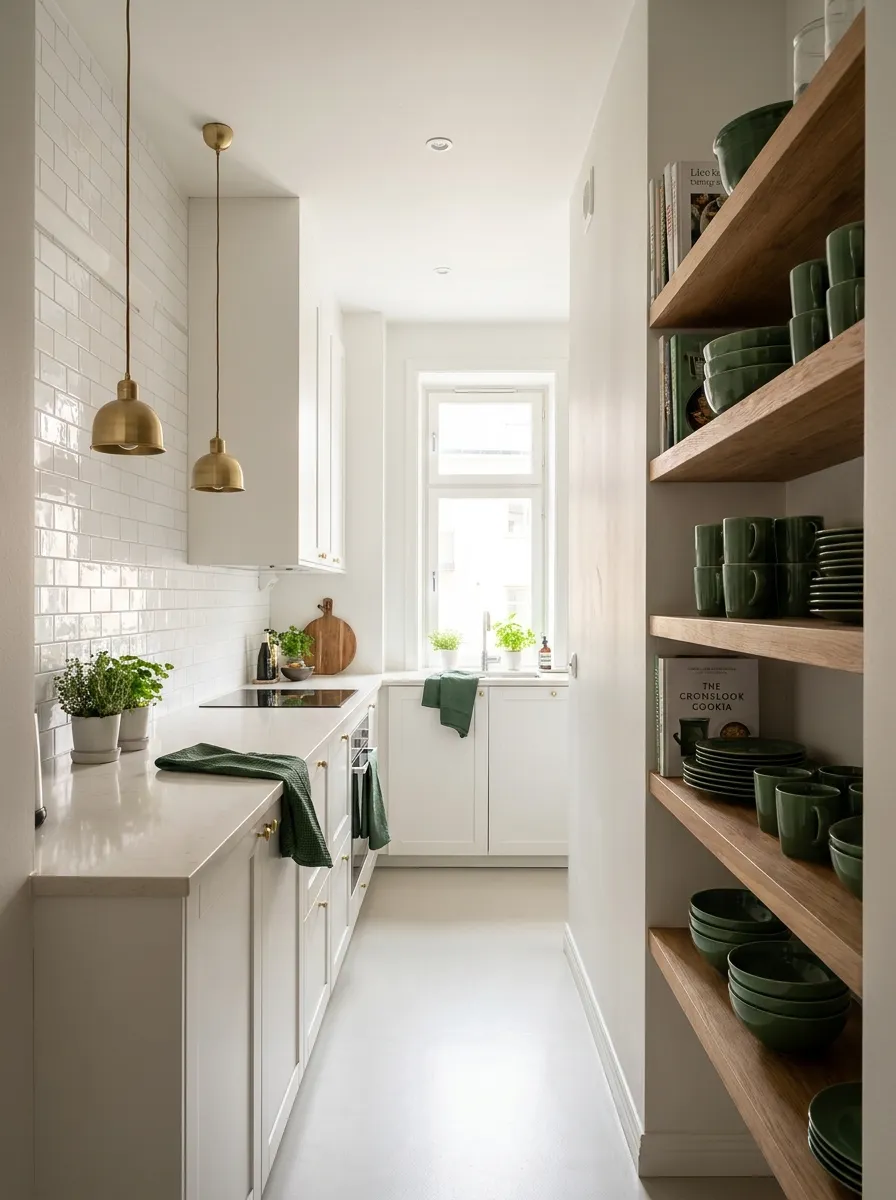
Modern white galley kitchen maximizing storage on both parallel walls
Two Galley Variations
1. Through Galley (Corridor Kitchen)
Open on both ends, with doorways at each end creating a passageway.
- Advantage: Multiple access points, better traffic flow
- Disadvantage: People walking through disrupts cooking
- Best for: Homes where kitchen connects two spaces
2. Closed Galley (One-End Closed)
Dead-end corridor with wall or window at one end.
- Advantage: No through-traffic, more focused work zone
- Disadvantage: Single entry point
- Best for: Serious cooks wanting uninterrupted workflow
Advantages ✓
- Most efficient layout for small kitchens
- Excellent work triangle (everything within reach)
- Doubles storage vs. one-wall layout
- Doubles counter space vs. one-wall
- Everything accessible with minimal steps
- Works in narrow rooms (as slim as 7 feet wide)
- Easy to create zones (wet zone one side, cook zone other)
- Affordable (straightforward cabinetry)
Disadvantages ✗
- Limited space for multiple cooks
- Through-traffic disrupts cooking (through galley)
- Can feel cramped if corridor too narrow
- Difficult to add dining space
- Open cabinet doors/appliances block corridor
- May feel claustrophobic (closed galley)
- Not ideal for entertaining while cooking
Best For:
- Rectangular, narrow rooms
- Serious home cooks wanting efficiency
- Small to medium households (1-3 people)
- Apartments and condos
- Historic homes with narrow kitchen spaces
- Anyone prioritizing workflow over socializing in kitchen
Optimization Tips:
- Place sink and range on opposite walls (optimizes triangle)
- Put refrigerator at one end (minimizes door-open corridor blockage)
- Use light colors to combat narrow feeling
- Install open shelving on one wall for airiness
- Add glass cabinet doors for visual expansion
- Use reflective backsplash (mirror, glass, glossy tile)
- Maximize lighting (recessed, under-cabinet, pendant)
- Consider pocket doors or remove door entirely if closed galley
- Use full-height cabinets for maximum storage
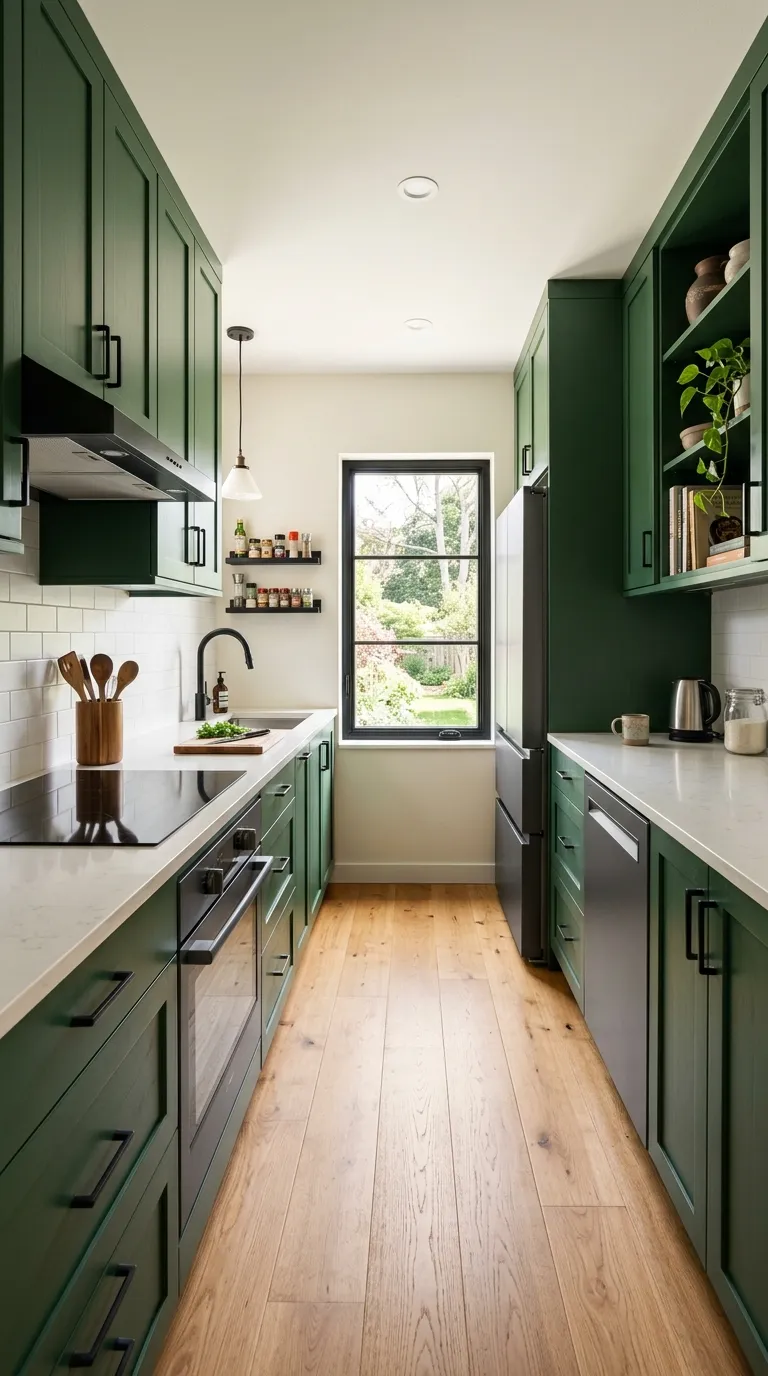
Closed galley kitchen with small breakfast nook at the end—maximizing the dead-end space
L-Shaped Kitchen Layout
The L-shaped layout is the most popular small kitchen configuration, featuring cabinets and appliances along two perpendicular walls, creating an “L” shape. This layout offers excellent balance between efficiency, storage, and flexibility.
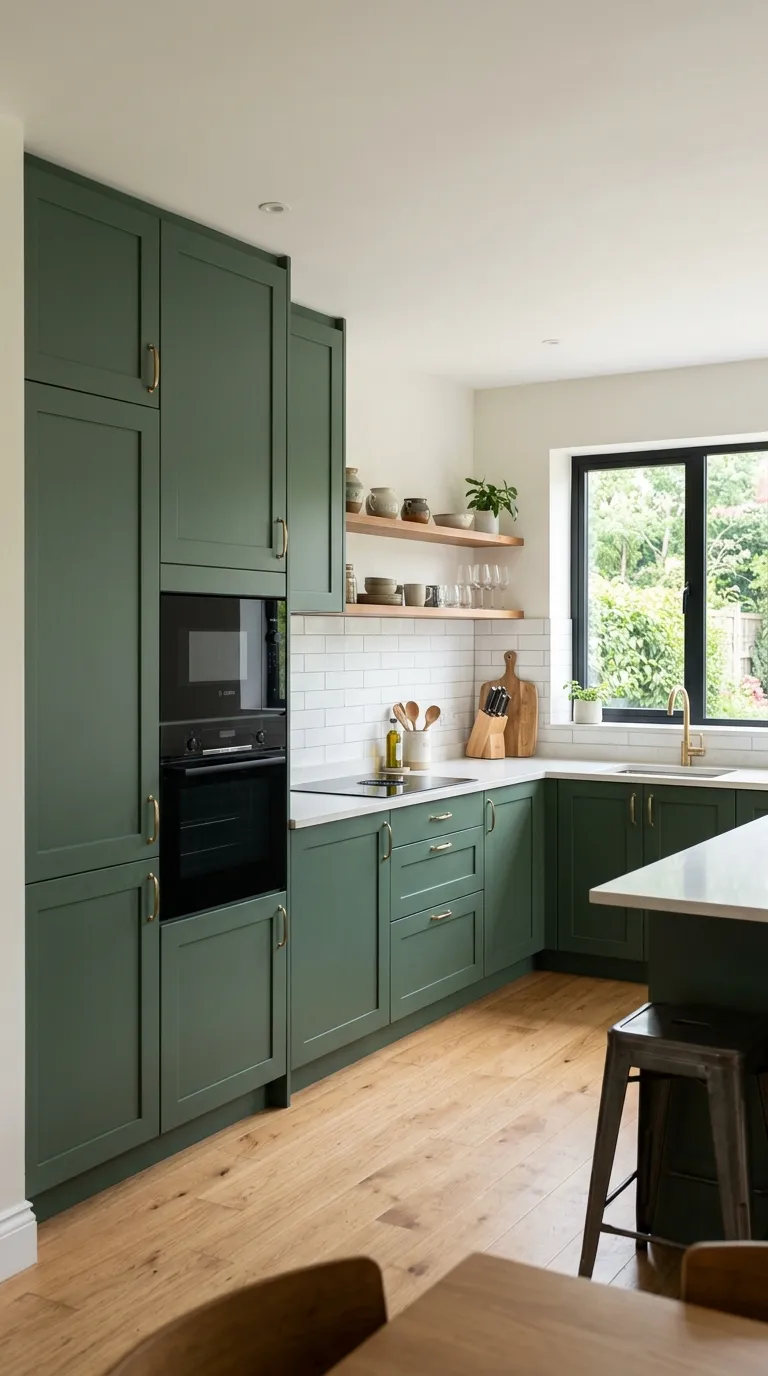
L-shaped kitchen layout utilizing two perpendicular walls with efficient corner solution
Configuration and Dimensions
Typical Arrangement:
- Wall 1 (longer): Refrigerator → Counter → Sink → Counter
- Wall 2 (shorter): Counter → Range → Counter
- Corner: Typically houses sink or features corner cabinet solution
- Each leg length: 8-15 feet
- Minimum leg lengths: 6 feet + 6 feet
- Comfortable leg lengths: 10 feet + 8 feet
L-Shaped Kitchen Space Requirements
Minimum Room Size: 10′ × 10′ (100 sq ft)
Comfortable Size: 10′ × 12′ to 12′ × 12′ (120-144 sq ft)
Clearance in Open Area: Minimum 42″ from cabinet edges
Optimal for: 100-175 square foot kitchens
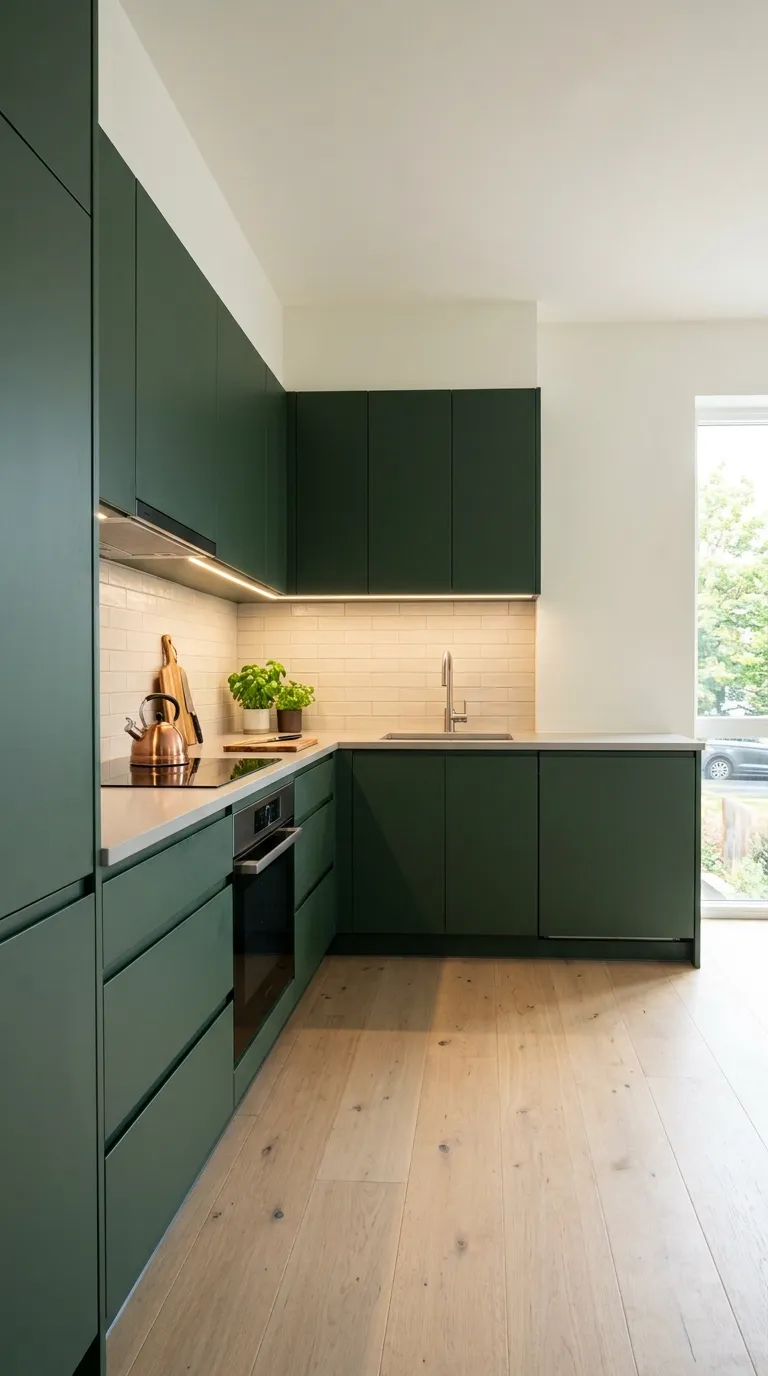
Modern L-shaped kitchen with white cabinets creating open, efficient workspace
The Corner Challenge and Solutions
The corner where the two walls meet presents both a challenge (access) and opportunity (storage). Solutions include:
Corner Cabinet Options:
- Lazy Susan: Rotating circular shelves (classic solution, good access)
- Corner Drawers: Angled drawers that open diagonally (excellent access, expensive)
- Magic Corner: Pull-out system bringing contents forward (maximizes space)
- LeMans Corner: Curved pull-out shelves (premium option, full access)
- Diagonal Cabinet: Angled front with standard shelves (affordable, wastes some space)
- Open Shelving: No doors, easy access (works for frequently used items)
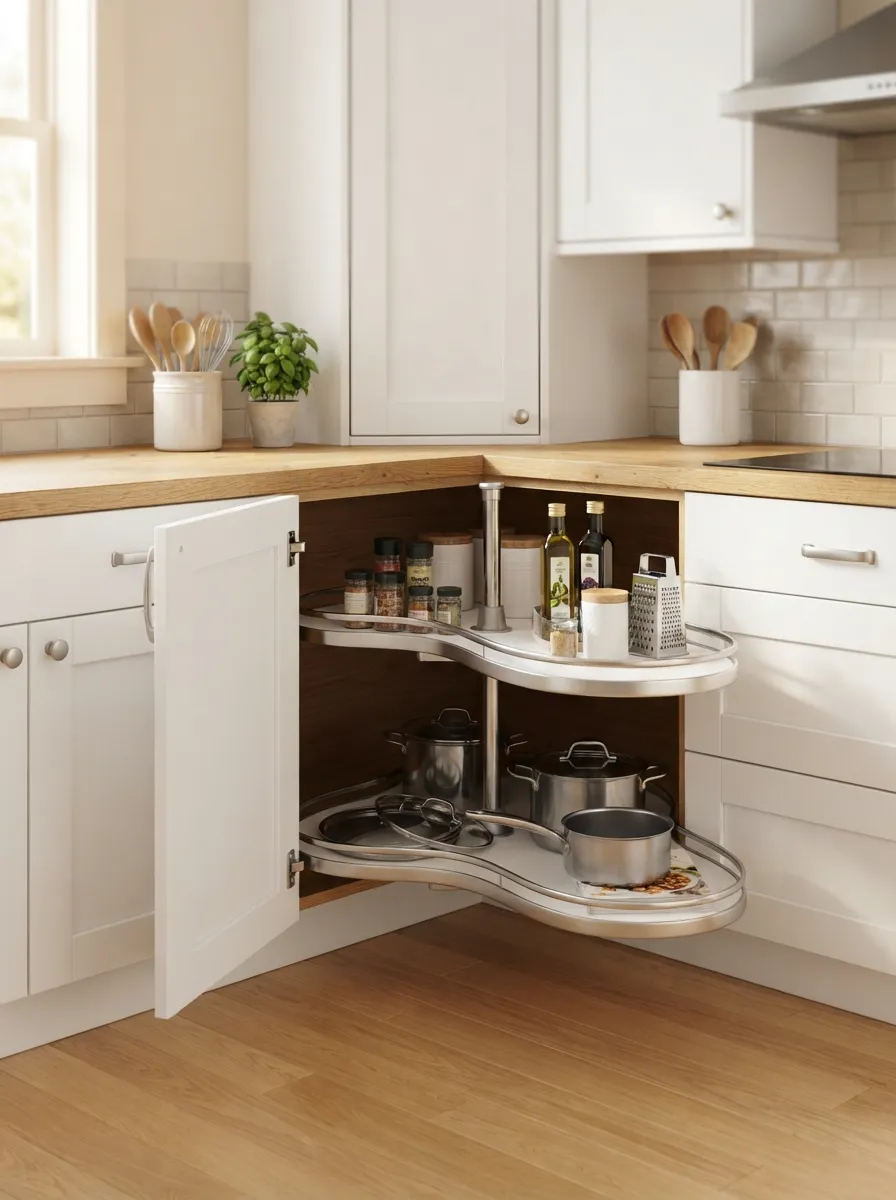
Corner cabinet solutions including lazy Susan and pull-out systems for L-shaped kitchens
Corner Sink Placement:
Placing the sink in the corner offers advantages:
- Frees up continuous counter space on both walls
- Creates natural work triangle
- Provides window view potential (if exterior corner)
- Eliminates difficult corner cabinet storage problem
- Requires special corner sink cabinet (more expensive)
Advantages ✓
- Excellent work triangle (compact, efficient)
- More counter space than galley or one-wall
- More storage than galley or one-wall
- Open design leaves space for small table/island
- Works with many room shapes
- Accommodates 2-3 people comfortably
- Flexible appliance placement
- Creates natural zones (prep wall, cooking wall)
- More social than galley (open to room)
Disadvantages ✗
- Corner storage can be difficult to access
- Requires minimum 100 sq ft room
- Corner cabinets more expensive
- May have wasted corner space (if poorly designed)
- Less counter space than U-shaped
- Through-traffic can interrupt work zone
Best For:
- Square or slightly rectangular rooms
- Open-concept living spaces
- Small to medium households (2-4 people)
- Cooks wanting balance of efficiency and openness
- Spaces where you want small dining area in kitchen
- Most versatile choice for typical small kitchens
Optimization Tips:
- Invest in quality corner cabinet solution (lazy Susan, magic corner)
- Consider corner sink if window available
- Add small peninsula to one leg for extra seating
- Use longer leg for primary prep/cleanup (sink area)
- Place range on shorter leg (typically)
- Add small rolling island in open floor space
- Extend cabinets to ceiling for maximum storage
- Use open shelving on one wall to prevent boxed-in feeling
- Ensure adequate counter space on both sides of sink (18-24″ minimum each side)
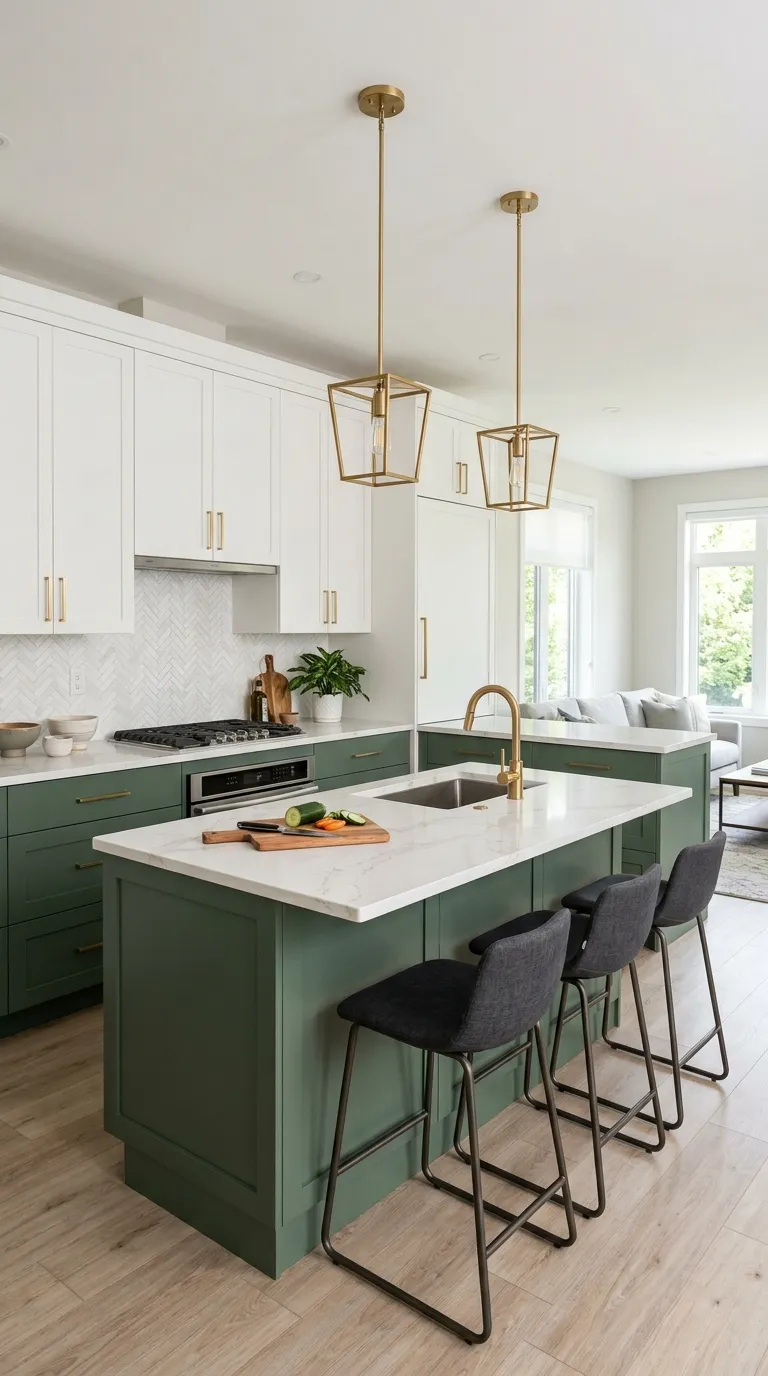
L-shaped kitchen enhanced with small peninsula providing breakfast bar seating
U-Shaped Kitchen Layout
The U-shaped layout features cabinets and appliances along three walls, creating a “U” configuration with an open entry on the fourth side. This layout offers maximum storage and counter space for small to medium kitchens.
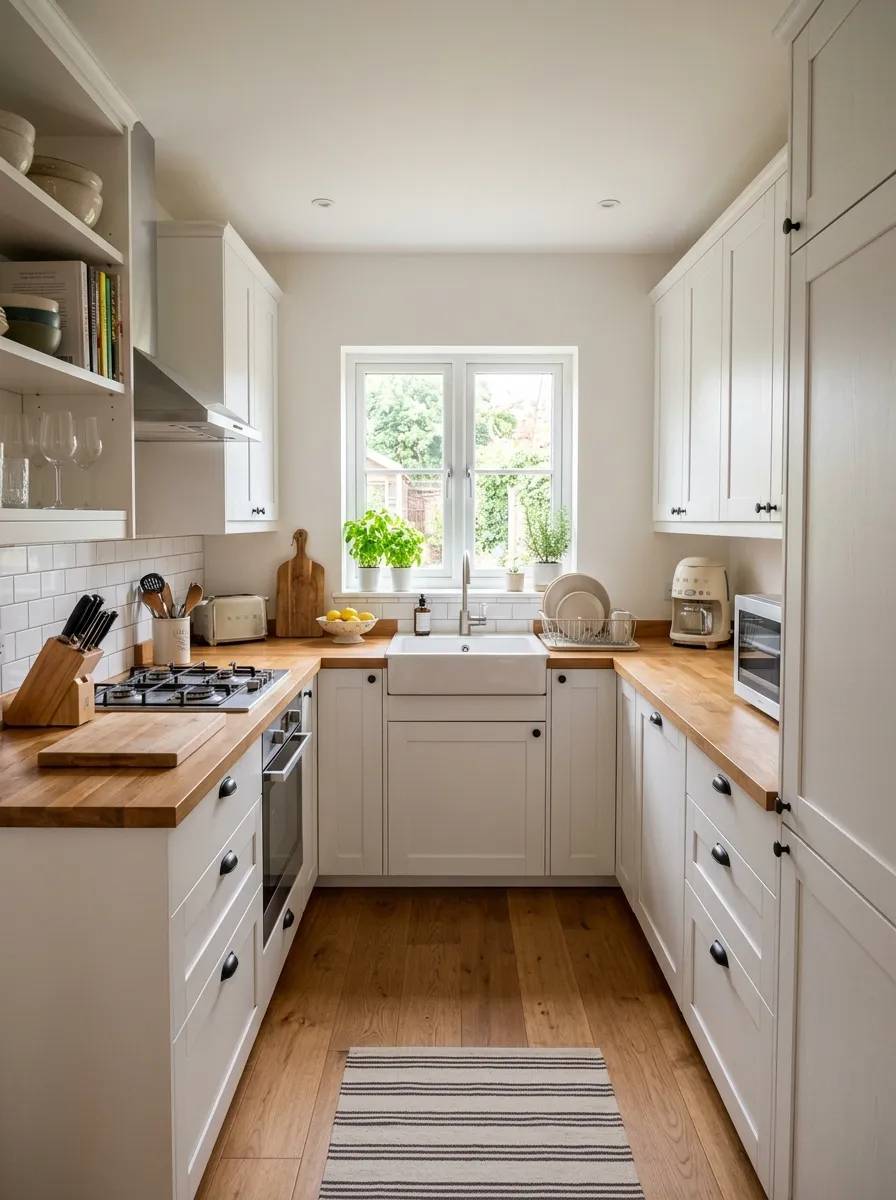
U-shaped kitchen utilizing three walls for maximum storage and counter space
Configuration and Dimensions
Typical Arrangement:
- Wall 1 (left): Refrigerator → Counter → Upper cabinets
- Wall 2 (back): Counter → Sink (typically centered) → Counter
- Wall 3 (right): Counter → Range → Counter
- Opening (fourth side): Entry from adjacent room
- Each leg length: 6-10 feet typically
- Opening width: 4-8 feet
U-Shaped Kitchen Space Requirements
Minimum Room Size: 10′ × 10′ (100 sq ft) but cramped
Comfortable Size: 10′ × 12′ or 12′ × 12′ (120-144 sq ft)
Center Aisle Width: Minimum 42″, comfortable 48-60″
Optimal for: 120-200 square foot kitchens
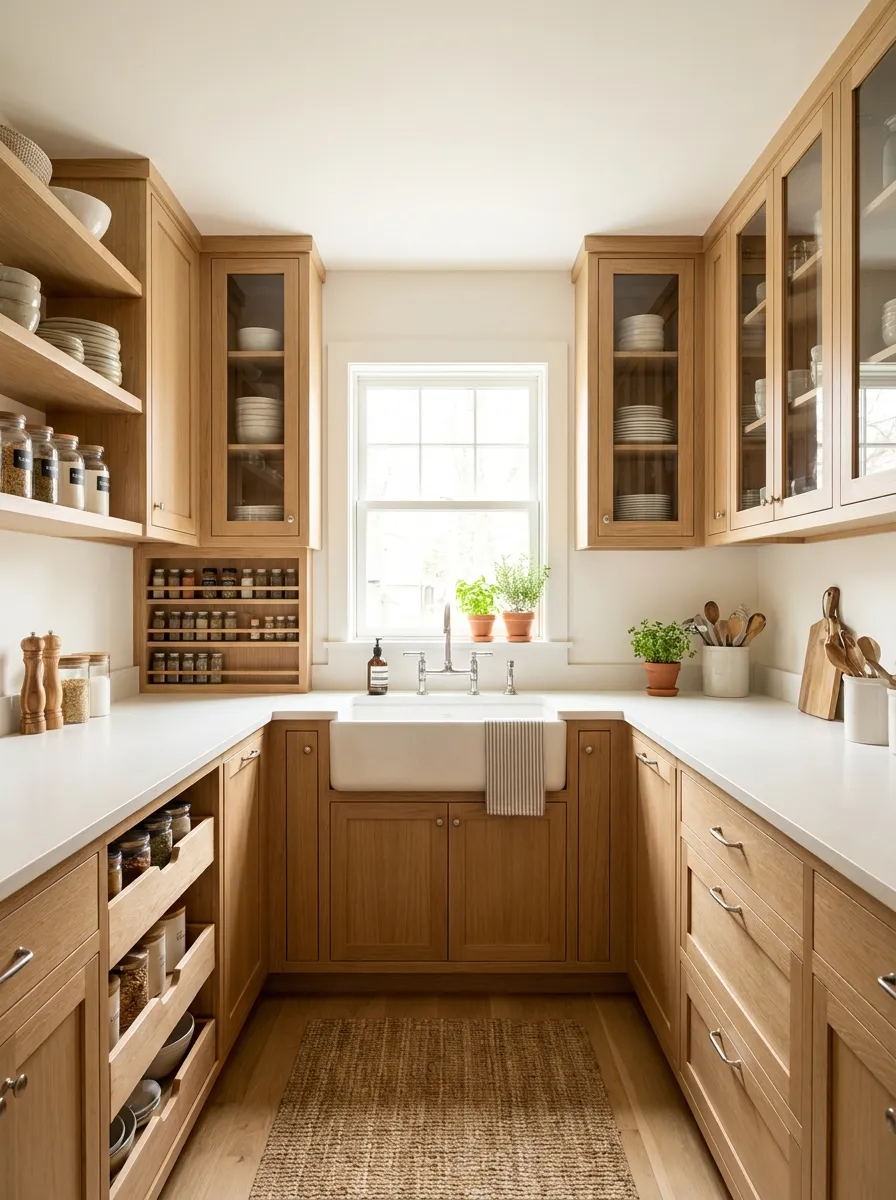
Compact U-shaped kitchen demonstrating efficient use of three walls in small space
Two Corner Challenges
U-shaped kitchens have TWO corners to solve (vs. L-shaped’s single corner):
- Solution 1: Use lazy Susans or pull-out systems in both corners
- Solution 2: Place sink in one corner, appliance garage in other
- Solution 3: Use diagonal corner cabinets on both sides
- Solution 4: Corner drawers on one side, open shelving on other
- Budget tip: Dead storage in one corner is okay for rarely-used items (turkey roaster, seasonal items)
Advantages ✓
- Maximum storage of all small kitchen layouts
- Maximum counter space
- Excellent work triangle (very compact)
- Everything within easy reach (minimal steps)
- Efficient for serious cooking
- Can accommodate 2-3 cooks comfortably
- No through-traffic interruptions
- Creates defined kitchen “room” within open plan
- Lots of options for appliance placement
Disadvantages ✗
- Requires larger minimum space (120+ sq ft comfortable)
- Two difficult corners to solve
- Most expensive layout (most cabinetry)
- Can feel enclosed/cramped if too small
- May block natural light if windows on U-walls
- Less social (cook faces walls, not room)
- No space for in-kitchen dining typically
- Narrow U can create traffic jams
Best For:
- Square rooms or slightly rectangular
- Serious home cooks needing maximum prep space
- Households wanting maximum storage
- Multiple cooks working simultaneously
- Dedicated kitchen rooms (not open-concept)
- Anyone prioritizing function over socializing
Optimization Tips:
- Maintain 48-60″ center aisle (not smaller, to avoid cramped feel)
- If room allows, consider 5-6 foot opening width (prevents tunnel effect)
- Place sink on back wall, ideally under window
- Put refrigerator on one end, range on opposite end
- Use one corner for sink (eliminates storage problem)
- Install light colors/reflective surfaces to prevent cave feeling
- Add glass-front uppers or open shelving on one wall
- Maximize lighting (this layout can feel dark)
- Consider removing upper cabinets on one side for openness
- Use shallow uppers (12″ instead of 15″) to reduce bulk
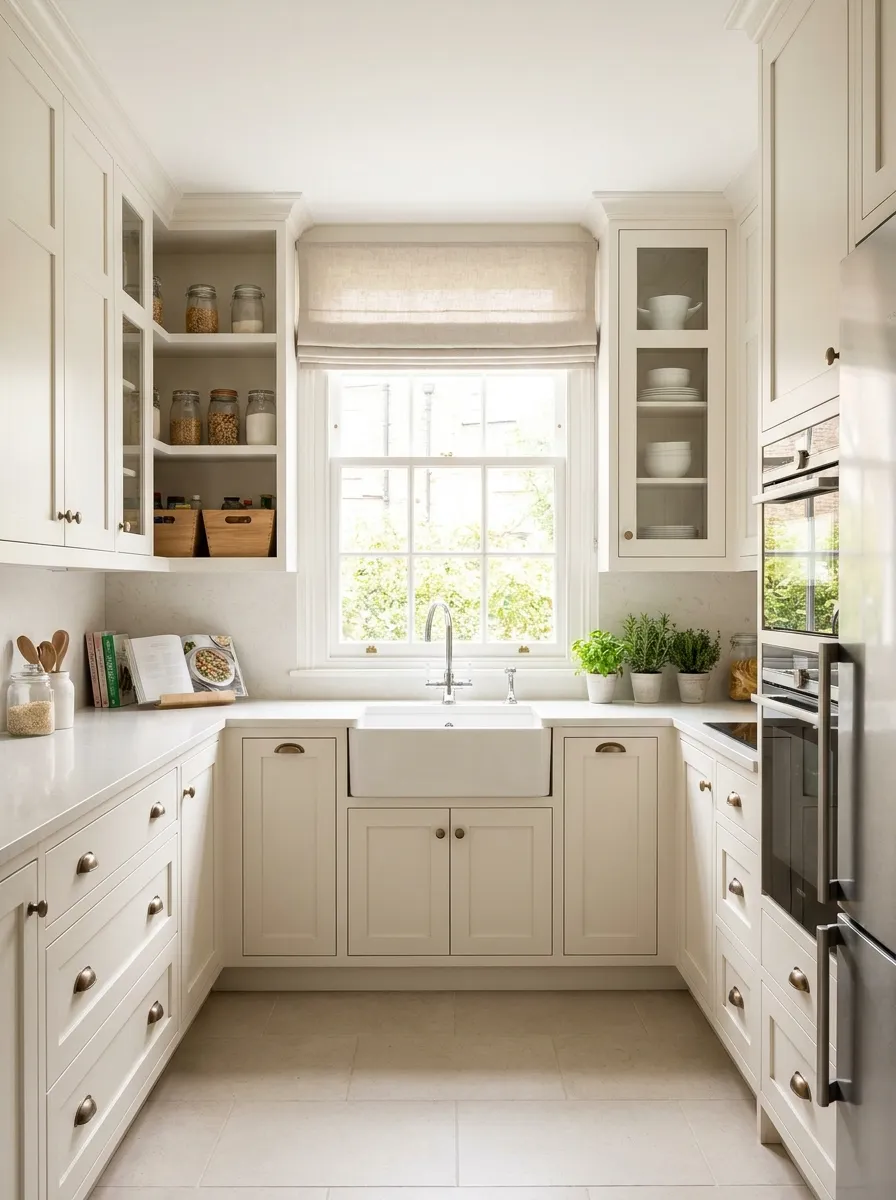
U-shaped kitchen with window over sink bringing natural light to enclosed workspace
U-Shaped vs. G-Shaped (Peninsula Addition)
Adding a partial fourth wall (peninsula) to a U-shaped kitchen creates a “G-shaped” layout:
- Adds: More counter space, seating potential, barrier to through-traffic
- Requires: Larger room (140+ sq ft), wider opening (60″ minimum)
- Best for: Open-concept spaces wanting defined kitchen zone
- Caution: Can make small kitchen feel cramped—only in rooms 12×12 or larger
Peninsula Layouts
A peninsula is a connected island—a cabinet/counter extension attached to existing cabinetry on one side, with three open sides. Peninsulas adapt various layouts to add functionality without requiring the space a freestanding island needs.
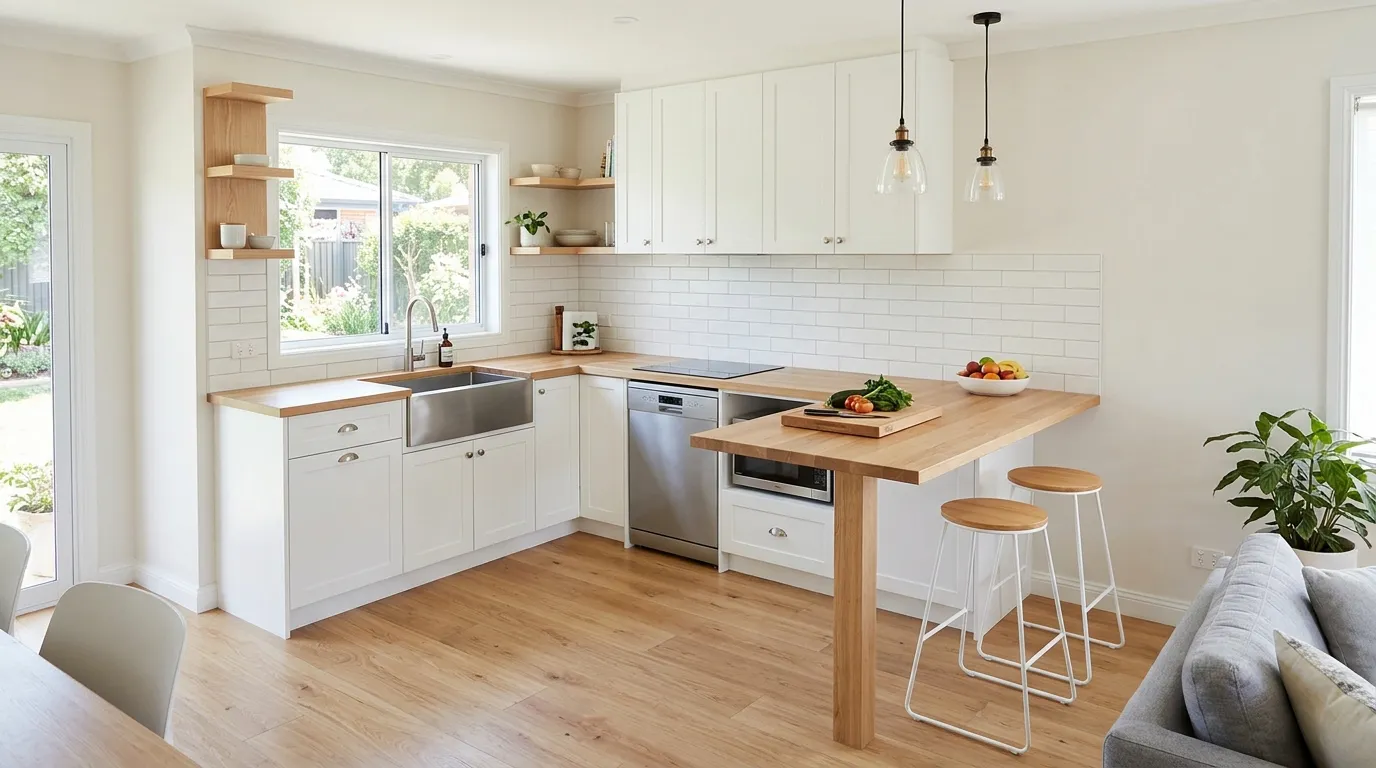
Kitchen peninsula providing breakfast bar seating and additional work surface
Peninsula Layout Variations
L-Shaped + Peninsula
Most common small kitchen peninsula application:
- Extends one leg of the L outward
- Creates natural room divider in open-concept spaces
- Adds 2-4 seats for casual dining
- Provides landing space opposite main work zone
- Space needed: 110+ sq ft comfortably
One-Wall + Peninsula
Transforms single-wall into modified L-shape:
- Peninsula extends perpendicular from one end
- Creates work triangle where none existed
- Adds significant counter and storage
- Defines kitchen boundary in studio/loft
- Space needed: 100+ sq ft
Galley + Peninsula
Closes one end of galley with peninsula:
- Eliminates through-traffic problem
- Adds seating without separate dining space
- Creates breakfast bar facing living area
- Can house cooktop or sink (though adds cost)
- Space needed: 90+ sq ft
U-Shaped + Peninsula (G-Shaped)
Already covered above—adds partial fourth wall to U-shape.
Peninsula Dimensions
Peninsula Length: 3-6 feet typical
Peninsula Depth: 24″ (standard base cabinet)
Overhang for Seating: 12-15″ beyond base cabinets
Total Depth with Seating: 36-39″
Clearance Behind Stools: 36″ minimum walkway
Counter Height: 36″ standard or 42″ bar height
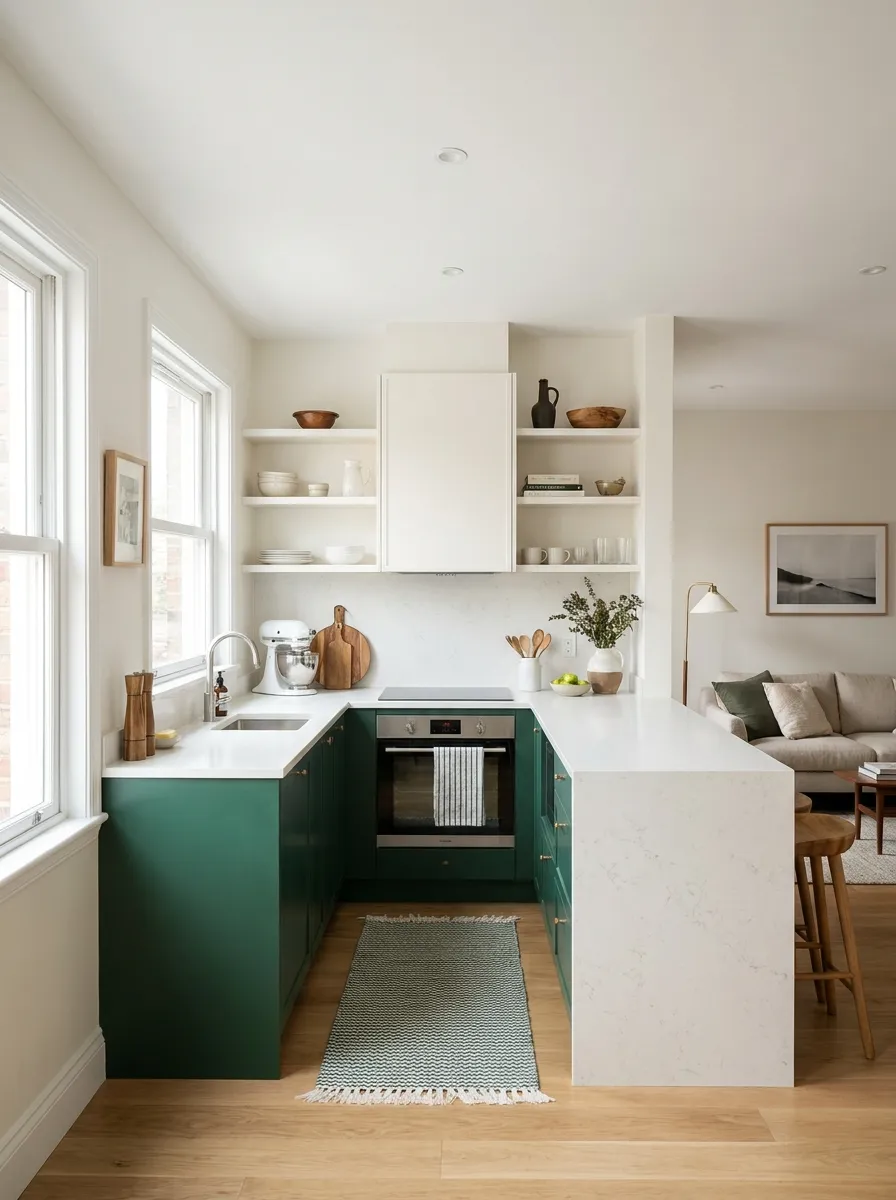
Small kitchen peninsula with storage cabinets on kitchen side, seating on opposite
Peninsula Features and Functions
Peninsulas can incorporate various functional elements:
- Seating: Breakfast bar for 2-4 people (most common use)
- Storage: Base cabinets on kitchen side, open to seating side
- Cooktop: Can house range or cooktop (requires ventilation)
- Sink: Prep or main sink (requires plumbing, more complex)
- Dishwasher: Can integrate into peninsula base
- Appliance garage: Hides small appliances on kitchen side
- Wine fridge: Accessible from seating side
- Shelving: Open shelving on seating side for cookbooks, display
Peninsula Advantages ✓
- Adds seating without separate dining table
- Requires less space than island
- Provides room definition in open-concept
- No additional electrical/plumbing needed (unless adding sink/cooktop)
- Creates traffic barrier (prevents kitchen walk-throughs)
- Less expensive than island
- Easier to install (connected to existing cabinets)
- Adds counter space for serving/entertaining
Peninsula Disadvantages ✗
- Less flexible than island (can’t access all sides)
- May interrupt traffic flow (creates one entry point)
- Requires adequate space behind seating (36″ minimum)
- Can make small kitchen feel closed off
- Seating faces kitchen work (not ideal for guests watching mess)
- Difficult to relocate once installed
Peninsula or Island? Decision Guide
| Factor | Choose Peninsula | Choose Island |
|---|---|---|
| Room Size | 100-150 sq ft | 150+ sq ft |
| Budget | Lower cost | Higher cost |
| Traffic Flow | Want to control/limit flow | Need multiple paths through kitchen |
| Seating Priority | Casual breakfast bar sufficient | Want seating on multiple sides |
| Flexibility | Permanent solution okay | May want to reconfigure later |
| Open Concept | Want defined kitchen boundary | Want fluid, open feeling |
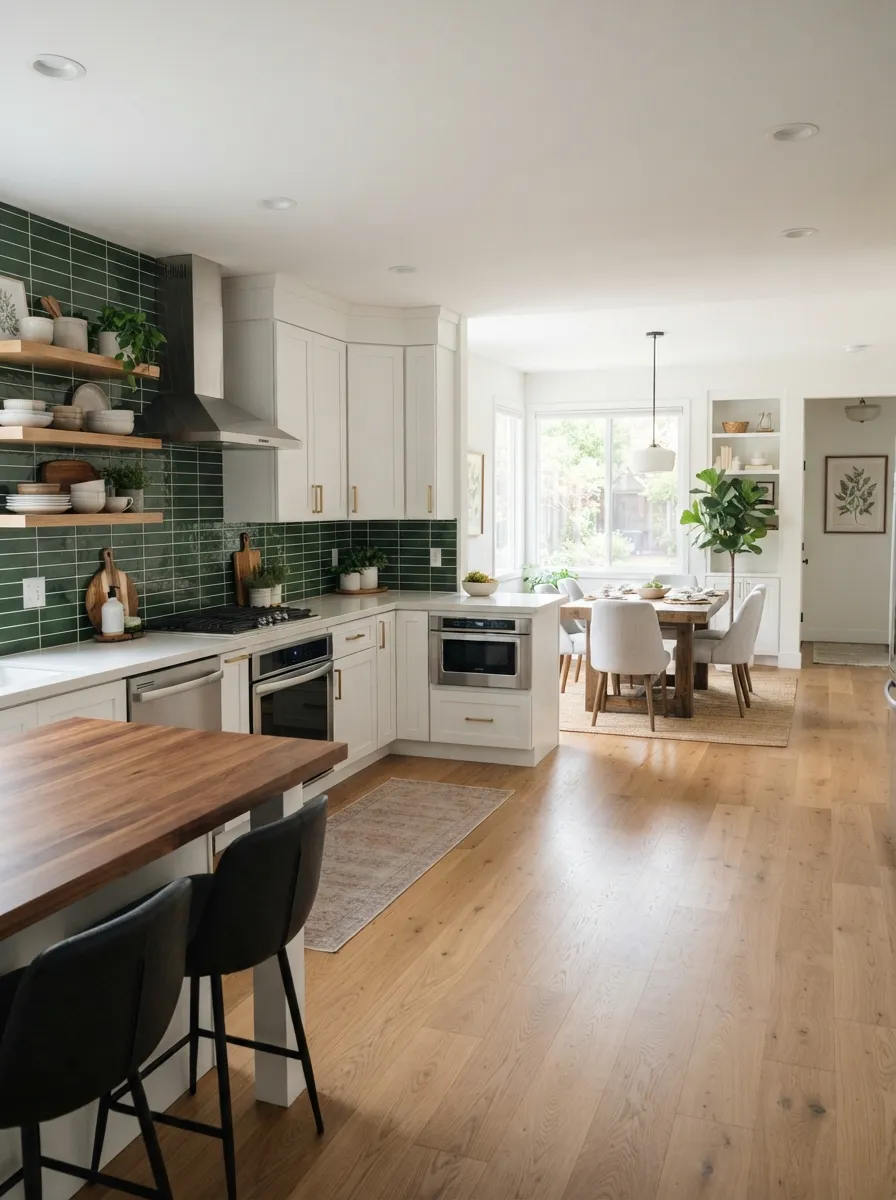
L-shaped kitchen with peninsula extension creating room divider in open-concept space
Island Options for Small Kitchens
Islands in small kitchens are controversial—they can add valuable functionality or create cramped disaster zones. Success depends entirely on having adequate space and choosing appropriate island size and type.
Space Requirements for Kitchen Islands
Minimum Island Clearances (CRITICAL)
Absolute Minimum Clearance: 36″ all around island
Comfortable Clearance: 42-48″ all around
Minimum Room Size for Island: 12′ × 12′ (144 sq ft)
Comfortable Room Size: 13′ × 13′ or larger (169+ sq ft)
Minimum Island Size: 24″ × 36″ (too small to be useful)
Functional Island Size: 24″ × 48″ or larger
Comfortable Island Size: 30″ × 60″ to 40″ × 72″
Small Kitchen Island Types
1. Mobile/Rolling Island Cart
Best solution for most small kitchens:
- Size: 24-30″ wide, 36-48″ long, 36″ tall typically
- Advantages: Moveable, affordable ($150-800), can remove if too cramped
- Features: Butcher block top, shelves/drawers, towel bar, wine rack
- Best for: Kitchens 100-140 sq ft wanting flexibility
- Tip: Choose locking wheels for stability during use
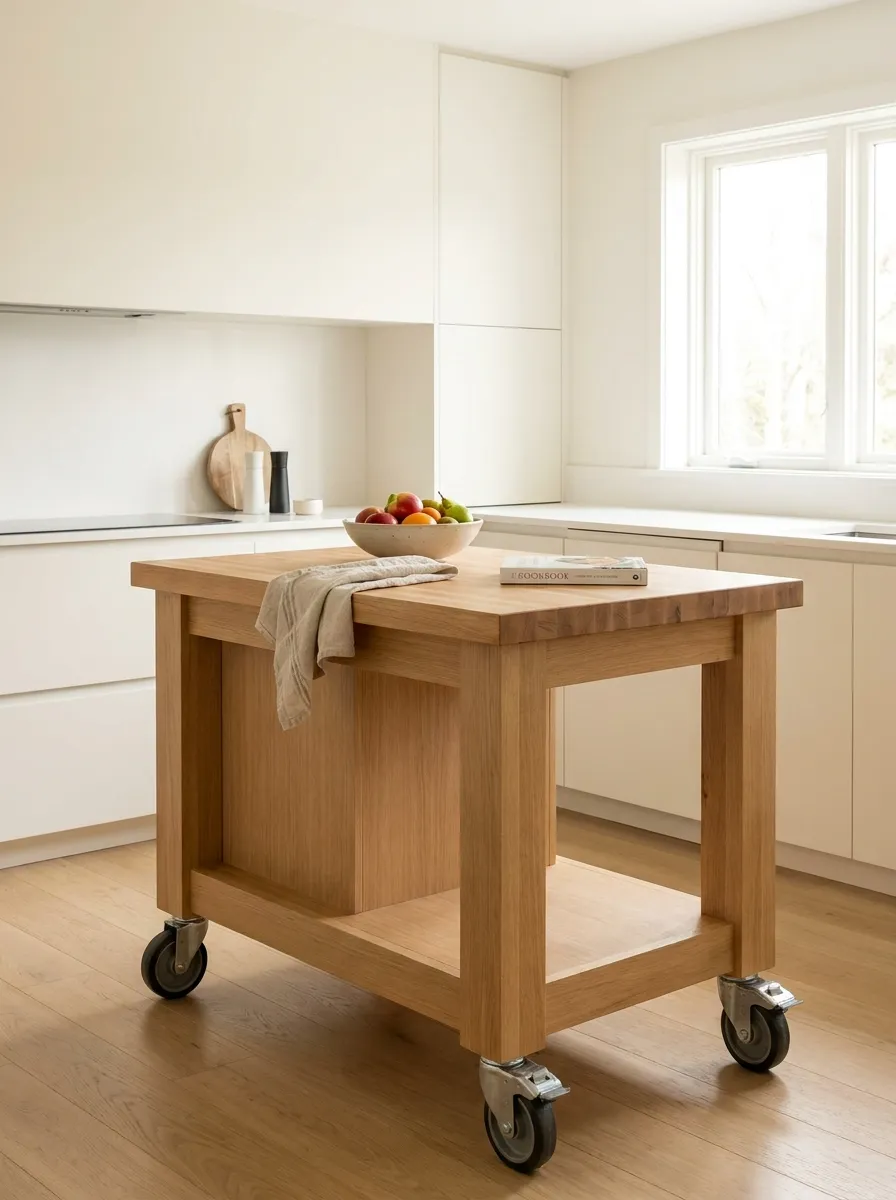
Mobile kitchen island cart with butcher block top and rolling wheels for flexibility
2. Narrow Permanent Island
Custom or semi-custom solution for tight spaces:
- Size: 18-24″ wide, 48-72″ long
- Advantages: Fits in narrow spaces, provides seating on long side
- Features: Thin profile, storage on one or both ends, electrical outlets
- Best for: L-shaped kitchens with 140-160 sq ft
- Caution: Ensure 42″ clearance minimum on all sides
3. Table-Style Island
Furniture-style piece that functions as island:
- Size: Dining table dimensions (30″ × 48″ to 36″ × 60″)
- Advantages: Doubles as dining table, less bulky than cabinetry
- Features: Open underneath (less storage but lighter feel), seating all around
- Best for: Kitchens without separate dining space
- Style: Farmhouse, industrial, or modern aesthetics
4. Mini Island with Seating
Compact purpose-built island:
- Size: 36-40″ × 48-60″
- Advantages: Provides 2-3 seats, modest storage, prep surface
- Features: Base cabinets on kitchen side, overhang for seating on one side
- Best for: 150-170 sq ft kitchens with decent workflow already
- Requires: Minimum 48″ clearance on all sides
Island Functions in Small Kitchens
Prioritize 1-2 functions for small kitchen islands (don’t try to do everything):
- Prep Space: Additional work surface (most common)
- Seating: 2-4 stools for casual dining
- Storage: Cabinets, drawers, open shelving
- Sink: Prep or main sink (requires plumbing, significant cost)
- Cooktop: Range or cooktop (requires ventilation, electrical/gas)
- Dishwasher: Can integrate if island includes sink
- Trash/Recycling: Pull-out bins
- Appliance Storage: Stand mixer lift, small appliance garage
- Wine Storage: Wine fridge or wine rack
- Bookshelves: Cookbook storage, decorative display
Island Alternatives for Small Kitchens
If island won’t work, consider these alternatives:
- Mobile cart: Already mentioned—best flexible solution
- Peninsula: Provides similar benefits with less space requirement
- Wall-mounted drop-leaf table: Folds down when not needed
- Pull-out counter extension: Slides out from existing cabinets
- Counter-height table against wall: Can push against wall when not dining
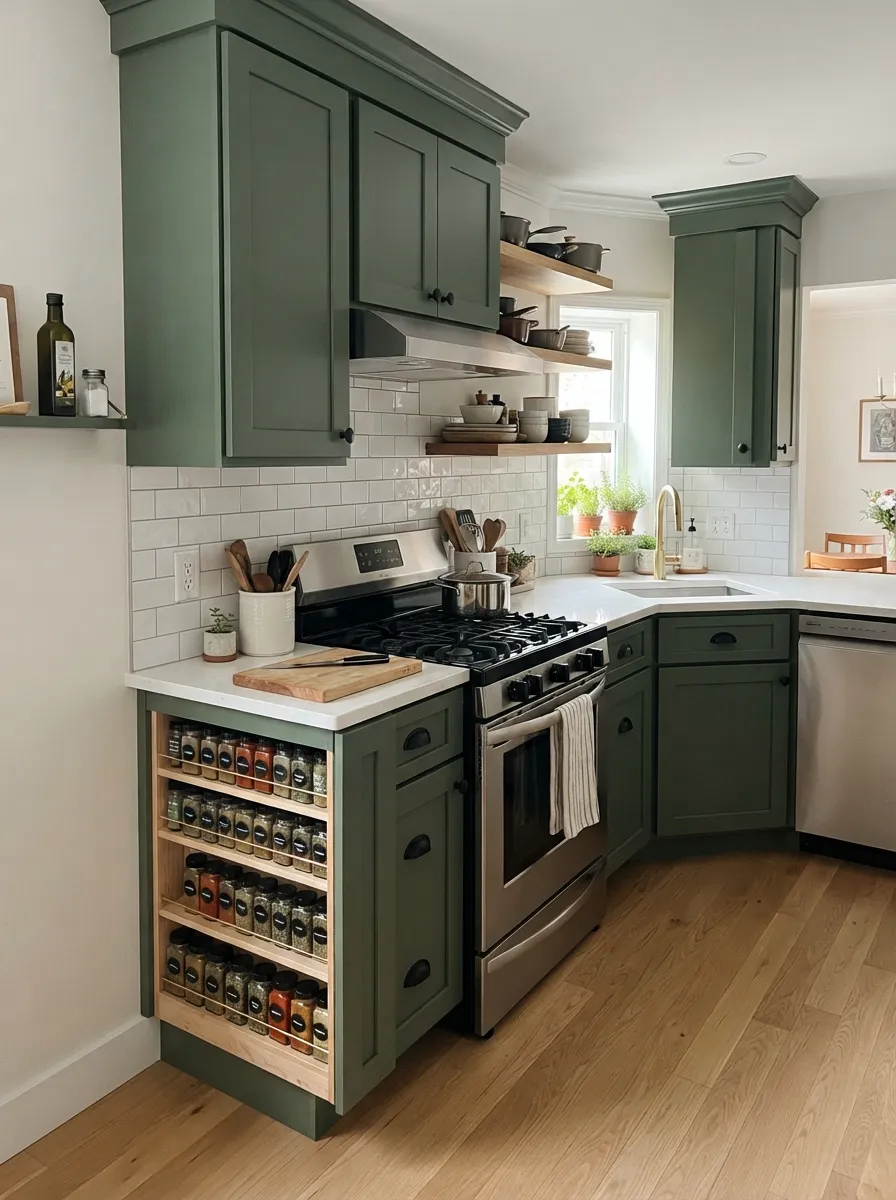
Efficient small kitchen without island—galley layout maximizes space better than forced island
Space Requirements Guide: Quick Reference
Understanding minimum and comfortable space requirements for each layout helps you make realistic decisions for your specific kitchen dimensions.
Comprehensive Layout Space Requirements
| Layout Type | Minimum Size | Comfortable Size | Optimal Size |
|---|---|---|---|
| One-Wall | 7′ × 8′ (56 sq ft) | 7′ × 10′ (70 sq ft) | 8′ × 12′ (96 sq ft) |
| Galley | 7′ × 8′ (56 sq ft) | 7.5′ × 12′ (90 sq ft) | 8′ × 13′ (104 sq ft) |
| L-Shaped | 10′ × 10′ (100 sq ft) | 10′ × 12′ (120 sq ft) | 12′ × 12′ (144 sq ft) |
| U-Shaped | 10′ × 10′ (100 sq ft)* | 10′ × 12′ (120 sq ft) | 12′ × 12′ (144 sq ft) |
| L-Shape + Peninsula | 10′ × 11′ (110 sq ft) | 11′ × 12′ (132 sq ft) | 12′ × 14′ (168 sq ft) |
| Galley + Peninsula | 9′ × 10′ (90 sq ft) | 10′ × 11′ (110 sq ft) | 10′ × 13′ (130 sq ft) |
| Any Layout + Island | 12′ × 12′ (144 sq ft) | 13′ × 13′ (169 sq ft) | 14′ × 14′ (196 sq ft) |
*U-shaped at 10×10 will feel cramped; 120+ sq ft strongly recommended
Critical Clearance Dimensions
| Clearance Type | Absolute Minimum | Comfortable | Ideal |
|---|---|---|---|
| Aisle Width (between cabinets) | 36″ | 42″ | 48″ |
| Galley Corridor | 36″ | 42-48″ | 48″ |
| Around Island (all sides) | 36″ | 42″ | 48″ |
| Around Peninsula (sides/back) | 36″ | 42″ | 48″ |
| In Front of Refrigerator | 36″ | 42″ | 48″ |
| In Front of Dishwasher | 36″ | 42″ | 48″ |
| In Front of Range | 36″ | 42-48″ | 48-60″ |
| Behind Seated Diners | 32″ | 36″ | 42-48″ |
Counter Space Recommendations
| Location | Minimum | Recommended |
|---|---|---|
| Each Side of Sink | 18″ | 24″ |
| One Side of Range | 12″ | 15-18″ |
| Other Side of Range | 15″ | 18-24″ |
| Next to Refrigerator (landing) | 15″ | 18-24″ |
| Prep Zone (total continuous) | 36″ | 42-48″ |
| Total Counter Space (entire kitchen) | 11 linear feet | 13-16 linear feet |
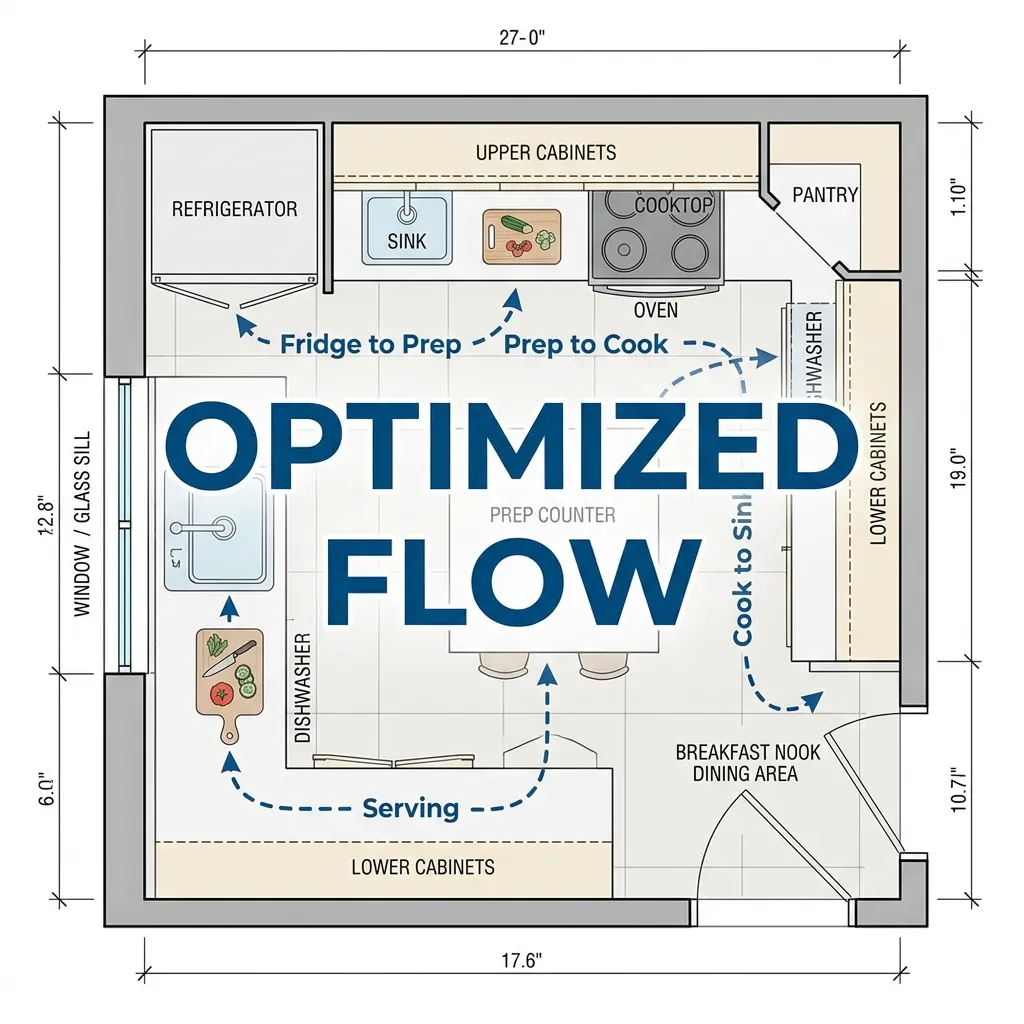
Kitchen clearance measurement diagram showing optimal aisle widths and spacing
How to Choose Your Layout: Decision Framework
Selecting the right layout involves analyzing your space, needs, budget, and priorities. Use this framework to make informed decisions.
Step 1: Assess Your Space Constraints
Measure Everything:
- Overall room dimensions (length × width)
- Door locations and swing directions (doors need 36″ clearance)
- Window locations and sizes (affect cabinet placement)
- Existing plumbing locations (moving is expensive)
- Electrical outlets and light fixtures
- HVAC vents, radiators, or other obstacles
- Ceiling height and any soffits
- Structural columns or walls (load-bearing can’t move)
Identify Fixed Elements:
- Cannot move: Load-bearing walls, main plumbing stack, windows
- Expensive to move: Plumbing (sink location), gas lines
- Moderate cost to move: Electrical, non-load-bearing walls
- Easy to adjust: Cabinet placement, appliance locations (within reason)
Step 2: Analyze Room Shape
| Room Shape | Best Layout Options | Avoid |
|---|---|---|
| Long Rectangle (2:1+ ratio) | Galley, One-Wall | U-shaped (wastes space) |
| Square or Nearly Square | L-shaped, U-shaped | Galley (wastes space) |
| Moderate Rectangle (1.5:1 ratio) | L-shaped, Galley | — |
| Irregular/Oddly Shaped | Custom L-shape adapting to walls | Rigid symmetrical layouts |
| Very Small (under 70 sq ft) | One-Wall, Galley | L-shaped, U-shaped, Islands |
| Open Concept (no walls) | L-shape + Peninsula, Island layouts | Galley (needs walls) |
Step 3: Define Your Priorities
Rank these factors (1-5, with 5 being most important):
- Maximum storage: If 4-5 → U-shaped or L-shaped
- Efficient workflow: If 4-5 → Galley or U-shaped
- Seating/dining in kitchen: If 4-5 → L-shape + Peninsula or Island
- Multiple cooks: If 4-5 → U-shaped or spacious L-shaped
- Open, social space: If 4-5 → L-shaped or Peninsula layouts
- Budget constraints: If 4-5 → One-wall or Galley (least cabinetry)
- Easy access/mobility: If 4-5 → Galley or L-shaped (avoid U-shaped)
Step 4: Match Your Cooking Style
| Cooking Style | Best Layout | Key Features Needed |
|---|---|---|
| Minimal (takeout, simple meals) | One-Wall | Basic appliances, minimal counter |
| Light cooking (weeknight dinners) | Galley or Small L-shaped | Moderate counter, efficient triangle |
| Regular home cooking | L-shaped | Good counter space, storage, triangle |
| Serious/Gourmet cooking | U-shaped or Large Galley | Maximum counter, zones, storage |
| Baking focus | L-shaped or U-shaped | Continuous counter run 48″+, storage |
| Entertaining while cooking | L-shaped + Peninsula or Island | Open sightlines, seating, serving area |
Step 5: Consider Household Size
- 1 person: One-wall or Galley works perfectly
- 2 people: Galley or L-shaped ideal
- 3-4 people: L-shaped or U-shaped recommended
- 5+ people: U-shaped or large L-shaped with Peninsula
- Multiple cooks regularly: U-shaped or spacious L-shaped (need 48″ aisles)
Step 6: Budget Reality Check
Approximate Cost by Layout (cabinets + installation only):
- One-Wall: $3,000-8,000 (least expensive, 8-12 linear feet of cabinets)
- Galley: $6,000-15,000 (15-20 linear feet)
- L-Shaped: $8,000-18,000 (18-25 linear feet, includes corner solution)
- U-Shaped: $12,000-25,000 (25-30 linear feet, two corner solutions)
- Peninsula addition: Add $1,500-4,000
- Island: Add $2,000-8,000 (depending on size, features)
Note: Costs assume mid-range semi-custom cabinets. Stock cabinets 30-40% less, custom 50-100% more. Does not include appliances, countertops, flooring, electrical, plumbing.
Decision Tree Summary
Quick Layout Selection Guide:
Choose ONE-WALL if: Space under 70 sq ft, budget under $5k, minimal cooking, want simplicity
Choose GALLEY if: Narrow room, serious cooking, efficiency priority, 2-3 people, budget moderate
Choose L-SHAPED if: Versatility needed, 100-150 sq ft available, want balance, most common choice
Choose U-SHAPED if: Maximum storage needed, 120+ sq ft, multiple cooks, serious cooking, budget allows
Add PENINSULA if: Want seating, have 110+ sq ft, open-concept space, need room divider
Add ISLAND if: Have 150+ sq ft, want seating on multiple sides, can maintain 42″ clearance all around
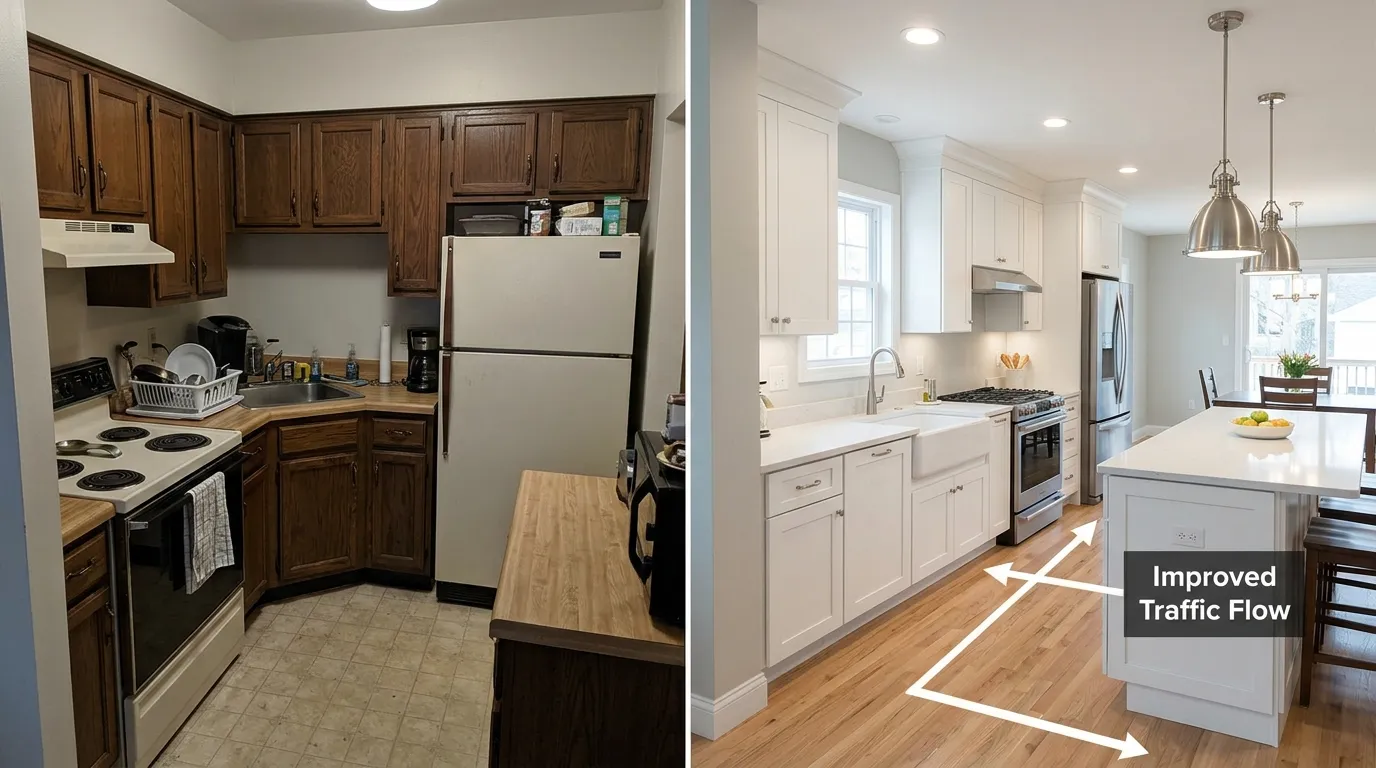
Careful measurement and planning are essential for choosing the right kitchen layout
Traffic Flow Optimization
Even the perfect layout fails if traffic flow is poor. Understanding and planning for movement patterns ensures your small kitchen functions smoothly.
Kitchen Traffic Zones
Kitchens have two types of traffic:
1. Work Traffic (Cook’s Movement)
- Movement within work triangle (fridge → sink → stove)
- Accessing storage, pantry, appliances
- Moving around during meal prep and cooking
- Priority: This traffic must be efficient and unobstructed
2. Through Traffic (Household Movement)
- People passing through kitchen to reach other rooms
- Family members getting drinks, snacks (not actively cooking)
- Entry/exit to dining room, backyard, garage, etc.
- Goal: Minimize or separate from work triangle when possible
Traffic Flow Rules for Small Kitchens
- Never route through-traffic through work triangle: Work triangle should be off to side of main traffic paths
- Avoid doorways in corners: Doors need 36″ swing clearance, eating into functional space
- Place refrigerator near kitchen entry: Most-accessed appliance, family shouldn’t walk through work zone
- Keep main aisle clear: Nothing should block the primary walkway (table, island, carts)
- Create single-direction flow in galleys: Through-galleys work best with traffic entering one end, exiting other
- Use peninsulas to control traffic: Strategically placed peninsula can redirect traffic around work zone
Layout-Specific Traffic Solutions
One-Wall Layout:
- Challenge: All traffic crosses work zone
- Solution: Place refrigerator at end nearest entry; use mobile cart for barrier when cooking
Galley Layout:
- Through-Galley Challenge: Traffic cuts through work corridor
- Solution: Place sink and range on same wall (puts active cooking on one side); install pocket door to close kitchen when cooking
- Closed-Galley Advantage: No through-traffic issue
L-Shaped Layout:
- Challenge: Traffic may cut corner through work zone
- Solution: Orient “L” so work triangle is in corner away from entry; place refrigerator on leg nearest entry
U-Shaped Layout:
- Advantage: Naturally controls traffic (single entry point)
- Challenge: Can feel bottlenecked if entry too narrow
- Solution: Ensure 4-6 foot entry opening; place refrigerator near opening
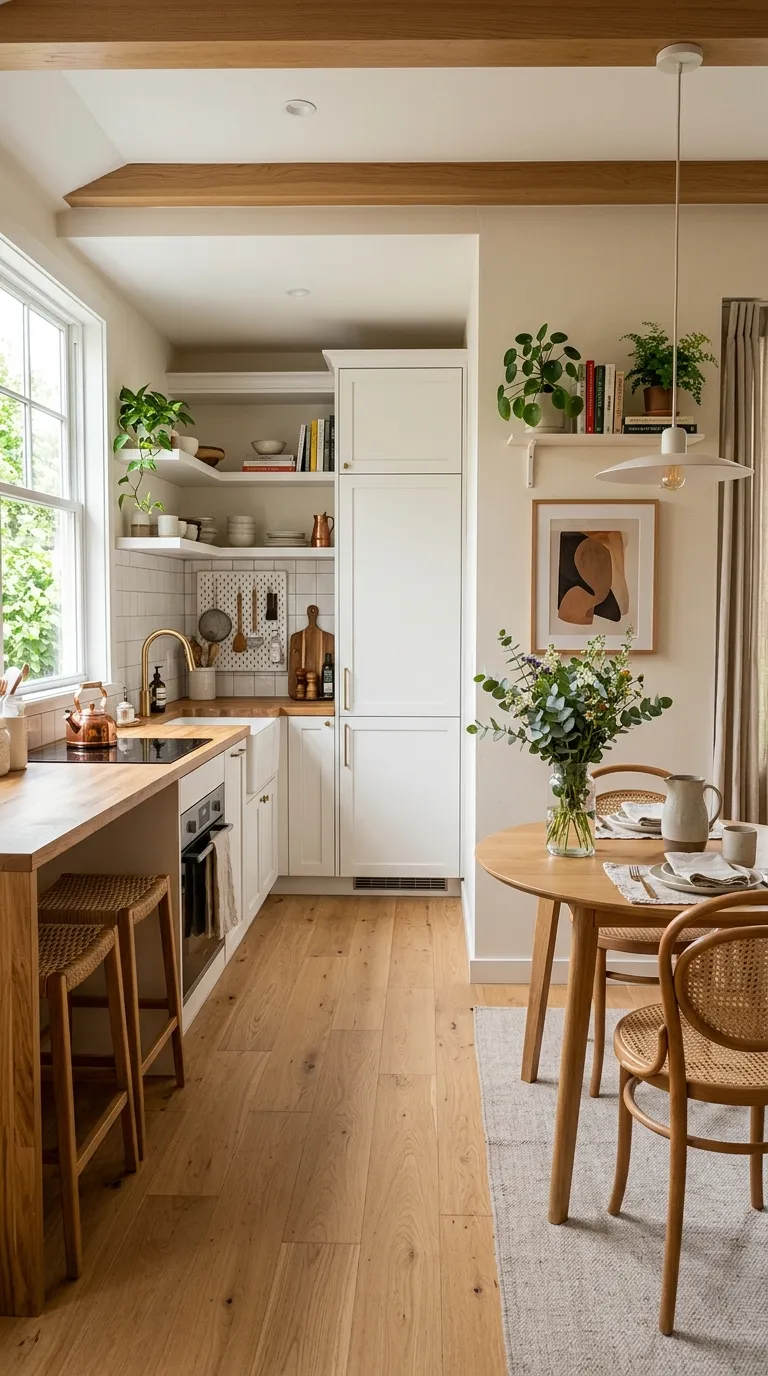
Kitchen traffic flow diagram showing work triangle and household traffic pathways
Common Traffic Flow Mistakes
Avoid These Layout Pitfalls ✗
- Refrigerator at far end from entry (everyone walks through kitchen)
- Island blocking direct path through kitchen (creates awkward navigation)
- Dishwasher on opposite wall from sink (inefficient dish workflow)
- Range directly opposite refrigerator in galley (constant crossing)
- Sink under window in traffic path (people behind you while washing dishes)
- Trash can in far corner (long trips while cooking create crossing patterns)
- Doorway opening into work triangle area (door swing interferes)
Multi-Cook Traffic Management
If multiple people cook simultaneously, plan for two work zones:
- Primary zone: Sink + Range (main cook)
- Secondary zone: Prep counter + secondary sink or extra counter near refrigerator
- Layout best for multi-cook: U-shaped or spacious L-shaped
- Minimum aisle: 48 inches (allows passing)
- Assign zones: One person on range wall, other on prep wall
Frequently Asked Questions
The galley layout is generally most efficient for small kitchens. It provides maximum storage and counter space in minimal square footage, creates the shortest work triangle (everything within easy reach), and eliminates wasted corner space. Galley kitchens work well in spaces as small as 7×8 feet and are ideal for serious cooks who prioritize workflow over socializing. However, the “best” layout depends on your specific room shape—long narrow rooms suit galleys, while square rooms work better with L-shaped layouts.
Islands require significant space to function properly—minimum 12×12 feet (144 sq ft) with 36-42 inches clearance on all sides. Most small kitchens under 140 sq ft should NOT have permanent islands as they create cramped, dysfunctional spaces. Better alternatives: mobile/rolling kitchen carts (movable, affordable, removable), peninsulas (attached to existing cabinets, require less space), or fold-down/pull-out counter extensions. If you have 150+ sq ft and can maintain 42-48 inch aisles around island, a narrow island (24-30″ deep, 48-60″ long) can work.
The work triangle connects your three primary work zones: sink (prep/cleanup), range (cooking), and refrigerator (storage). The total distance around the triangle should be 12-26 feet (sum of all three sides), with no single leg shorter than 4 feet or longer than 9 feet. This principle minimizes steps during meal preparation, reduces carrying hot pots long distances, and creates natural workflow. In small kitchens, the challenge isn’t making the triangle small enough (it naturally stays compact), but ensuring adequate counter space between points and preventing traffic from cutting through the triangle.
Minimum clearances: 36 inches absolute minimum between cabinets/appliances (tight but functional), 42-48 inches comfortable (recommended for most kitchens), 48 inches ideal if space allows (especially for multiple cooks). Specific situations: Galley kitchens need 42-48″ corridor width, around islands require 42-48″ on all sides, in front of dishwasher/refrigerator need 42″ minimum (when doors open), and behind seated diners require 36″ minimum walkway. Never go below 36 inches—appliance doors and cabinet drawers when open make the space functionally even narrower.
U-shaped layouts provide maximum storage because you have cabinetry on three walls (vs. one wall for one-wall layout, two walls for galley/L-shaped). U-shaped offers approximately: 25-30 linear feet of cabinets (vs. 8-12 feet one-wall, 15-20 feet galley, 18-25 feet L-shaped). However, U-shaped requires larger room (120+ sq ft comfortable) and costs more (two corner cabinets needed). For very small spaces under 100 sq ft, galley layout provides best storage-to-space ratio. Storage can also be maximized regardless of layout by using floor-to-ceiling cabinets, pull-out pantry organizers, corner solutions (lazy Susan, magic corner), and vertical wall storage.
Depends on your room shape and priorities. Choose galley if: room is long/narrow (rectangular), you prioritize efficiency and workflow, space is 60-120 sq ft, budget is moderate, and you cook seriously but alone/with one other person. Choose L-shaped if: room is square or moderate rectangle, you want versatility and openness, space is 100-175 sq ft, you want seating potential (can add peninsula), and you entertain while cooking. Galley is more efficient for cooking workflow but less social. L-shaped is more versatile and accommodates casual dining but uses space less efficiently in narrow rooms.
Peninsulas are almost always better for small kitchens. Peninsula advantages: requires less space (works in 110+ sq ft vs 144+ sq ft for island), costs less (attached to existing cabinets), doesn’t require clearance on all sides (only three sides), provides same seating/function as island, and helps define kitchen boundary in open-concept. Choose island only if: you have 150+ sq ft minimum, can maintain 42-48″ clearance on ALL sides, want seating accessibility from multiple sides, and have budget for additional cabinetry/electrical/plumbing. For most kitchens under 150 sq ft, mobile cart or peninsula works better than permanent island.
Absolute minimum: 7′ × 8′ (56 sq ft) using one-wall layout—this is very tight, suitable only for studio apartments with minimal cooking. Functional minimum: 7′ × 10′ (70 sq ft) with one-wall or galley layout—enough for basic meal preparation. Comfortable minimum: 8′ × 10′ (80-90 sq ft) with galley layout—good workflow and adequate storage. Small but not cramped: 10′ × 10′ (100 sq ft) with L-shaped layout—versatile, comfortable for most households. Below 70 sq ft, focus on compact appliances (24″ range/dishwasher), maximize vertical storage, and consider one-wall layout. Between 70-100 sq ft, galley layout maximizes efficiency. Above 100 sq ft, L-shaped or U-shaped layouts become viable.
You can change layout, but plumbing location affects cost significantly. Fixed/expensive to move: main plumbing stack (vertical pipe serving multiple floors)—avoid moving if possible, gas lines (requires licensed professional, permits), and load-bearing walls (need structural engineer, expensive). Moderate cost to move: sink location ($1,000-3,000 typically), dishwasher (usually near sink anyway), and non-load-bearing walls ($500-2,000). Easy/affordable to adjust: electrical outlets ($200-800), lighting, cabinet placement, and appliance locations (if not plumbing/gas-dependent). Budget-friendly approach: design layout around existing sink/gas locations, or be prepared for $2,000-5,000 additional cost to relocate plumbing.
Layout strategies: maintain 42-48″ aisles (don’t go below 36″), avoid forcing island into small space (creates obstacles), choose galley/L-shaped over U-shaped if under 120 sq ft, and place refrigerator at end (not middle of run). Design strategies: use light colors (white, cream, light gray) throughout, install glass-front upper cabinets or open shelving, maximize natural light (avoid heavy window treatments), use reflective materials (glossy tile backsplash, mirrors), extend cabinets to ceiling (vertical emphasis), ensure excellent lighting (multiple sources), and keep counters clear (prioritize hidden storage). Layout choice matters: properly-sized galley feels more spacious than cramped U-shape with too-narrow aisles.
Conclusion: Your Layout Foundation
Your kitchen layout is the most fundamental design decision you’ll make—it determines how efficiently your space functions, how much storage and counter space you have, and how comfortable daily cooking feels. Unlike finishes and colors you can easily change later, layout is permanent (or expensive to modify), making it crucial to choose wisely from the start.
The “best” layout isn’t universal—it depends entirely on your specific room dimensions, cooking habits, household size, and budget. A perfectly executed galley kitchen can outperform a poorly planned U-shaped kitchen despite the U-shape’s theoretical advantages. Success comes from honest assessment of your space constraints and realistic matching of layout to your actual needs, not aspirational ones.
Key takeaways: Measure your space precisely and understand fixed constraints before choosing layout. Prioritize workflow efficiency (work triangle) over trendy features that don’t fit. Maintain adequate clearances (42-48″ aisles)—never sacrifice this for extra storage. Choose simpler layouts over complex ones if room is under 120 sq ft. Consider traffic patterns, not just cooking workflow. Budget realistically—more elaborate layouts cost significantly more.
Remember: Small kitchens can be incredibly functional and beautiful with the right layout. Don’t try to force large-kitchen features (islands, elaborate zones) into spaces too small to accommodate them. Instead, embrace your kitchen’s size and choose the layout that makes every square foot work intelligently. The galley kitchen in a 90 sq ft space can function better than a cramped U-shaped layout in the same space—smart design always trumps square footage.
Your layout choice creates the foundation for everything else—storage solutions, lighting, decor, and functionality. Invest time in this decision, measure carefully, plan thoroughly, and you’ll create a small kitchen that works beautifully for years to come.
Explore More Small Kitchen Design Ideas Get Professional Design Help