Small Kitchen Design for Home Bakers
Quick Answer Small kitchen design for home bakers works best when you plan one dedicated baking zone: a lower work surface (about 30 to 32 inches high) or pull-out board for rolling dough, a home for the stand mixer beside outlets, vertical storage for sheet pans and cooling racks, a stocked ingredient zone, and landing space next to the oven for hot pans.
A home baker asks more of a kitchen than a typical cook does. You need a large, clear surface for dough, somewhere to park a heavy mixer, storage for flat things that don’t fit in normal cabinets, a place to cool trays, and bulk ingredients within reach. In a small kitchen, that list collides with everything else. This guide shows how to design a small kitchen around frequent baking, with the heights, storage dimensions, and layout moves that matter most, three sample plans from low-budget to full remodel, and the mistakes that make a compact baking kitchen frustrating.
Quick Takeaways
- Plan a single baking zone near the oven and fridge instead of spreading baking tools around the kitchen
- A work surface at roughly 30 to 32 inches makes rolling and kneading easier than a standard 36-inch counter
- Choose a surface that suits dough: quartz, stone, or marble is easier to roll on than tile, which has grout lines
- Store sheet pans and cooling racks vertically in a narrow tray cabinet, drawer, or slim rolling rack
- Give the stand mixer a permanent home, either a lift, an appliance garage, or a dedicated counter spot with outlets
- Leave about 15 inches of landing space next to the oven for hot pans
- A baking zone can be a cart, a hutch, or a pull-out board; a remodel is optional
What’s In This Guide
- What Home Bakers Need That Other Small Kitchens Don’t
- The Baking Workflow, Zone by Zone
- 10 Design Decisions for a Small Baker’s Kitchen
- Best Baking Setup by Kitchen Layout
- Three Sample Plans (Cart, Weekend Baker, Serious Baker)
- Storage Dimensions to Plan Around
- Budget Tiers
- Mistakes to Avoid
- Frequently Asked Questions
What Home Bakers Need That Other Small Kitchens Don’t
| Everyday small kitchen | Small baker’s kitchen |
|---|---|
| Counters for chopping and plating | A large, clear surface for rolling, kneading, and shaping |
| Appliances stored away | A heavy stand mixer used several times a week |
| Standard cabinets | Vertical storage for flat sheet pans, cooling racks, and cutting boards |
| A few pantry staples | Bulk flour, sugar, butter, chocolate, and specialty ingredients |
| Oven used occasionally | Oven used heavily, with hot trays coming out often |
| Standard counter height | A lower surface to roll and knead comfortably |
Baking is also messier and more precise than everyday cooking, which is why zone planning matters more than extra storage.
The Baking Workflow, Zone by Zone
Baking follows a loop: weigh, mix, shape, bake, cool, finish. A good small kitchen lets that loop happen in a few steps without crossing the cook’s path.
| Step | What it needs | Where it should live |
|---|---|---|
| Weigh and measure | Scale, scoops, bowls, dry ingredient containers | Within one reach of the mixer |
| Mix | Stand mixer, outlets, a stable surface | The baking zone counter, lift, or appliance garage |
| Shape and roll | A large clear surface, rolling pin, bench scraper | The lowered counter, pull-out board, or marble slab |
| Bake | Oven, racks, timers, mitts | Beside the baking zone |
| Cool | Cooling racks, landing space | Next to the oven, with a heat-safe surface |
| Finish and store | Piping tools, containers, cake stands | Drawer or pantry within reach |
💡 Pro Tip: Keep the baking zone near the sink-oven-fridge work triangle. Butter, eggs, and dough often move between the fridge and the oven, and every extra step adds up over a long bake.
10 Design Decisions for a Small Baker’s Kitchen
1. Pick One Baking Zone and Protect It
Start by gathering all your bakeware, tools, and staples in one place to see how much counter and storage you really need. Then choose a spot near the oven and fridge. A hutch, buffet, or side table can serve as a baking center if the kitchen has no space for a built-in one. Once chosen, keep the zone for baking only: no mail, no coffee machine, no fruit bowl.
2. Lower the Work Surface (or Fake It)
Standard counters are 36 inches high, which is comfortable for chopping but high for rolling and kneading. Designers often recommend lowering a baking section to about 30 to 32 inches, and some remodels use a two-tier kitchen with the main run at 36 inches and a baking station near 32. If you can’t change the cabinets, try one of these:
- A pull-out board or table at a lower height in a base cabinet
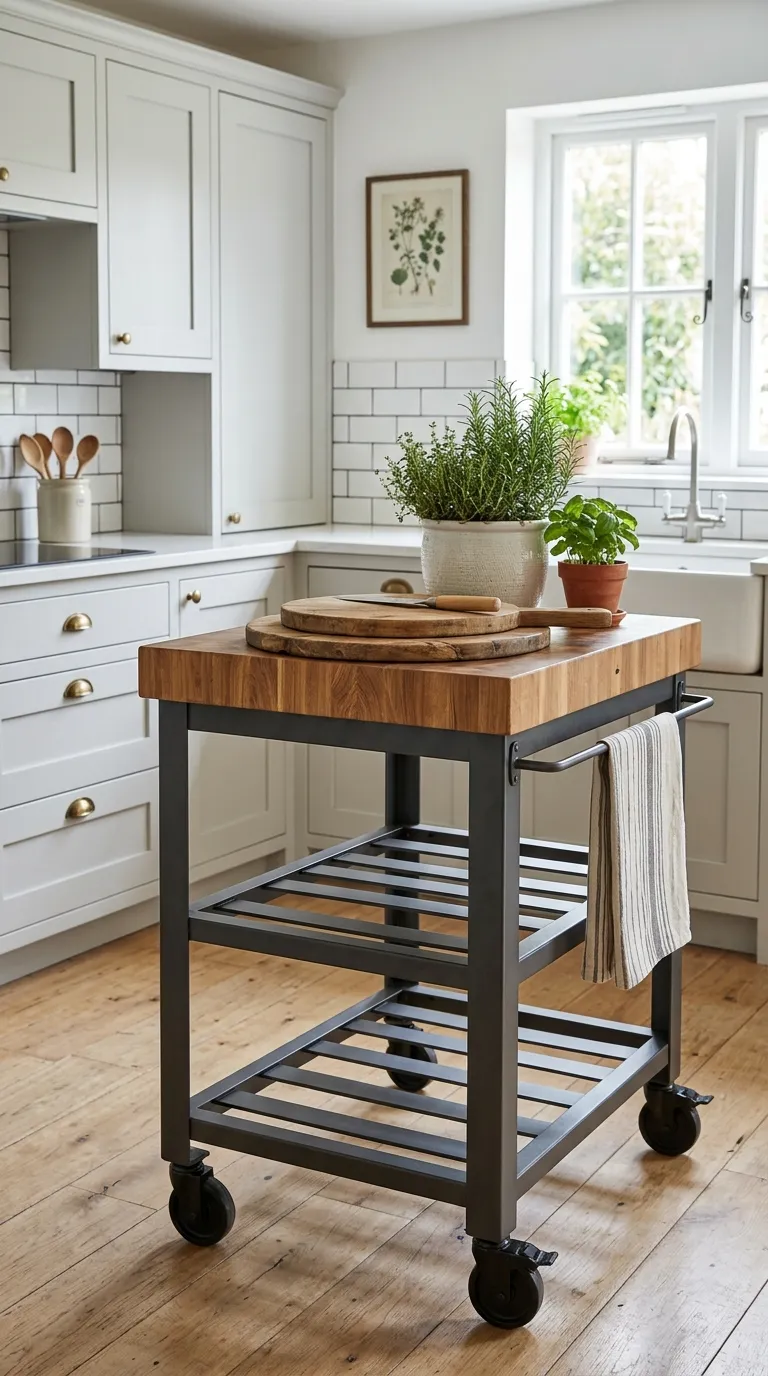
- A sturdy rolling cart that is shorter than the counter
- A pastry board on a lower table or the dining table
- A removable toe-kick platform to stand on, which some baking centers use to adjust height
3. Choose a Surface That Suits Dough
Stone and quartz are durable and easy to roll on, and marble stays cool, which is why it’s a favorite for pastry. Tile counters are difficult for rolling because of the grout lines. If you can’t change your counter, a portable marble or composite pastry board, often a modest purchase, gives you a smooth rolling surface that stores upright in a narrow gap. For the dough you’ll roll, plan for a clear area of roughly 24 inches wide by 20 inches deep as a practical minimum.
4. Give the Mixer a Permanent Home
A stand mixer is heavy (common home models weigh roughly 20 to 30 pounds) and nobody wants to lift it out of a cabinet every time. Three options work in small kitchens:
- A mixer lift raises the mixer flush with the counter and drops it back below when you’re done
- An appliance garage keeps it plugged in behind a door; see our guide to small kitchen appliance garage ideas
- A dedicated counter spot beside an outlet, with an alcove or niche built around it
Measure the mixer’s height and the headroom needed when the head tilts back.
5. Store Sheet Pans and Cooling Racks Vertically
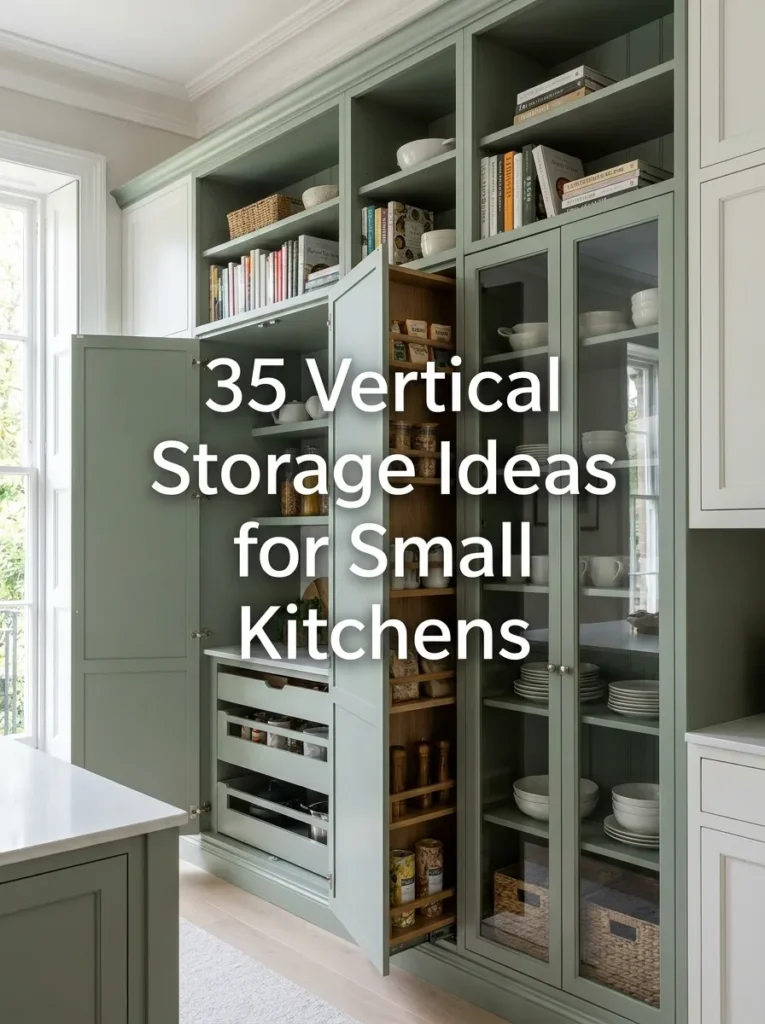
Flat pans waste space when stacked and are awkward to pull out. Tray dividers make smart use of narrow cabinets by storing pans and racks on edge, and deep drawers with full-extension slides give easy access to everything inside. A narrow base cabinet with vertical dividers can hold half-sheet pans on edge, provided the interior is deep enough for the pan’s length. For more ideas, see our small kitchen baking sheet storage ideas.
6. Build an Ingredient Zone
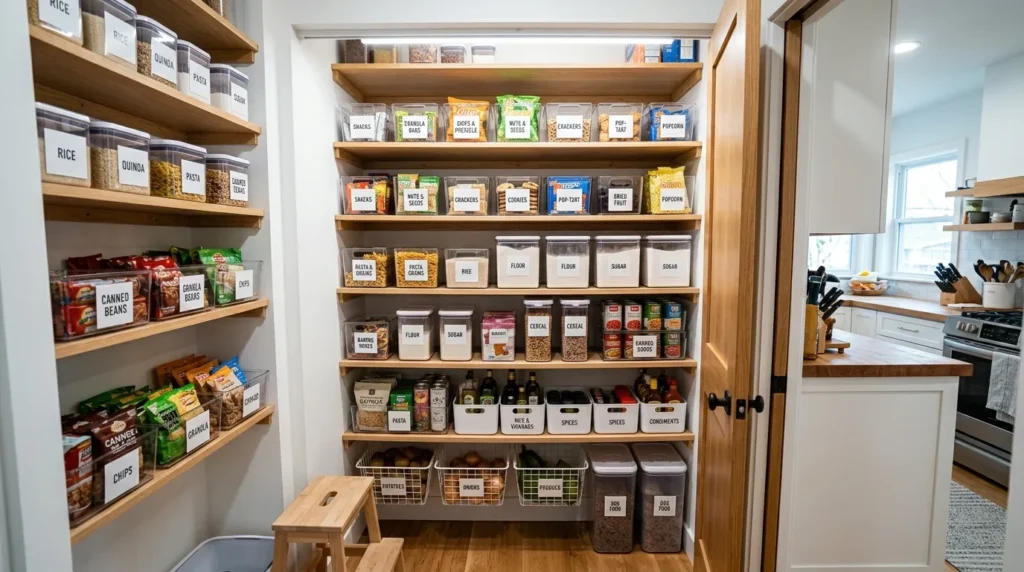
A baker’s pantry is about airtight containers, not boxes. Decant flour, sugar, and other bulk staples into labeled containers with a scoop inside, and keep them on one shelf or in one drawer within a step of the mixer. A kitchen scale, measuring cups, and spoons go in the nearest drawer. For container setups, see our 30 small kitchen food storage container ideas, and for pantry layouts, see how to create a functional pantry without space.
7. Plan Cooling and Landing Space
Hot trays need somewhere to go the moment they leave the oven. Plan about 15 inches of heat-safe landing space beside or opposite the oven. For cooling, use a fold-down shelf, a pull-out board, or a slim rolling baker’s rack that holds cooling racks and pans in tiers and tucks into a gap when you’re done.
8. Think About the Oven and the Cold Chain
Baking is hard on small ovens. If you’re remodeling, consider a wall oven at a comfortable height, which reduces bending, or a lift-style oven for people who find it hard to reach into a low oven. Butter, dough, and eggs also need cold storage. If your fridge and freezer are small, a freezer-friendly routine (flat-frozen dough, portioned cookie dough) helps a lot.
9. Add Outlets and Task Lighting
A baking zone needs more than one outlet: mixer, hand mixer, scale, and phone or tablet for recipes. Kitchen counter outlets are generally required to be GFCI protected, so have a licensed electrician confirm the plan. Bright task lighting under the cabinets makes it easier to read recipes and see doneness and decoration details.
10. Keep the Floor and Cleanup in Mind
Flour, sugar, and butter end up on the floor. A durable, easy-clean floor, an anti-fatigue mat at the baking zone, and a nearby trash or compost solution all help. See our small kitchen trash and recycling solutions.
Best Baking Setup by Kitchen Layout
| Layout | Best baking zone | Why it works |
|---|---|---|
| Galley | End of one run, beside the oven, with a pull-out board | Keeps the baking zone out of the main walkway |
| L-shaped | The shorter leg, with the mixer in the corner | Corners make a natural, protected baking nook |
| U-shaped | One arm lowered to baking height | Three sides give plenty of surface and storage |
| One-wall | A rolling cart plus a wall-mounted rack | Adds a work surface without cabinets |
| Studio or tiny kitchen | A hutch, buffet, or dining table as the baking zone | Borrows space from the living area |
| With an island | A lowered section at the end of the island | Gives you a dedicated rolling surface |
For more on layouts, see our guides to small galley kitchen designs, L-shaped kitchen designs for small kitchens, and kitchen island designs for small kitchens.
Three Sample Plans
Plan A: The Cart Baker (Lowest Budget, No Remodel)
A rolling cart or sturdy table becomes the baking zone. Add a portable marble or composite pastry board, a slim rolling baker’s rack, a vertical file organizer for pans, and airtight containers for staples. Plug the mixer in beside the counter. This setup works in rentals and costs the least.
Plan B: The Weekend Baker (Moderate Changes)
Dedicate one base cabinet to vertical tray dividers, convert a drawer to deep storage for bowls and tools, and add a pull-out board at about 30 to 32 inches. Use a corner or end-of-run counter for the mixer, with an appliance garage if you can add an outlet. Add under-cabinet task lighting.
Plan C: The Serious or Cottage Baker (Remodel)
A lowered baking section at 30 to 32 inches with stone or quartz, a mixer lift, a tall pantry with an outlet and ingredient storage, deep drawers for pans and bowls, a wall oven at a comfortable height, and landing space on both sides. If you plan to sell baked goods, check your local cottage food laws, since rules and kitchen requirements vary by state and municipality.
Storage Dimensions to Plan Around
| Item | Typical size (approx.) | Planning note |
|---|---|---|
| Half sheet pan | 18 by 13 in | The most common home-oven size; stores on edge in a narrow cabinet |
| Quarter sheet pan | 13 by 9 in | Fits many small ovens and toaster ovens |
| Full sheet pan | 26 by 18 in | Too large for most home ovens |
| Cooling rack (for a half sheet) | About 17 by 12 in | Stores flat beside the pans |
| Muffin tin | About 14 by 10 in | Stores on edge or in a shallow drawer |
| 9 by 13 in baking pan | 9 by 13 in plus handles | Stores on edge or stacked |
| Stand mixer | About 14 in tall and 14 in deep | Add headroom for the tilt-back head |
| Rolling pin | 12 to 20 in long | Store in a deep drawer or on a wall hook |
Sizes are approximate and vary by brand, so measure what you own before buying organizers.
Budget Tiers
| Tier | What you do | Examples |
|---|---|---|
| Low | Add mobile and vertical storage; no construction | Rolling cart, pastry board, vertical file organizer, airtight containers |
| Medium | Reconfigure cabinets and add a few built-ins | Tray dividers, deep drawers, pull-out board, appliance garage kit, under-cabinet lighting |
| High | Remodel around baking | Lowered counter with stone, mixer lift, tall pantry with outlet, wall oven |
Prices vary widely by region and brand, so get quotes for built-in work.
Mistakes to Avoid
Spreading baking tools around the kitchen. One zone beats three half-organized drawers.
Ignoring work surface height. A 36-inch counter is a common reason bakers’ shoulders and wrists hurt.
Choosing tile or an uneven surface. Grout lines make rolling dough frustrating.
Lifting the mixer every time. If it’s hard to get out, you’ll bake less. Give it a permanent home.
Forgetting landing space. Hot trays need a safe, heat-resistant place to go.
Buying organizers before measuring. Pan and rack sizes vary, so measure first.
Skipping outlets. A baking zone with one outlet becomes a tangle of extension cords.
Frequently Asked Questions
How do I design a small kitchen for baking?
Plan one dedicated baking zone near the oven and fridge. Include a lower work surface (about 30 to 32 inches) or a pull-out board, a permanent home for the stand mixer, vertical storage for pans and racks, an ingredient zone, and landing space for hot trays.
What is the best counter height for baking?
Many designers recommend about 30 to 32 inches for rolling and kneading, since it’s lower than the standard 36-inch counter. The best height is the one that lets your elbows bend comfortably while you work.
What is the best countertop for rolling dough?
Stone, quartz, and marble are popular because they’re smooth, durable, and easy to clean. Marble stays cool, which pastry bakers like. Tile is a poor choice because grout lines make a bumpy surface.
Where should I store a stand mixer in a small kitchen?
Use a mixer lift, an appliance garage with an interior outlet, or a dedicated counter spot beside an outlet. Avoid storing it in a cabinet that you have to lift it out of every time.
How do I store baking sheets and cooling racks in a small kitchen?
Store them vertically, in a narrow cabinet with tray dividers, a deep drawer, or a slim rolling rack. Standing them on edge saves space and makes them easy to pull out.
Can I create a baking station in a small apartment kitchen?
Yes. Use a rolling cart, a pastry board, a vertical organizer for pans, and airtight containers for staples. A hutch, buffet, or dining table can serve as the baking zone.
How much counter space does a baker need?
Plan for a clear area of about 24 inches wide by 20 inches deep for rolling dough, plus a separate landing space of about 15 inches by the oven. More is better, but a well-planned baking zone can work in less.
Do I need a second oven for baking?
Not necessarily. Many home bakers work well with one oven. A second oven or a toaster oven helps if you bake in volume or need two temperatures at once.
Do I need a permit or special kitchen to sell baked goods from home?
It depends on where you live. Cottage food laws vary by state and local government, so check your local requirements before you sell.
How can I reduce mess when baking in a small kitchen?
Use a rimmed board or silicone mat to contain flour, keep a small bench scraper and brush at the zone, and place a trash or compost bin nearby. A durable, easy-clean floor helps.
Related Pages
35 Small Kitchen Appliance Garage Ideas
Give the stand mixer a plugged-in home behind a door.
15 Small Kitchen Baking Sheet Storage Ideas
More ways to store flat pans and racks.
30 Small Kitchen Food Storage Container Ideas
Organize bulk ingredients with airtight containers.
Small Kitchen Layout Ideas
Fit a baking zone into your layout.
Small Kitchen Interior Design
Fit a baking zone into your interior design.
Final Thought
Small kitchen design for home bakers isn’t about squeezing in more gear. It’s about giving the baking loop (weigh, mix, shape, bake, cool, finish) a clear path in a small space. Start with one baking zone, get the surface height and material right, give the mixer a permanent home, store flat things vertically, and keep landing space beside the oven. You can do all of it with a cart and a pastry board, or build it into a remodel. Either way, the result is a kitchen that makes you want to bake more.
Ready to plan the whole room? Browse Small Kitchen Layout Ideas
Electrical work and local rules: have a licensed electrician handle new outlets, and check local cottage food laws if you sell what you bake.
Sources
- Kitchen design guidance on baking centers and workflow from design and home-improvement publications (including This Old House, Houzz, and Building Moxie)
- Standard counter-height planning guidance (36 inches standard; lower baking stations of about 30 to 32 inches are optional)
- Appliance manuals for clearances and dimensions of your mixer and oven
- Your state or local cottage food regulations, if you sell baked goods